Materials:
- 8 x 11 inch sheet of felt (in the color Mom would love!)
- scissors
- thread (choose a bright clor to contrst the felt)
- needle
- fabric glue
- elastic
- paper
- pencil


Instructions:
Step 1: Use your paper and pencil to draw a template of your mask. (A standard sleep mask is about 4 x 8 inches.) If you mess up, simply erase and try again! You can have as many passes as you like.
Step 2: Once you are happy with your template, cut it out.

Step 3: Trace the template onto the felt twice.

Step 4: Cut out the traced shapes carefully. You want them to align perfectly (or as perfectly as you can manage).

Step 5: Cut a length of elastic. This piece, when tied together, should fit around Mom’s head.
Step 6: Grab your fabric glue. Spread some glue on the felt pieces and sandwich them together.

Step 7: Before the glue dries, insert your length of elastic between the felt pieces, so it is sandwiched between them and the ends are evenly spaced on either side of the mask. Press the elastic into the glue and felt and let it sit to dry.

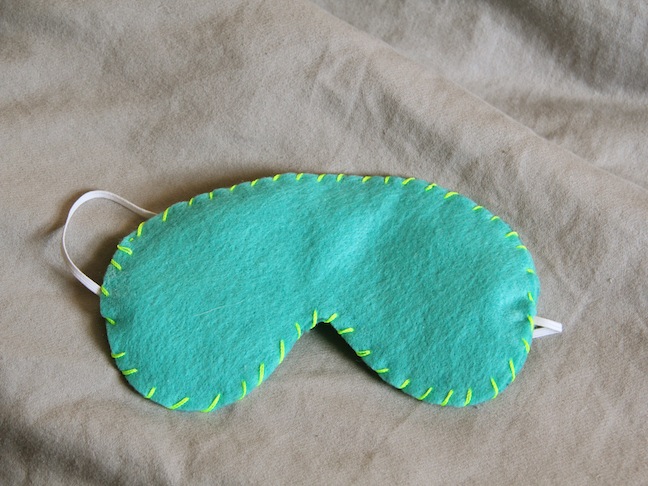
Step 8: To secure your mask (and for a fun pop of color!) add some stitching to the edges! You don’t need to be a sewing expert! Simple stitch all around the mask and make sure to stitch into the elastic to secure it even more.

You’re finished! Wrap it up and gift it out and be prepared to hear rave reviews!

Want more Mother’s Day gift ideas?
- 6 Homemade Gifts for Mother’s Day
- Hanging Dishtowel DIY Craft
- Fabric Pendant DIY Craft
- Watercolor Bookmarks DIY Craft
- Edible Cupcake Bouquet
- Watercolor Paper Flower Bouquet DIY Craft
Find more crafts from Kersey Campbell at ARDOR.