Supplies:
- upcycled mason jars
- paint (as many colors as you like)
- paint brushes
- tea lights
- standard printable mailing labels
- pencil
- scissors
- spooky designs (you can freehand, or find images online to print and trace; choose skeletons, witches, ghosts, goblins, and/or jack-o-lanterns)
Instructions:
Step 1: Using your pencil, draw your spooky designs on to the mailing labels.
Step 2: Once you’re happy with your shapes, cut them out, peel off the backing, and apply the stickers to your mason jar. Press down firmly and smooth out any air bubbles.

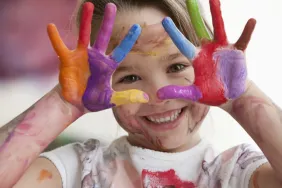
Step 3: Here comes the part your little one will adore! Hand over the mason jars and let your toddler go to town with the paint. (My 2 year old loved this project so much that we’ve repeated it four times in the last week! ) Be sure to instruct you child not to paint on the inside of the jars if you want your shapes to glow properly.

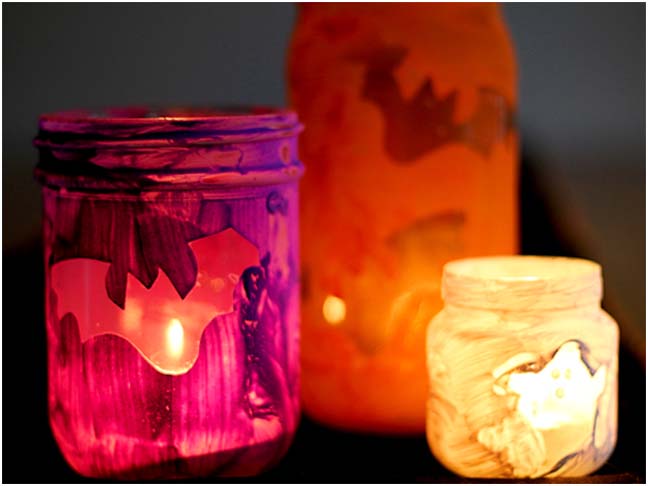
Step 4: Once your child is through painting, your jars should look like this:

Step 5: Just like painting a room in your house, this craft works best if you peel of the stickers before the paint completely dries.

Step 6: Add a tea light to each jar, and you’re done! You’ll see a solid glow from the sides of the jar that didn’t have stickers applied to them and fun Halloween shapes everywhere else!

Want more DIY Halloween Crafts?
- DIY Puffy Paint Pumpkins Craft
- DIY Candy Cornballs Craft
- DIY Witch Hat Craft
- DIY Pumpkins from Oranges Craft
Stephanie Morgan blogs at Modern Parent Messy Kids.