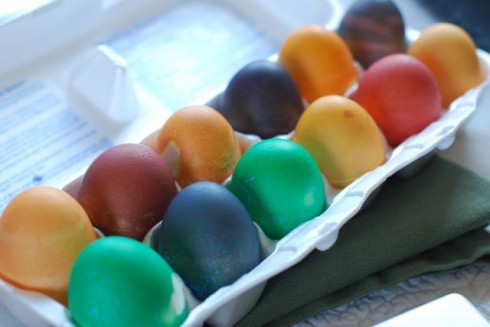
Dyeing Easter eggs is a fun tradition in our house. We love buying the whitest eggs we can find, bringing them home, and turning them all sorts of pretty colors. Since my kids are pretty young I take the easy route when it comes to coloring the eggs. I use food coloring and follow the directions on the back with just a few tweaks. That way I know our eggs are edible after they’ve been dyed, and we can make rainbow egg salad! I also know they’ll always turn out great and my daughter will be thrilled with the result. Here is our simple method to dye Easter eggs.
Supplies:
- eggs
- white vinegar
- food coloring
- bowls
- tongs
- paper towels
- rubber bands, tape, and stickers (optional)
Instructions:
Step 1: Start with 1 dozen hard boiled eggs. You should use white eggs if possible because they are the best for absorbing color.
Step 2: Make the egg dye baths as follows: Mix 1/2 cup boiling water, 1 teaspoon white vinegar, and 20 drops of food dye in a bowl. Swirl so the color completely saturates the liquid.
Step 3: Dip the cooled egg in the dye and let it sit, turning once or twice for about 5 minutes to achieve peak color. Use tongs or a fork to remove the egg to a paper towel to dry off.
Step 4: For fun designs: Put rubber bands or tape around the egg before dipping to form lines around the egg. Or, stick stickers on the egg and peel them off after they’ve been dyed.
Step 5: To make new colors: To make intense colors try mixing them. For example, 20 drops of red and 10 drops of yellow make an intense orange.
This easy method for dyeing eggs will please your whole family. And, since the food dye is edible, your eggs won’t go to waste. Enjoy this easy activity with your kids this week, and you’ll have them until Easter!
More Easter Egg DIYs: