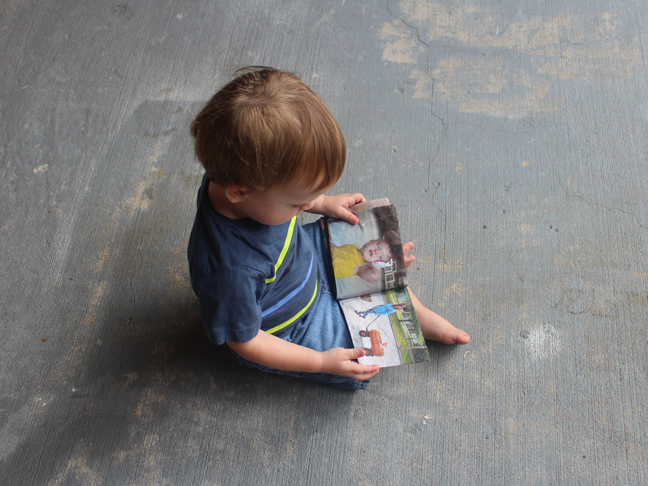

My son loves to look at photos of himself and people he knows. It inspired me to make a fabric photo book for him. He loves flipping through the pages and identifying whos who. This would make an awesome gift for a first birthday or baby shower, especially if you have loved ones that live far away. In just a few quick hours you will have an extra special baby book that is one amazing memory keeper. Here’s how to make it.

Supplies:
- white cotton fabric
- non-fusible fleece (quilt batting)
- quilt-basting spray
- sewing machine
- pins
- white thread
- scissors
- sewing needle
- rotary cutter
- cutting mat
- quilting ruler
- transfer paper (Lesley Riley’s Transfer Artist Paper is perfect for this project, but other photo transfer paper will work as well)
- inkjet printer
- 8 favorite digital photographs to print
Instructions:
Step 1: Cut white cotton fabric into 4 rectangles measuring 8½ inches x 11 inches. For cutting ease, place a piece of letter size paper on top of fabric and use it as a template; press cotton fabric so there are no wrinkles and cut.

Step 2: Print out your 8 photographs onto the transfer artist paper. Each photo should measure 5 inches x 7 inches, so you can print two photos on each piece of transfer paper.

Step 3: Place transfer paper image-side-down onto white fabric. Press with a hot iron. Follow instructions on transfer paper package instruction.

Step 4: Using a rotary cutter, trim all fabric images down to 5 inches x 7 inches. You should have 8 images.

Step 5: Place 2 fabric images together, right sides facing each other. Pin at the stitching edge if needed, however, try not to pin too much, because pinning leaves holes in the images. Place into sewing machine and stitch together with a ¼ inch seam allowance. Repeat for all other images. You should now have 4 long photo rectangles.

Step 6: Cut batting into 2 rectangles measuring 4½ inches x 13½ inches. Spray the batting with the quilting basting spray and place onto the back of the photo rectangle. Press gently to adhere.

Step 7: Place 2 photo rectangles right sides together. Pin, only if needed. Place into sewing machine and stitch together with a ¼ inch seam allowance. Stitch along the outside edge, leave a 4 inch opening at the bottom. Repeat for the other 2 photo rectangles.

Step 8: Trim all corners.

Step 9: Turn right-side-out through the opening at the bottom. Wiggle corners into place.

Step 10: Handstitch the bottom opening closed. Repeat for other rectangle.

Step 11: Place the photo rectangles on top of each other. Line them up at the middle seam. Place into your sewing machine and stitch together at middle seam. Backstitch at each end.

That’s it!

More DIY gift ideas for babies: