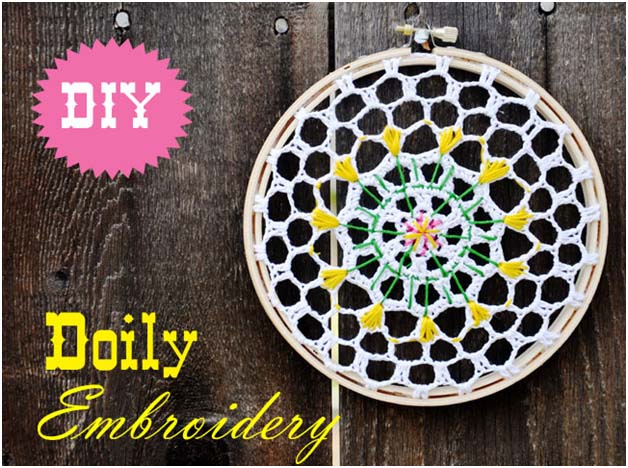
Embroidery can be a bit intimidating with all its stitch types and floss colors, so I thought a doily would be the perfect ‘practice’ blank to try out my skills. Little did I know how fun and modern it could be! A dollar store doily turns into a piece of needlework that can be adapted to suit your decor needs.
MATERIALS

- 8″ or larger doily (Dollar Store)
- 6″ Embroidery hoop
- Embroidery floss
- Embroidery needle
- Scissors
INSTRUCTIONS

Position your doily into your hoop, making sure your middle design is centered. Separate the hoop and slide the doily between the two forms. Once positioned, tighten the set screw at the top to hold in place

Thread the needle with all 6 embroidery strands in the thread

To start your design, choose a center point and tie off. (This the back of the design and hoop)

Working from the front and letting the doily design dictate your stitches, start free forming a design. Study the openings and tightly crocheted stitches that will allow the needle through. There is no wrong way to do this.

To begin a new color and to keep from tying unsightly knots, pull the thread through the back of a few doily stitch loops to secure, then cut.

Keep working until you are satisfied with your design

Turn your work over and carefully snip away the excess doily on the back

Hang in any room and enjoy your new piece. I added a black felt backing to this one to make the color pop against the light walls in my daughter’s bedroom.
Enjoy!