As a mom with little to no spare time on my hands, I love when I can get two goals accomplished with one easy project. These DIY hanging wall frames made with rulers definitely fit into that category. Win!
In just thirty minutes, I have an easy and affordable teacher’s gift to score points on the first week of school. Plus, I have an inexpensive and cute piece of art to hang at home for daily inspiration.
It breaks my heart to see my children get down on themselves. Whether it’s a mean kid at school, difficulty with schoolwork, or whatever the reason for the lack of confidence—a simple print on the wall to remind them that they are AWESOME, SPECIAL, and LOVED is a victory in my book.

I hope you take the time to make this DIY hanging ruler frame, and let it inspire you and your family.
Supplies:
- Art print (I found mine at Fleur de Lis, a paperie, via Etsy.)
- 2 standard wooden rulers
- Acrylic paint
- Painter’s tape
- Twisted jute rope
- Scissors
- Hot glue or staple gun
- X-Acto knife
- Foam core board
- Multi-purpose spray adhesive
Instructions:
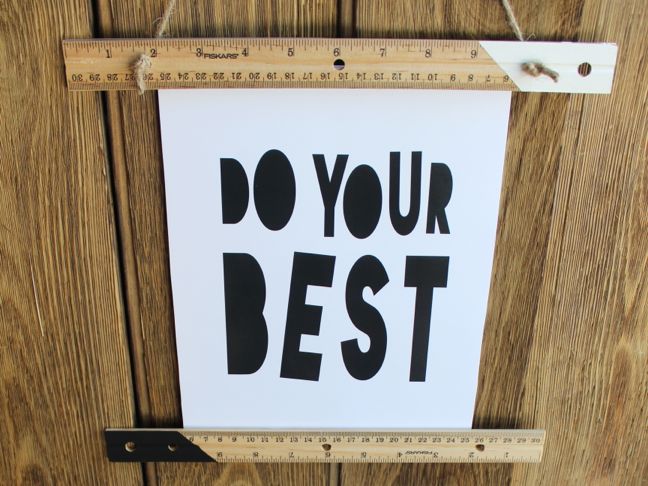
Step 1: Find a print that you want to use to inspire your kids for the year. I found mine here and here. My parents always told me, “Do your best.” If I felt like I failed, they asked me if I did my best. If I did, it was okay…which was an instant relief for me. Now I tell my kids the same thing, and it helps them put things in perspective. Recently, I saw a “SHEro” magician speak to kids of all ages several weeks ago with a powerful message. The first part was to inspire kids to recognize their own superhero talents that lie within each and every one of them. The second part was to never give up on their dreams—and she said the words, “Impossible stands for I’m possible.” Those words really stuck with me, and I hope they have an impact on my children, too.


Step 2: Paint the ruler with a design of your choice. For the black and white print, I created a more modern, geometric line on the end of each ruler, and painted the top black and the bottom white. For the colorful print, I painted the middle of the ruler a bright red.


Step 3: Use the multi-purpose spray adhesive to glue the print to the foam core board. Use an X-Acto knife to cut the foam core board along the edge of the art print.
Step 4: Tie the twine through the holes in the ruler, and tie a double-knot on the front side.

Step 5: Mark pencil lines on the back of the ruler to ensure your art print is centered when you glue it.
Step 6: Glue or staple (with a staple gun) the art print to the back of the ruler on top and bottom (below the holes in the ruler, so white does not show).
Step 7: Hang.

More DIY Wall Art: