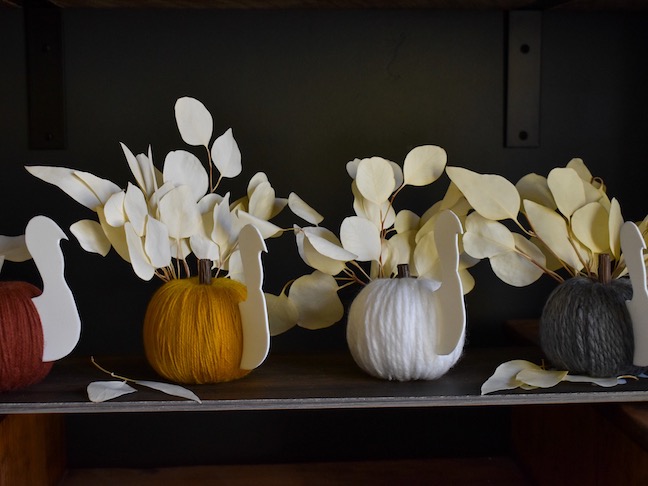
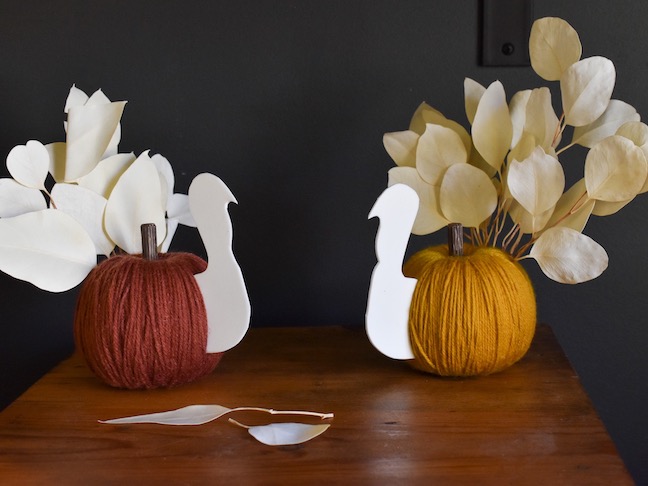
Although the ghosts, goblins and bats have flown away until next Halloween, the pumpkins scattered around my house remain. When November rolls around, I love to decorate with fall branches, turkeys and pumpkins. This year, I transformed some of my mini yarn pumpkins into the cutest DIY pumpkin turkeys. All in, the project cost about $20, so gather the materials and let’s make some turkeys. Honestly, with the round shape of the pumpkin and the same seasonal vibes, I can’t believe I never made a pumpkin into a turkey before!
This craft is inherently kid-friendly, so if kids want to take the lead on this, let them. They can do a traditional school-style turkey face with a brown head, red gobbler and googly eyes. Kids can make it a silhouette (like mine), or face-view cut out of the turkey head. Instead of dried leaves, kids can use faux leaves or real leaves from the ground outside. These would be perfect place holders for Thanksgiving dinner, or gifts for family and friends with a note of gratitude for their friendship. If you use faux pumpkins, they can be a part of your yearly decor.
Gobble up all the cuteness and fun with this fall craft. Here’s how to do it.
DIY Pumpkin Turkey’s
Materials:
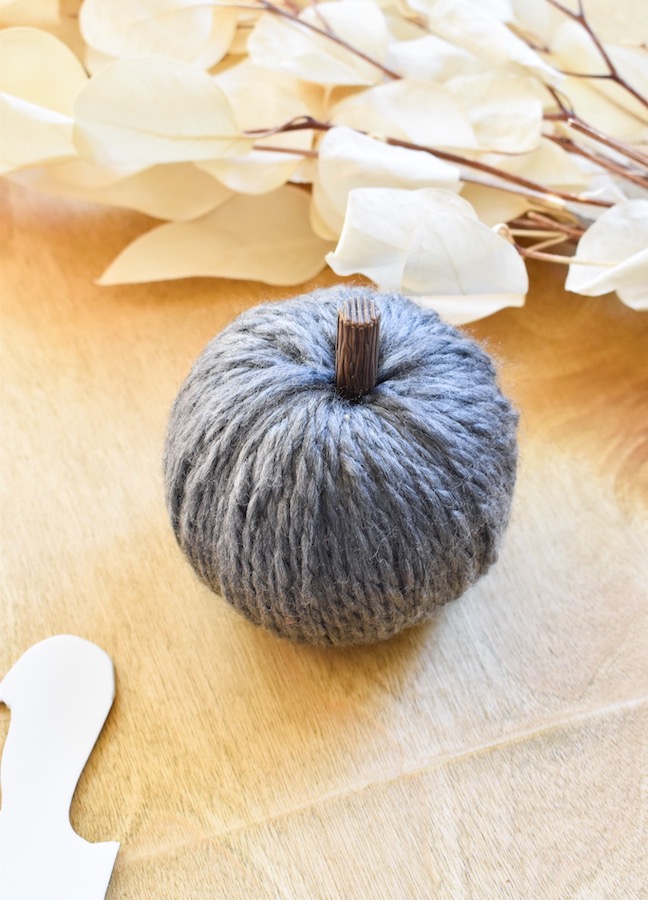
- Mini pumpkins, real or faux (I found my mini yarn pumpkins at the Target Bullseye’s Playground. This, this and this are some other great options)
- Leaves, real or faux (I used these dried Eucalyptus leaves)
- Elmer’s glue
- scissors
- Foam sheet
- Pencil
Directions:
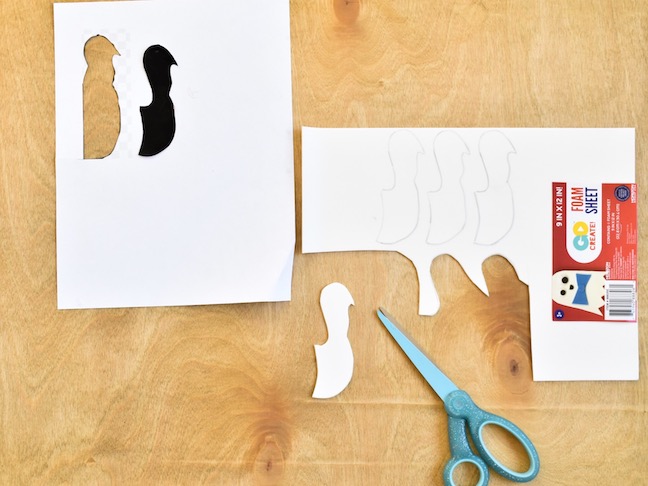
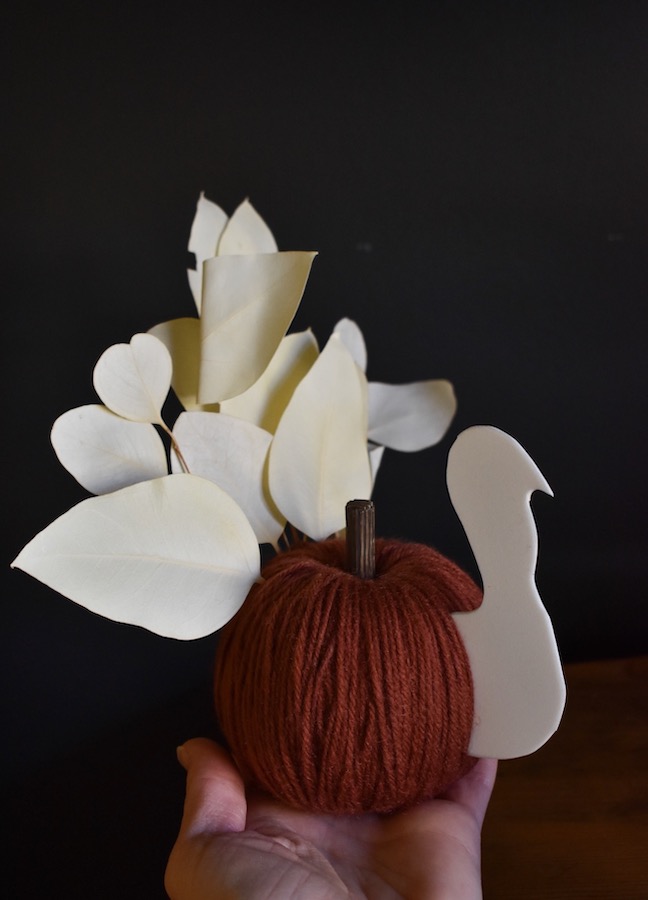
Step 1: Search turkey silhouette profile on the internet. Once you find one, copy it, and then paste it in Word. Next, crop the body so you just have the head. Enlarge or shrink it to the size you want (look at your pumpkin and determine the best sized turkey head). Print the silhouette, and cut it out. Now, trace it on the foam sheet with a pencil. Once you have your heads traced, cut them out.
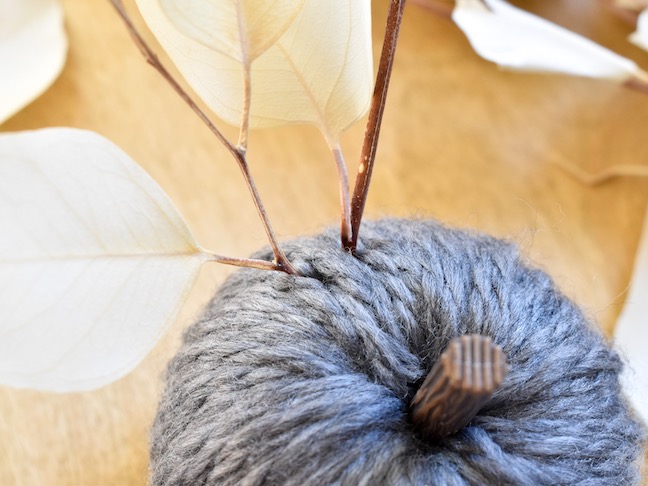
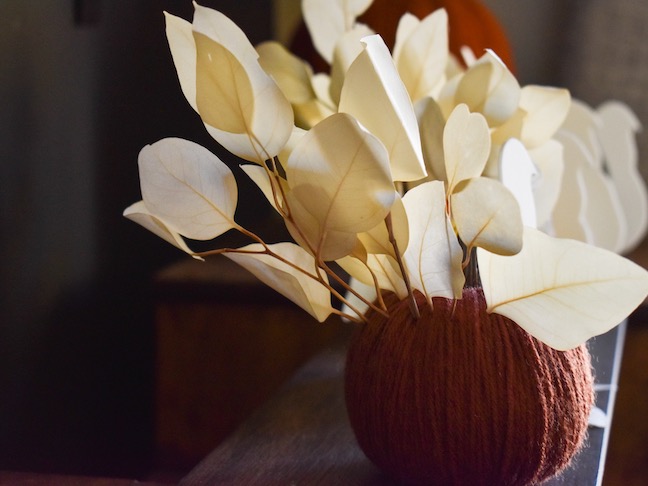
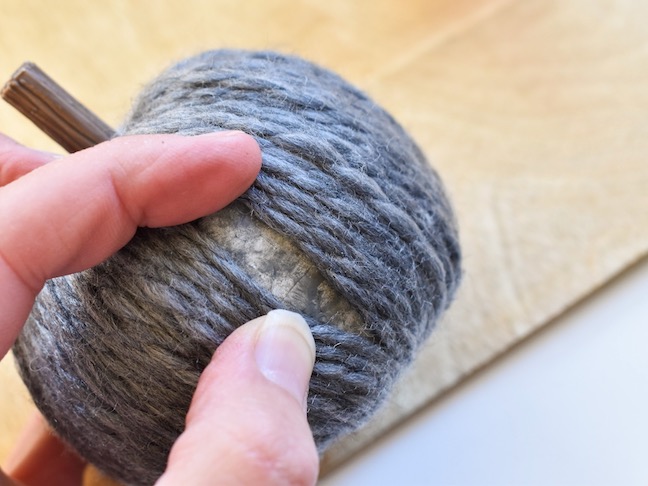
Step 2: Insert the leaves in the back of the pumpkin. The leaves are the turkey feathers. The pumpkins I used were easy because the inside of them were made of foam (most faux pumpkins will be similar) so I was able to insert the branches in the pumpkin. If there was a more solid area of the foam, I used a pencil to pre-drill a hole, and then I inserted the leaves. If you use a real mini pumpkin, you have to glue the leaves in place.

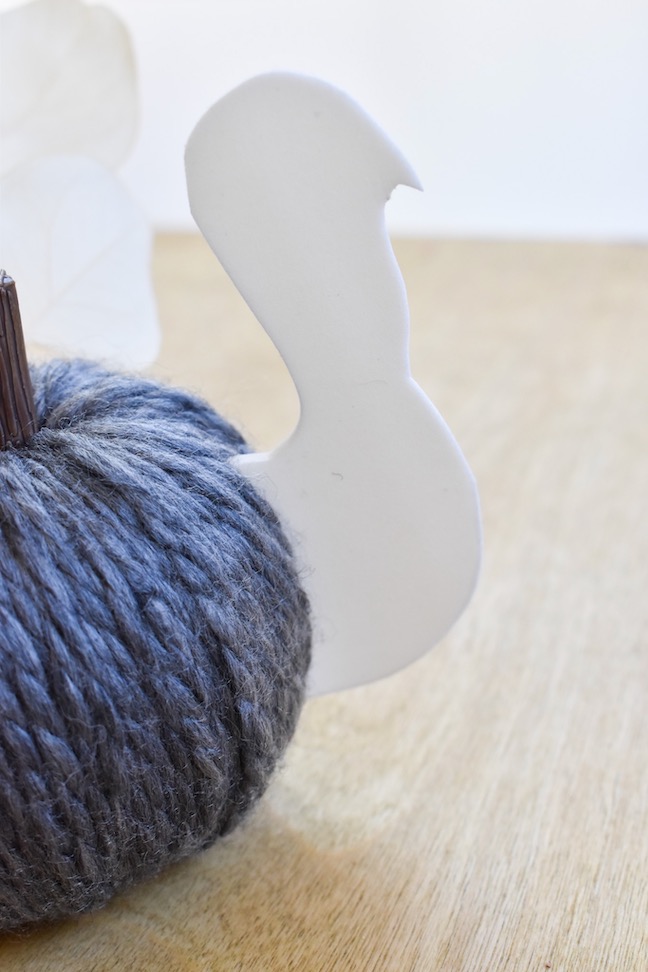
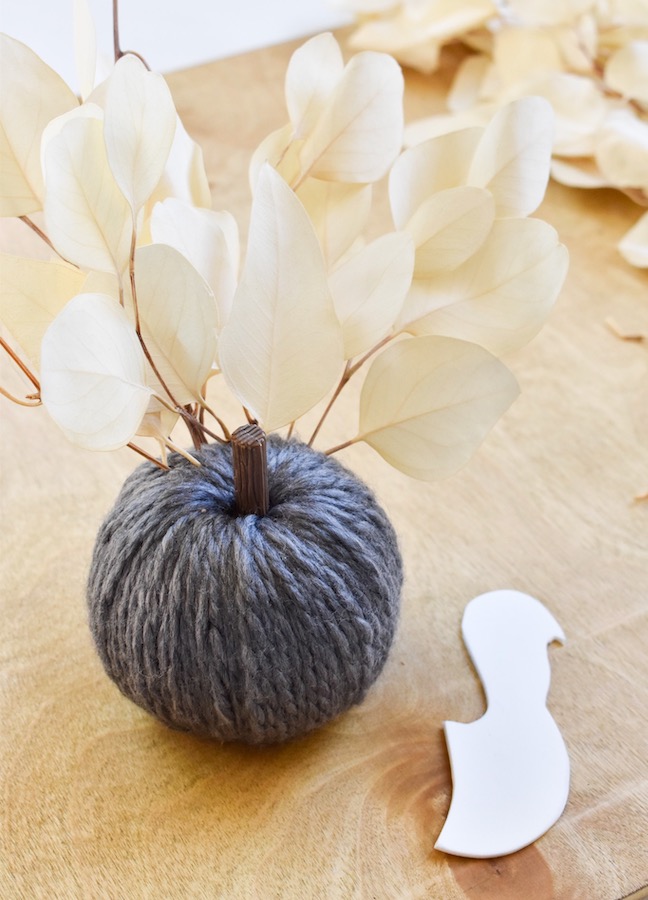
Step 3: Add a strip of glue along the back of the turkey head silhouette, and set it between two pieces of yarn on the opposite side of the leaves. Hold it for about 30 seconds to one minute. If Elmer’s glue is not strong enough for your pumpkin (results will vary based on the material of the pumpkin), then use a hot glue gun.
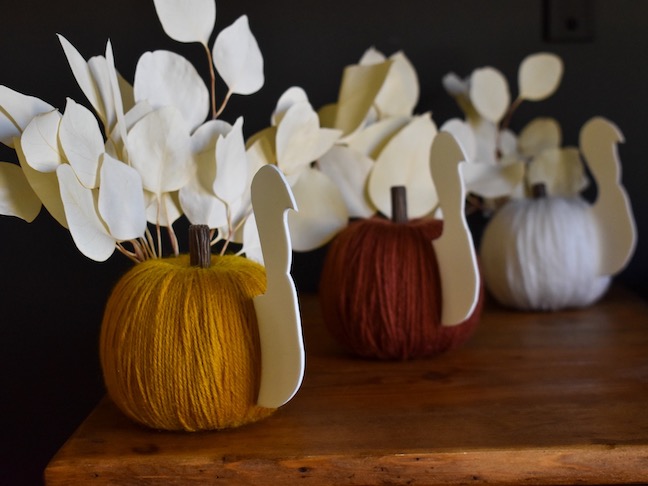
Step 4: Display the cutest DIY pumpkin turkey ever!