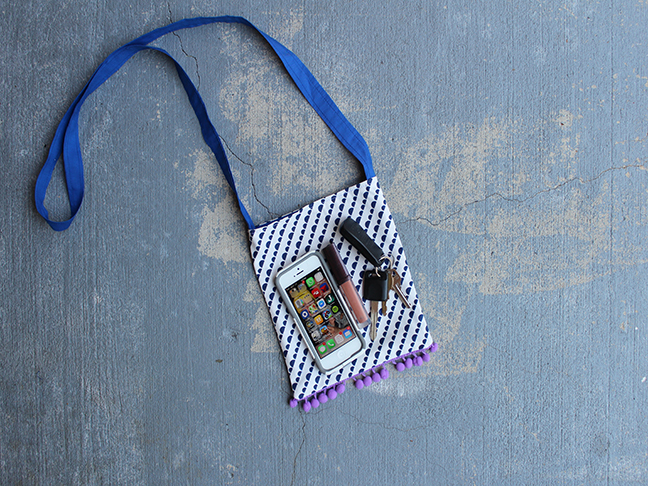
Need a mini bag to cruise around town? Make a DIY cross body bag that is both stylish and functional. Perfect in size, it will carry all your little odds and ends. Plus, it is trimmed with pom poms, so it might just be the cutest bag around.


Supplies:
- Fabric – 2 or 3 colors
- Pom pom trim – 1/4 yard
- Sewing machine and supplies
- Iron and ironing board

Instructions:
Step 1: Cut out the pieces. From the main fabric, cut out a rectangle measuring 9"L x 8"W. From the lining fabric, cut out another piece measuring the same size and also a piece measuring 47"L x 2 1/2"W. Cut the pom pom trim 9" in length.

Step 2: Lay the main fabric on your working surface, right side facing up. Lay the pom pom trim along the bottom edge at the 1/2" seam allowance. The pom poms need to face toward the inside of the bag. Pin. Place into your sewing machine and stitch the trim down. Stitch as close to the pom poms as possible. Press with an iron.

Step 3: Trim away any pom poms that lay in the 1/2" side seam allowance.

Step 4: Lay the other main fabric piece on top, right sides facing each other. Pin along the bottom. Place into sewing machine and stitch together. Follow the previous stitches made while sewing the pom pom trim in place. Press seams again.

Step 5: Open the bottom seam allowance and press in place. The pom poms should face outward and lay nice and flat.


Step 6: Turn so the right sides are facing toegther again. Pin at the side seams. Place back into your sewing machine and stitch the side seams together with a 1/4" seam allowance. Press. At the bottom, trim each corner. Repeat these steps and sew the lining pieces together (minus the pom pom trim).


Step 7: Sew the strap. Fold the strap in half and press with an iron. (Folded, the strap will be 47" x 1 1/4".) Along each long side, turn under again 1/4". Press. Pin. Place into your sewing machine and edgestitch along both sides.


Step 8: Center each strap end over the side seams. The raw edges should meet, and the long portion of the strap shoud be facing into the bag. Pin. Place into your sewing machine and stitch down with a scant 1/4" seam.

Step 9: Leave the main bag right side facing out. The strap should be hanging INSIDE the bag. Turn the lining to face wrong side out. Pull the lining over the main bag. Match along the top edge and pin in place. Place into your sewing machine and stitch around the top edge with a 1/4" seam allowance. Leave a small 2" to 3" opening near 1 side seam. Press with an iron.

Step 10: Pull the bag right-side out through the opening.


Step 11: Place the the lining into the bag. Wiggle the corners into place. Press all over to lay flat. Pin the small opening closed and place into sewing machine. Topstitch around the entire top edge.

That's it! Happy sewing.

More Sewing Projects: