“Snowman! Snowman! Snowman!” If your kids are anything like mine, they have been glued to the window since the first snowflake hit the ground, and they haven’t shut up about making their very own Olaf ever since. Easy, right? Just grab the carrot and the button eyes and — wait. Here’s the thing. There’s actually some nuance to building a snowman and some legit ways of making it better. So, before your snowday fun turns into a Lampoon’s-style disaster, read these tips and find out how to make a killer snowman that your family will love (and then check out the slideshow for even more inspiration!).
Step 1:
Choose the right snow. No, seriously. If the snow is too powdery it will sift through your fingers like sand. Snowman snow must be packable — think moist, not flaky – in order to hold together. Fresh snow that has fallen when temps are around 32° F (0° C) is ideal. If your snow doesn’t pass muster, never fear: Just spray it with a little water.

Step 2:
Start packing. Now that you’ve got the grade-A packable stuff, take a handful and start shaping the snow into a ball. Keep packing. Don’t stop yet. In fact, keep packing the ball with snow until a.) it’s super big, or b.) frostbite has kicked in.

Step 3:
Put your back into it. See all the rest of the snow on your lawn or sidewalk? Do a few quick leg stretches, because now it’s time to crouch down and roll the ball away from you, across all that white, powdered goodness. It’s a pain in the butt, but it’s actually kind of fun, and it works! All the other snowflakes want to come to the party, and your first ball should be getting large enough to serve as the base for your snowman.
Step 4:
Rinse and repeat. Remember everything you just did? Well, do it again. Twice. Your second ball should be a bit smaller (for the waist). Your third ball will be slightly smaller still, and serve as the head.
Step 5:
Stack ‘em. For your basic, bottom-heavy snowman, you’ll now want to stack your snowballs from largest to smallest. If you made them super big (good job!) you might want to use a shovel to lift the midsection and head in place. Pack additional snow between the balls to help hold them together.

Step 6:
Accessorize. Now comes the fun part – give your snowman some ‘tude! Get creative with fruit, veggies, stuff from your craft box or utensils drawer, and give your snowman eyes, a nose, a mouth, and maybe a hat, scarf, or jewels. Come up with a name for him (or her) too, if you like, and decide if you’re accessorizing a Kim Snow-dashian or maybe a Will Smith-cicle.

And, you’re done! You deserve a hot chocolate!
If packing and rolling seems like too much work (I don’t blame you), you could always use the less traditional method of piling up a large mound of snow and carving out the shape of a snowman. It’ll still look awesome, and either way your fam will have a blast. Happy snowman-making!
More Ideas for Winter Fun:
- The Best Playdate Ideas for When it’s Cold Outside
- 14 Winter Movies You’ll Actually Want to Watch with Your Kids
- 29 Incredibly Fun Indoor Games for Kids
Photos: Getty
Snowmen!
-
Snowmen! #1
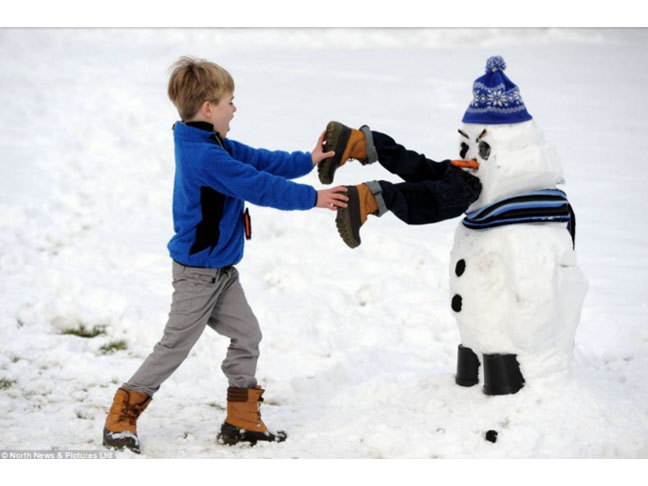
Lol! Get creative and get some major laughs with a kid-eating snowman.
Photo: Imgur
-
Snowmen! #2
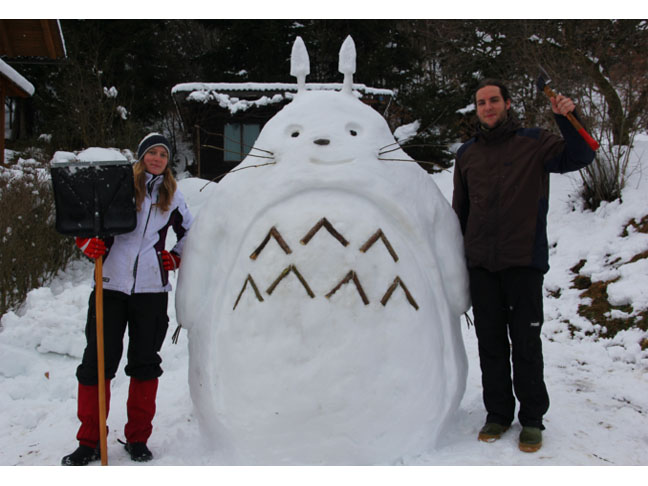
Turn your snowman into mythical forest sprite, Totoro. Your kids will have lots of fun creating their favorite anime character.
Photo: Imgur
-
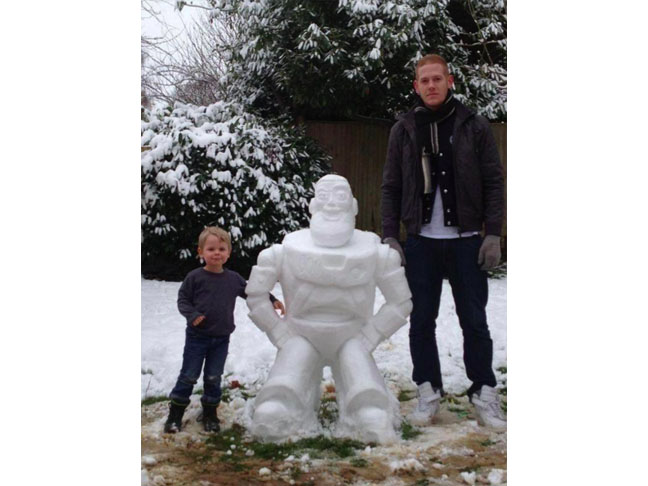
Snowmen! #3
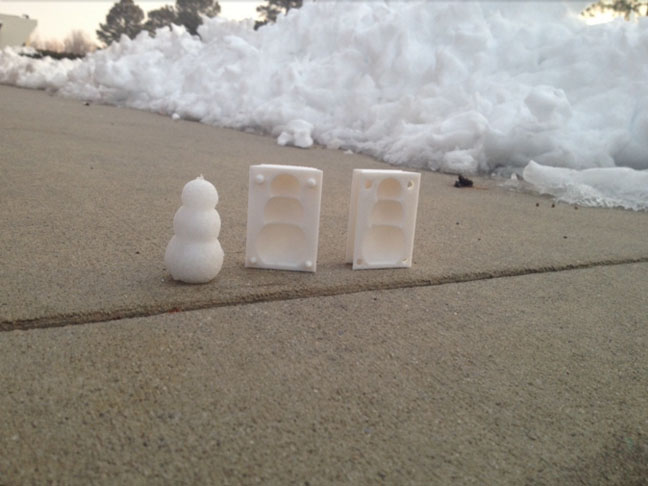
Get high-tech and use a 3D printer to make a tiny snowman mold.
Photo: Imgur
-
Snowmen! #4
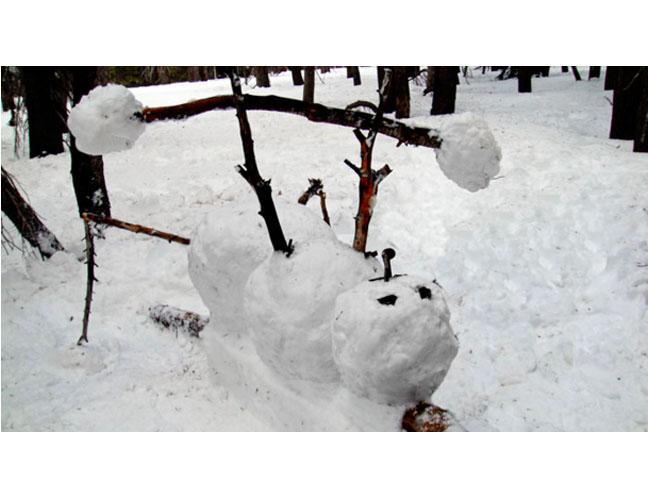
How many snowflakes can your guy bench? Build a weightlifting snowman and find out!
Photo: Imgur
-
Snowmen! #5
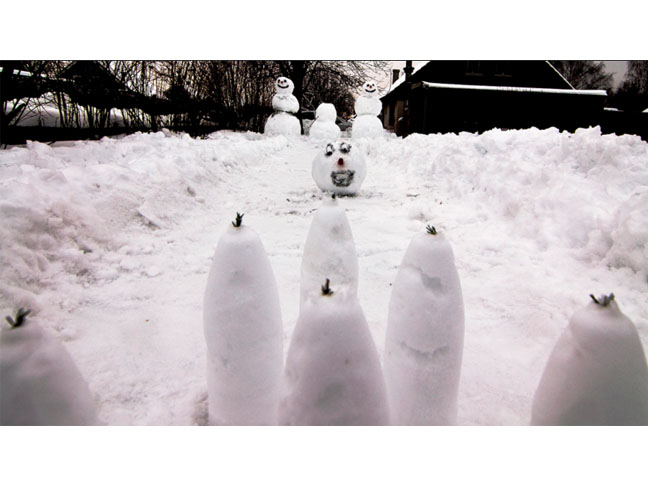
Let your snowmen have some fun by making them their own bowling lane!
Photo: Flickr/Brian Colson
-
Snowmen! #6
"Toy Story" fans will love the idea of a Buzz Lightyear snowman!
Photo: Imgur
-
Snowmen! #7

Make a cute-as-a-button classic snowman, a la The Snowman by Raymond Briggs.
Photo: Imgur
-
Snowmen! #8
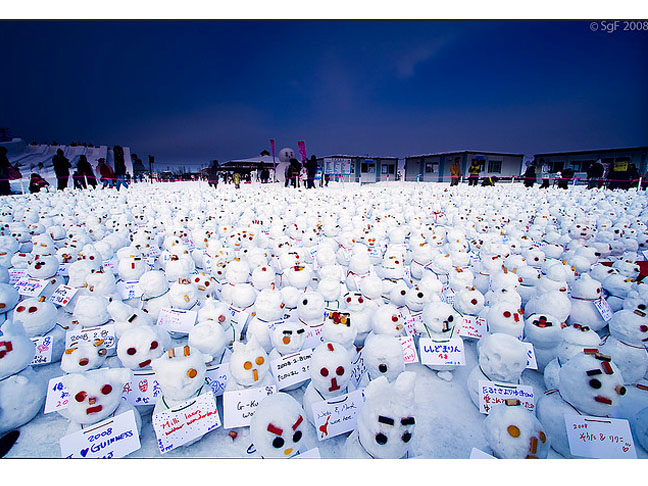
Attack of the snowman clones!
Photo: Flickr/Sacha Fernandez
-
Snowmen! #9
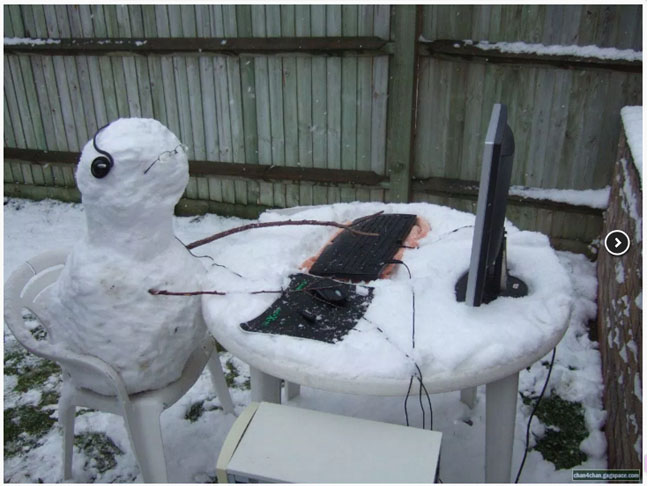
Turn that broken computer in the garage into a programming snowman!
Photo: Leganerd
-
Snowmen! #10
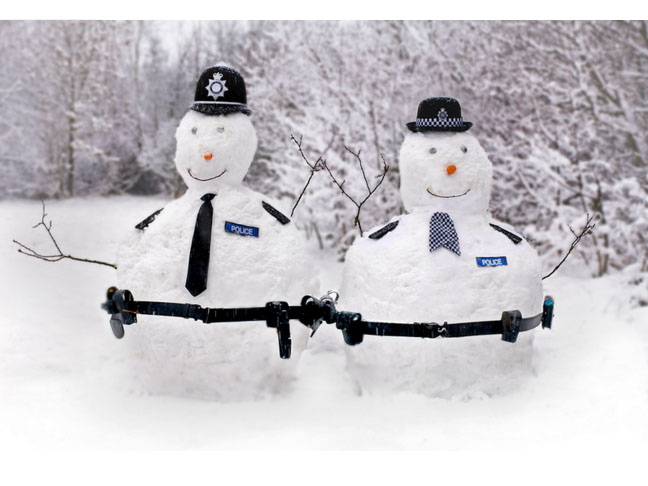
Everyone will feel safer knowing there are police snowmen protecting the neighborhood.
Photo: Flickr/West Midlands Police
-
Snowmen! #11
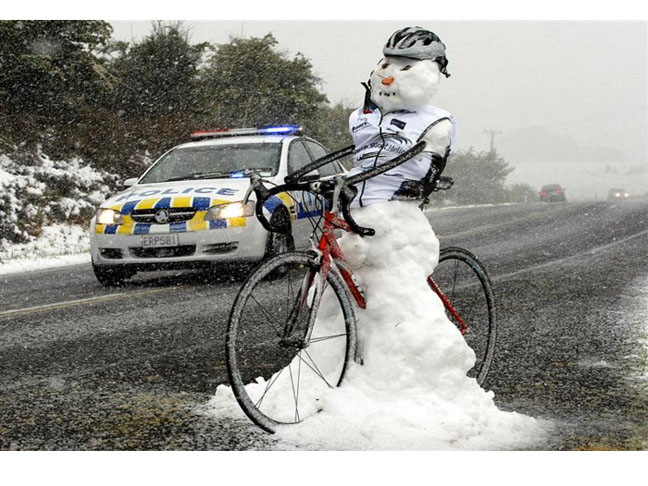
Let your snowman get a little exercise and try putting him on a bike this year!
Photo: Bike Life
-
Snowmen! #12
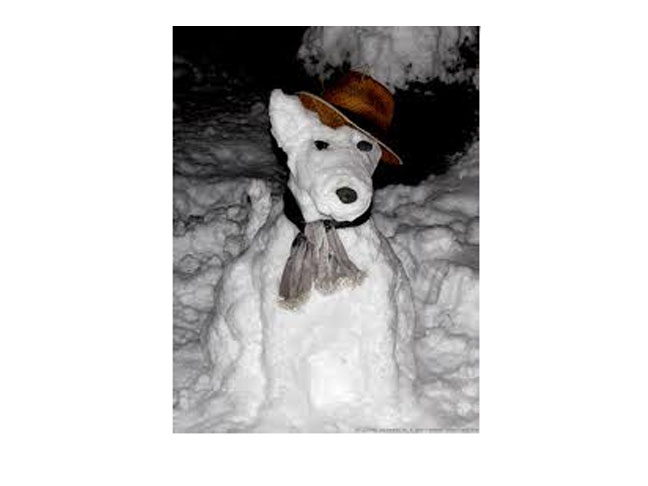
If you're a dog lover, I bet your pooch would appreciate a snowdog to pal around with!
Photo: A Letter To My Dog
-
Snowmen! #13
It's good to know that when your snowman starts to melt he will bow down to you.
Photo: Imgur
-
Snowmen! #14
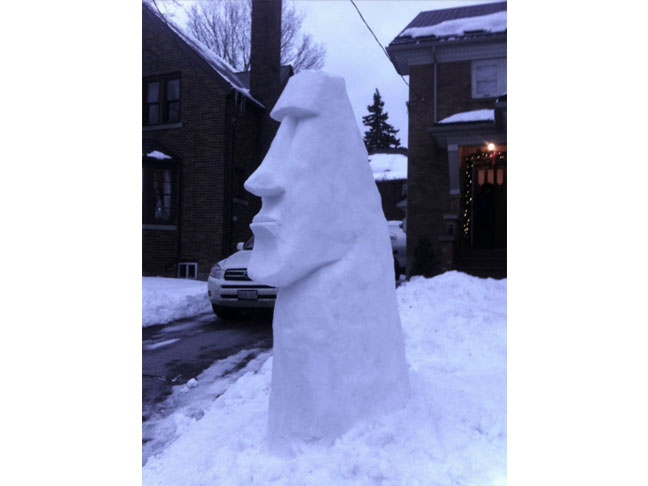
Master your skills as neighborhood sculptor with an impressive Easter Island snowman.
Photo: Imgur
-
Snowmen! #15
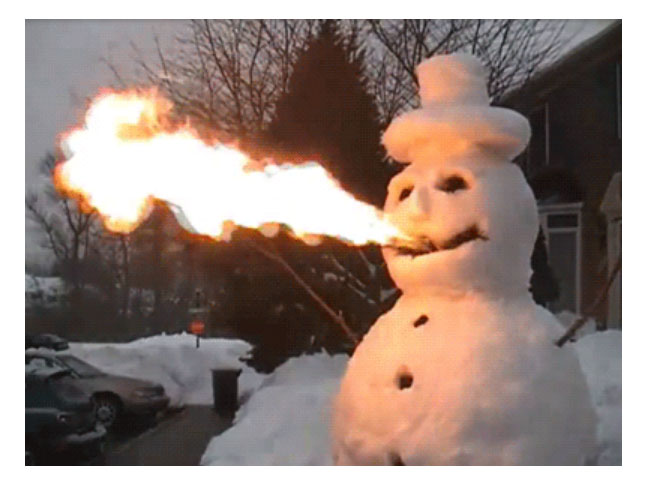
Make a fire-breathing snowman! Freak out your neighbors with some dazzling pyrotechnics.
Photo: Imgur
-
Snowmen! #16
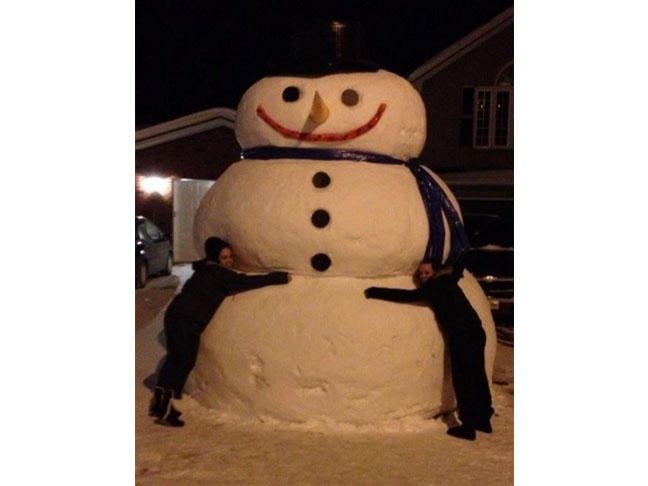
The bigger the blizzard, the bigger the snowman. You might need a traffic cone for the nose!
Photo: Imgur
-
Snowmen! #17
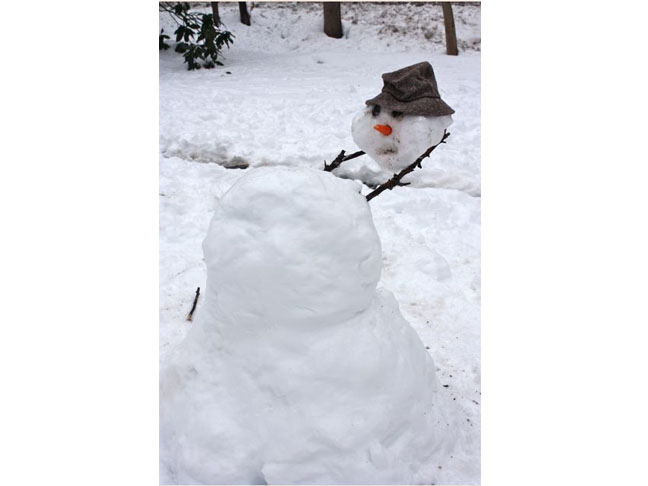
Make a headless snowman!
-
Snowmen! #18
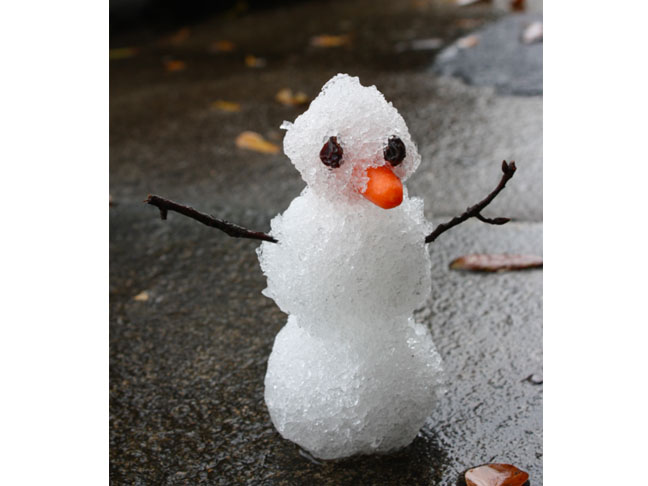
Don't have much snow? Make a teeny-tiny iceman!
Photo: Imgur
-
Snowmen! #19
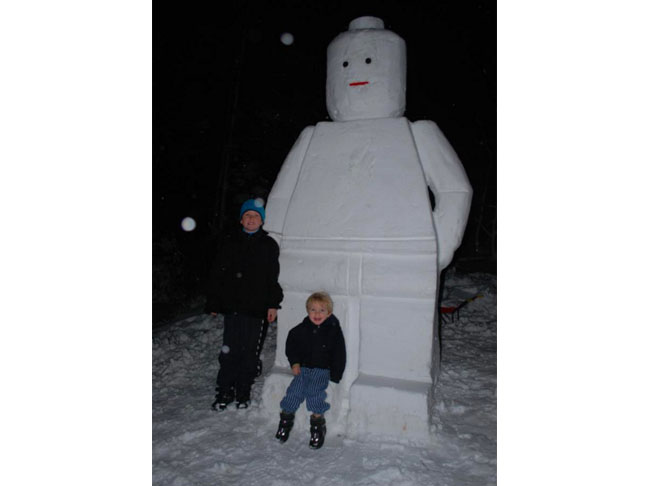
Everything is awesome when you build a Lego snowman!
Photo: Imgur
-
Snowmen! #20
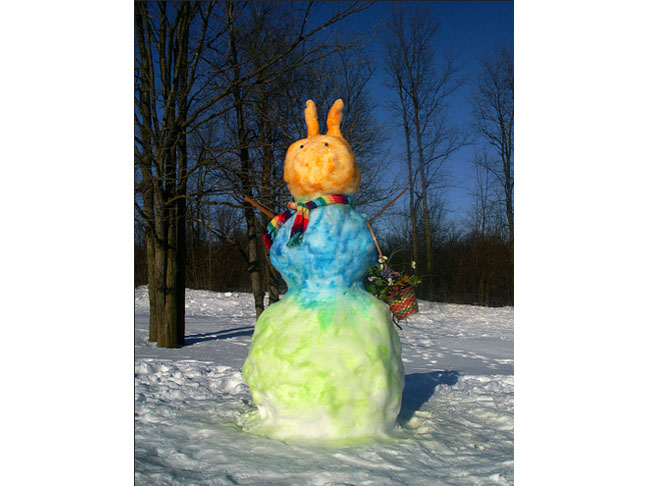
Who says a snowman has to be white? This multi-colored snow-bunny is adorable!
Photo: Flickr/Saffron Blaze
-
Snowmen! #21
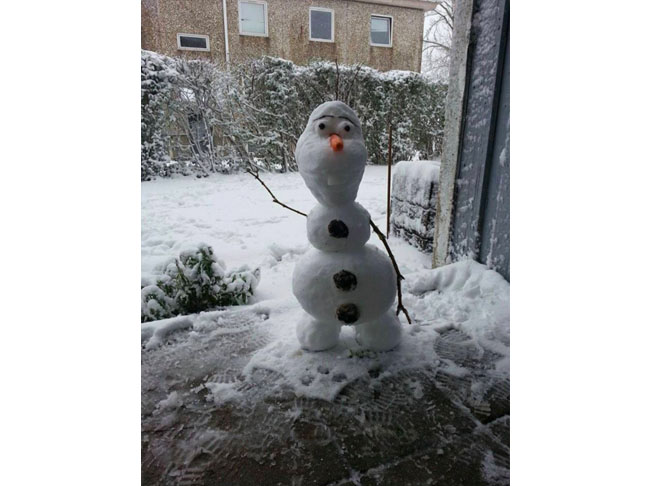
No snowman roundup is complete without our favorite summer-lovin' pal, Olaf!
Photo: Imgur
-
Snowmen! #22
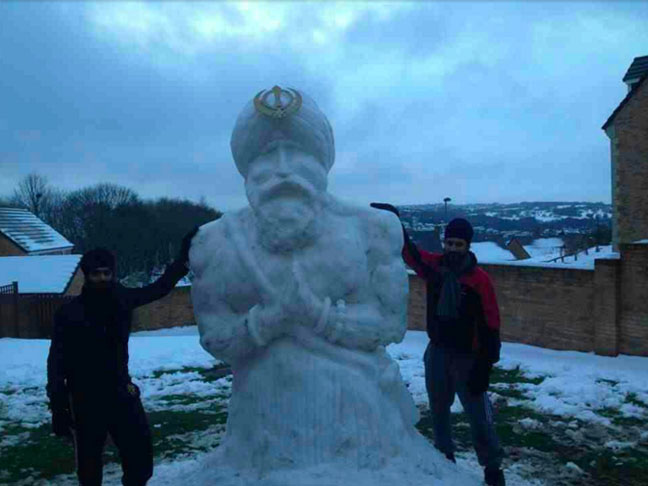
Now that is one Sikh snowman!
Photo: Imgur
-
Snowmen! #23
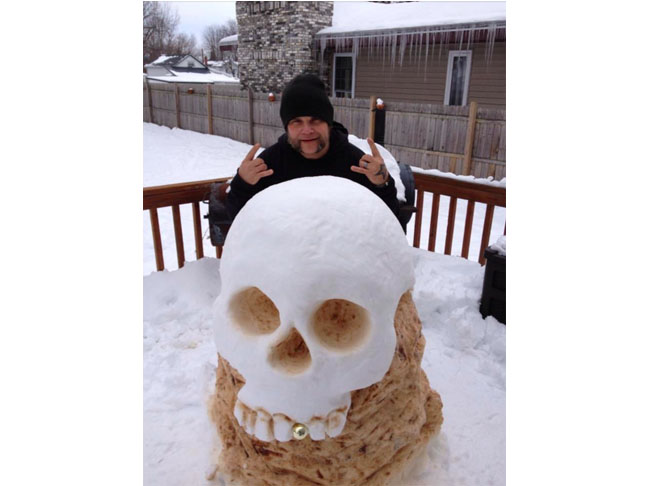
If you're looking for a slightly darker idea this winter, why not build a giant skull snowman?
Photo: Imgur
-
Snowmen! #24

Send a message with your snowman -- this says "I love you" in sign language!
Photo: Imgur
-
Snowmen! #25

I don't know what it is about this buckethead snowman, but it seems to be major catnip!
Photo: Imgur
-
Snowmen! #26
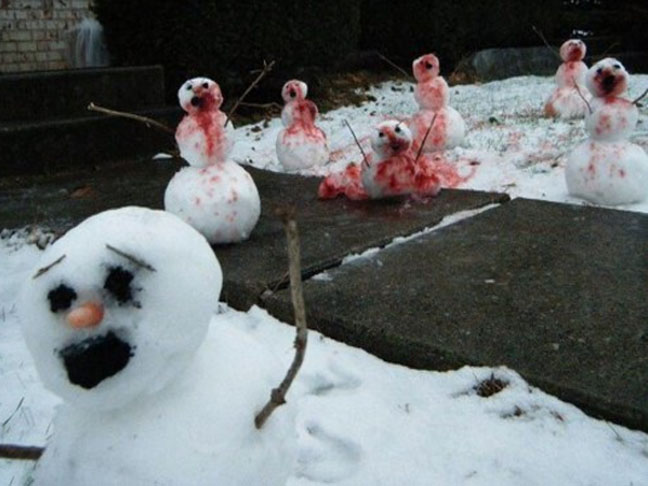
For a morbid twist, turn your winter wonderland into a snowman-massacre!
Photo: Imgur
-
Snowmen! #27
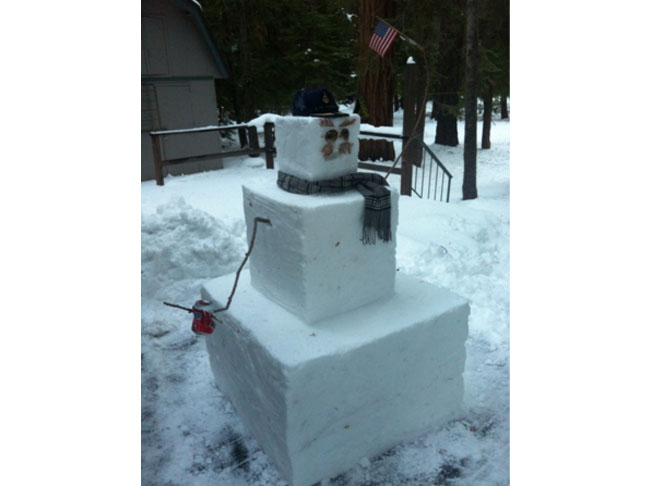
Break from tradition and make a square snowman!
Photo: Imgur
-
Snowmen! #28
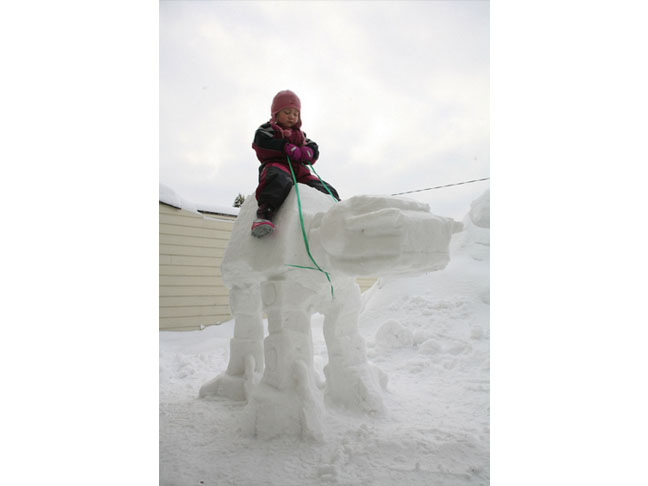
'Tis the season for an awesome Star Wars snowman!
Photo: Imgur
-
Snowmen! #29
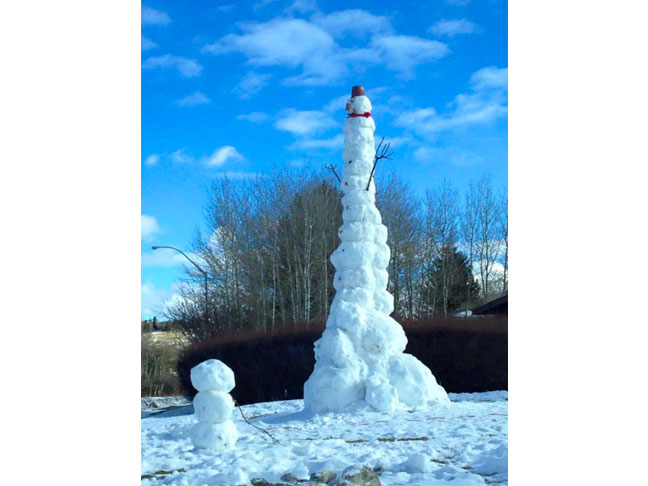
If your kids have fun making the balls, why stop at three? Just keep going, and going, and going...
Photo: Imgur
-
Snowmen! #30
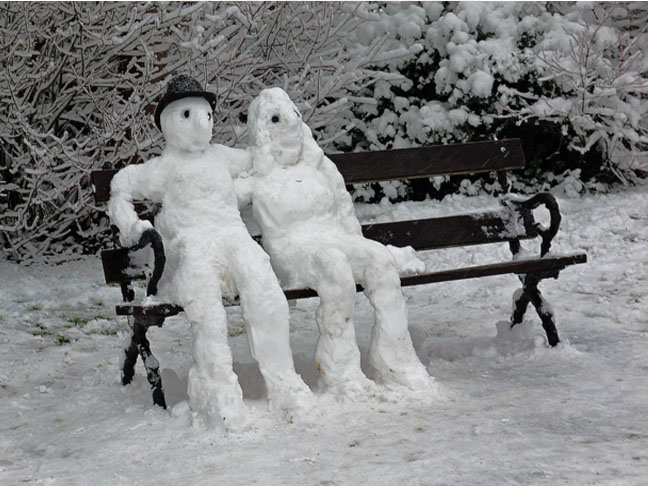
Make a lifelike snow-couple to keep each other company on cold winter nights.
Photo: Flickr/Clive Hodges
-
Snowmen! #31
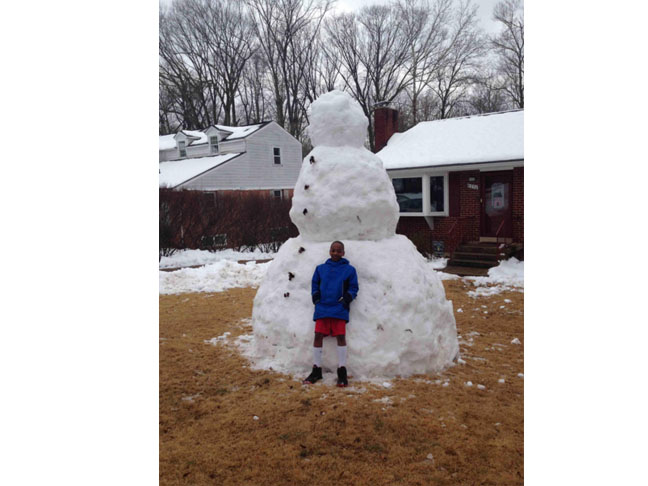
Sometimes bigger is better. Frosty the Ogre is sure to keep burglars away!
Photo: Imgur