

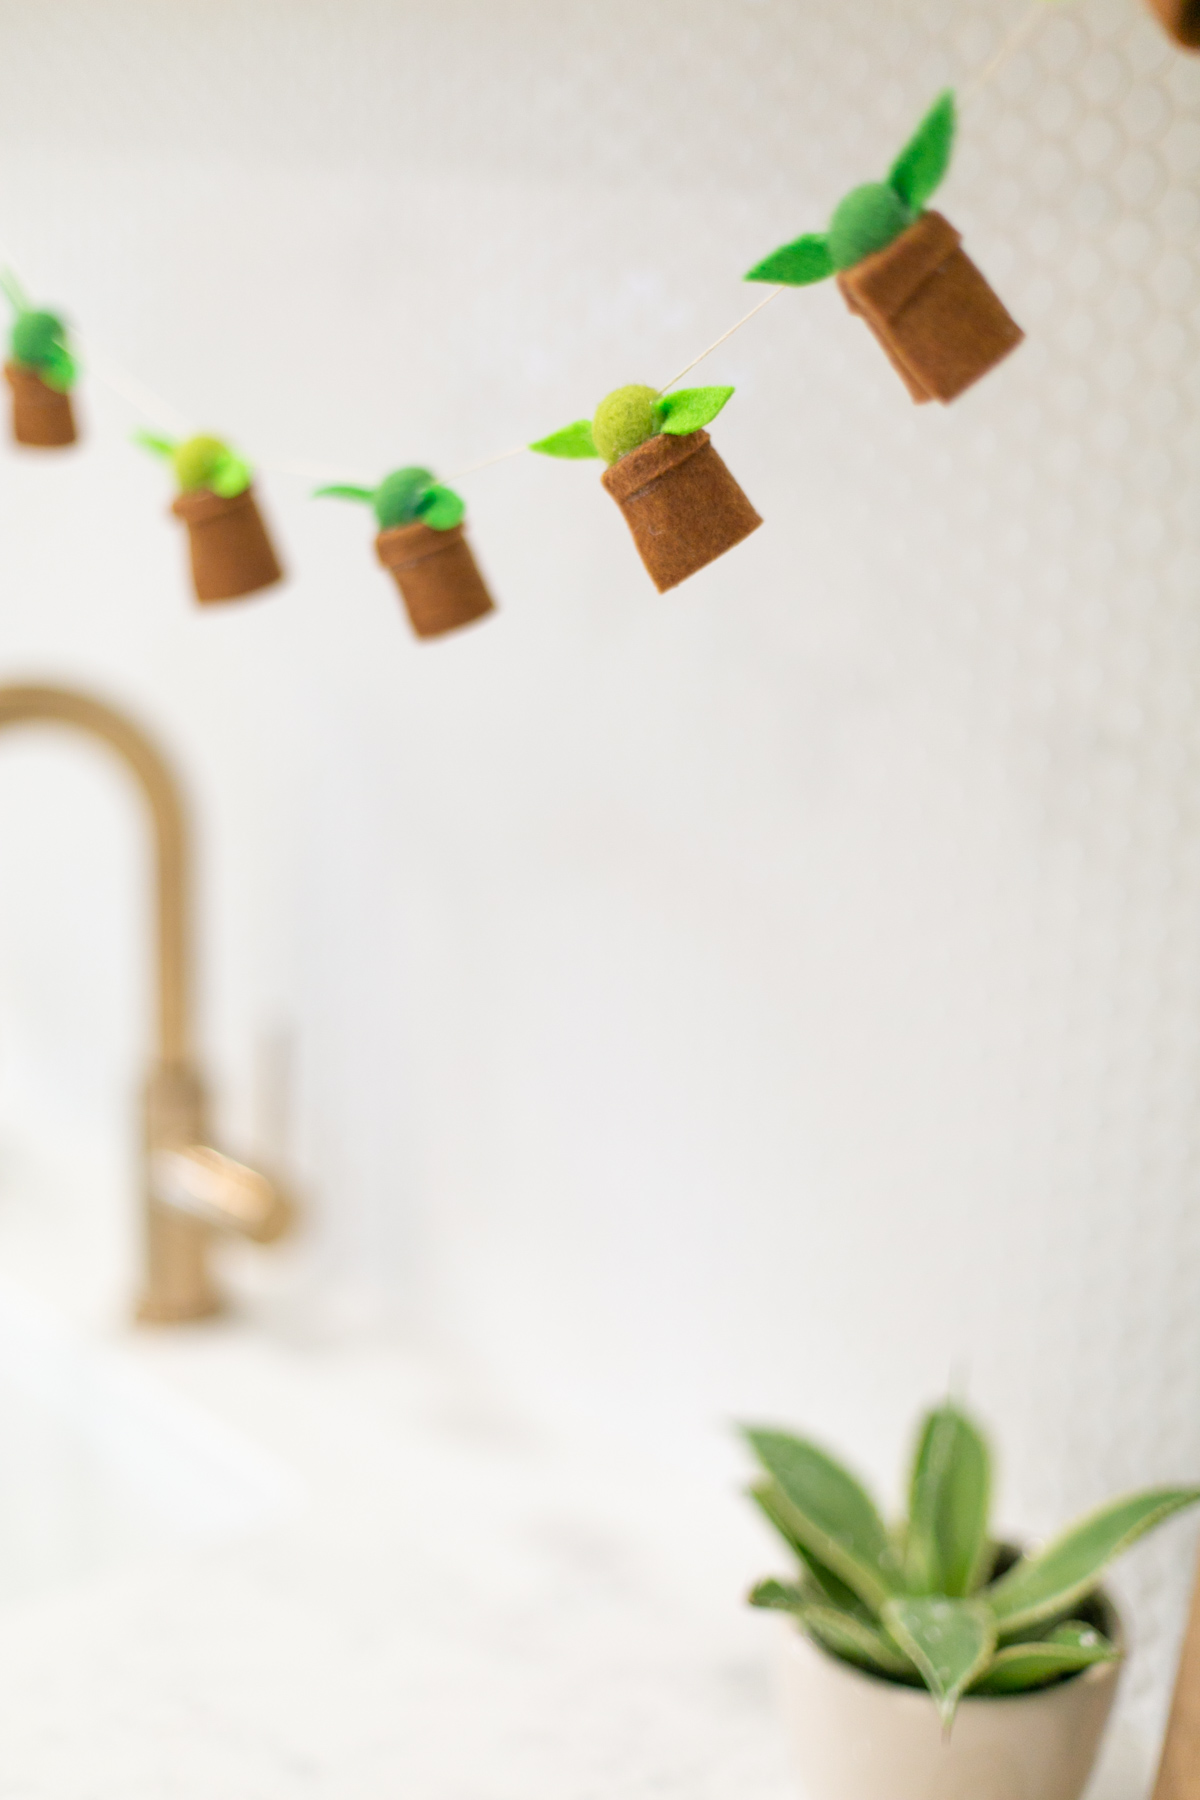
I admit it — our household is fully under the spell of Baby Yoda, and we’re not mad about it! We began watching ‘The Mandalorian’ not quite knowing what to expect, and quickly realized that we all couldn’t wait for the new episodes to air each week. And since we all know that Baby Yoda is the cutest of the bunch, I thought a DIY was in order!
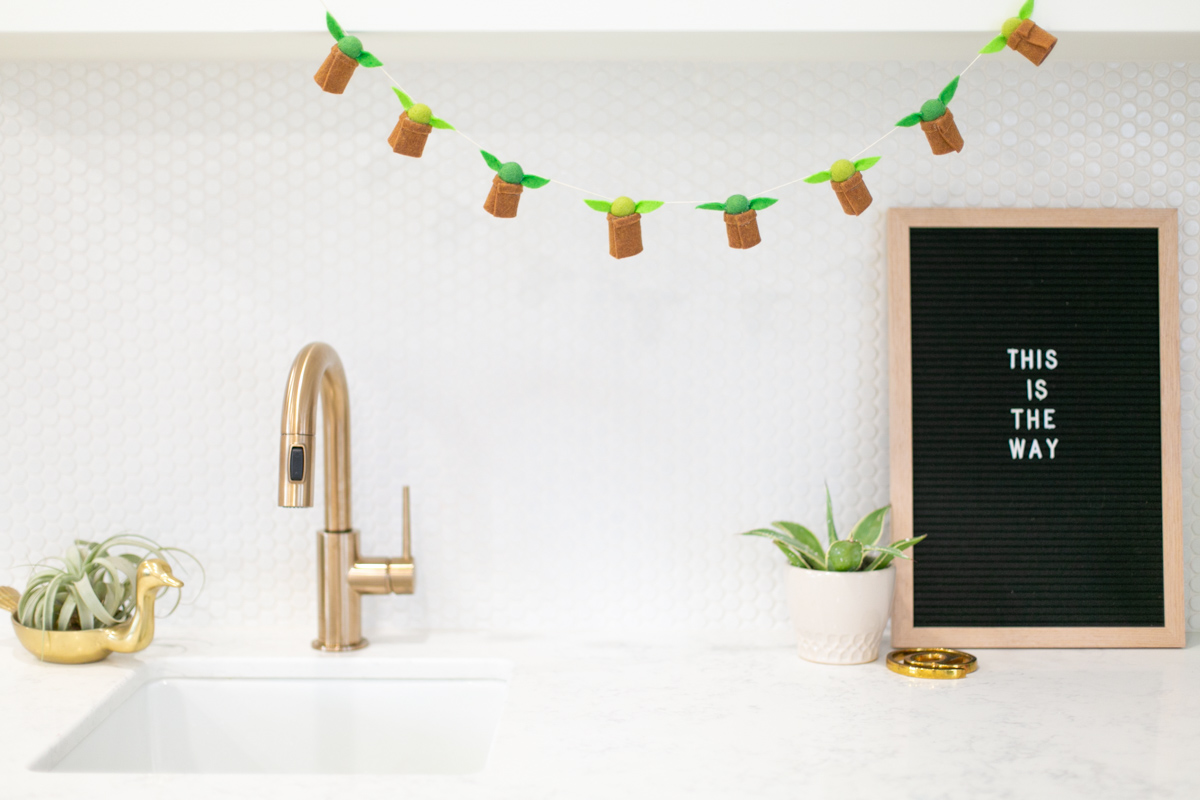
In fact, my three-year-old daughter has taken to calling herself Baby Yoda, and calling my husband Mando. So this cute little DIY Baby Yoda garland will be living in her bedroom, because she’s the most taken by that cute little green guy. Every time he uses the force to heal somebody who’s injured on the show, she practically stands up and cheers. So if you have a similar Baby Yoda fan on your hands, whip up this cute DIY garland! It’s fast and easy, and just uses a few materials.
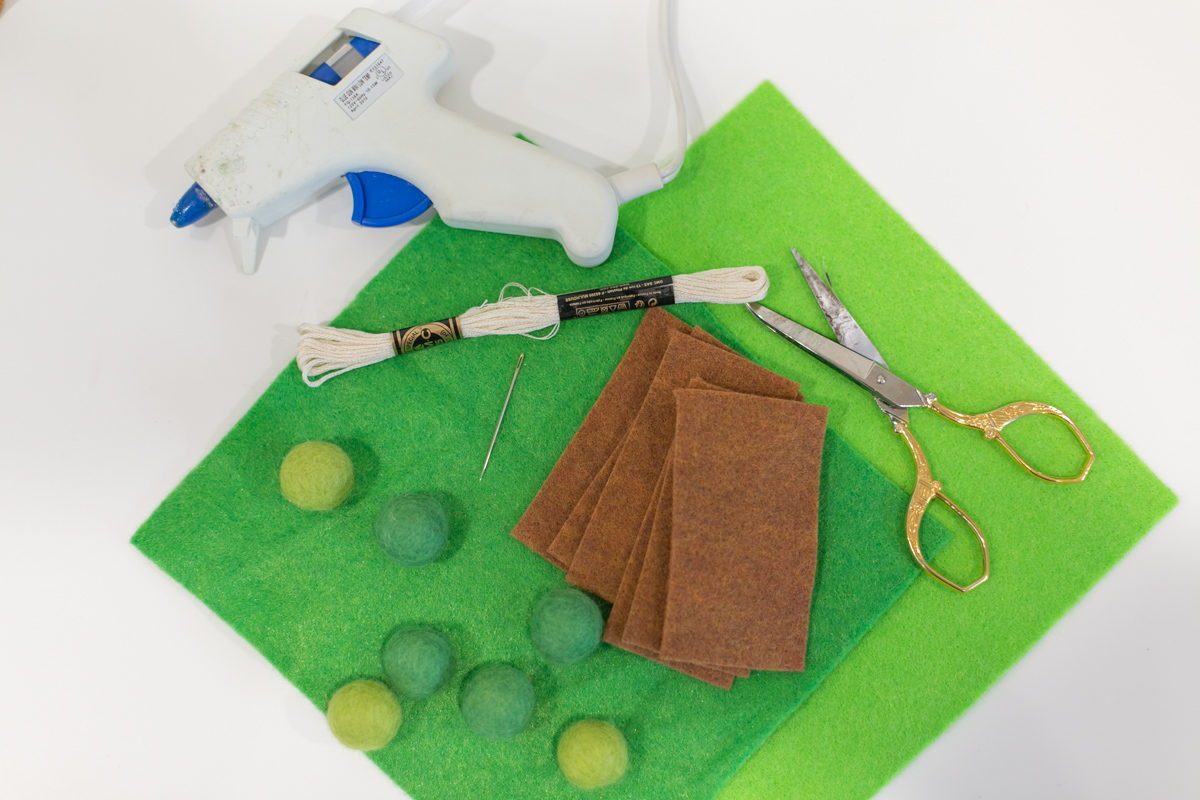
Supplies:
- 20 mm felt balls in various shades of green
- matching green felt
- brown felt
- glue gun
- embroidery thread
- embroidery needle
Instructions:
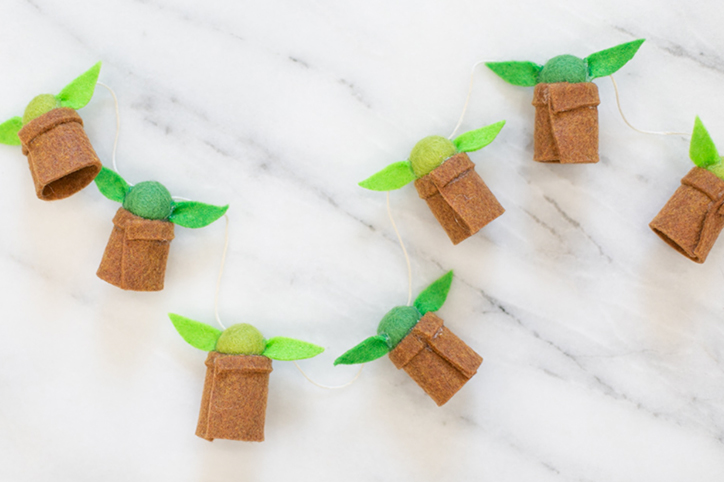
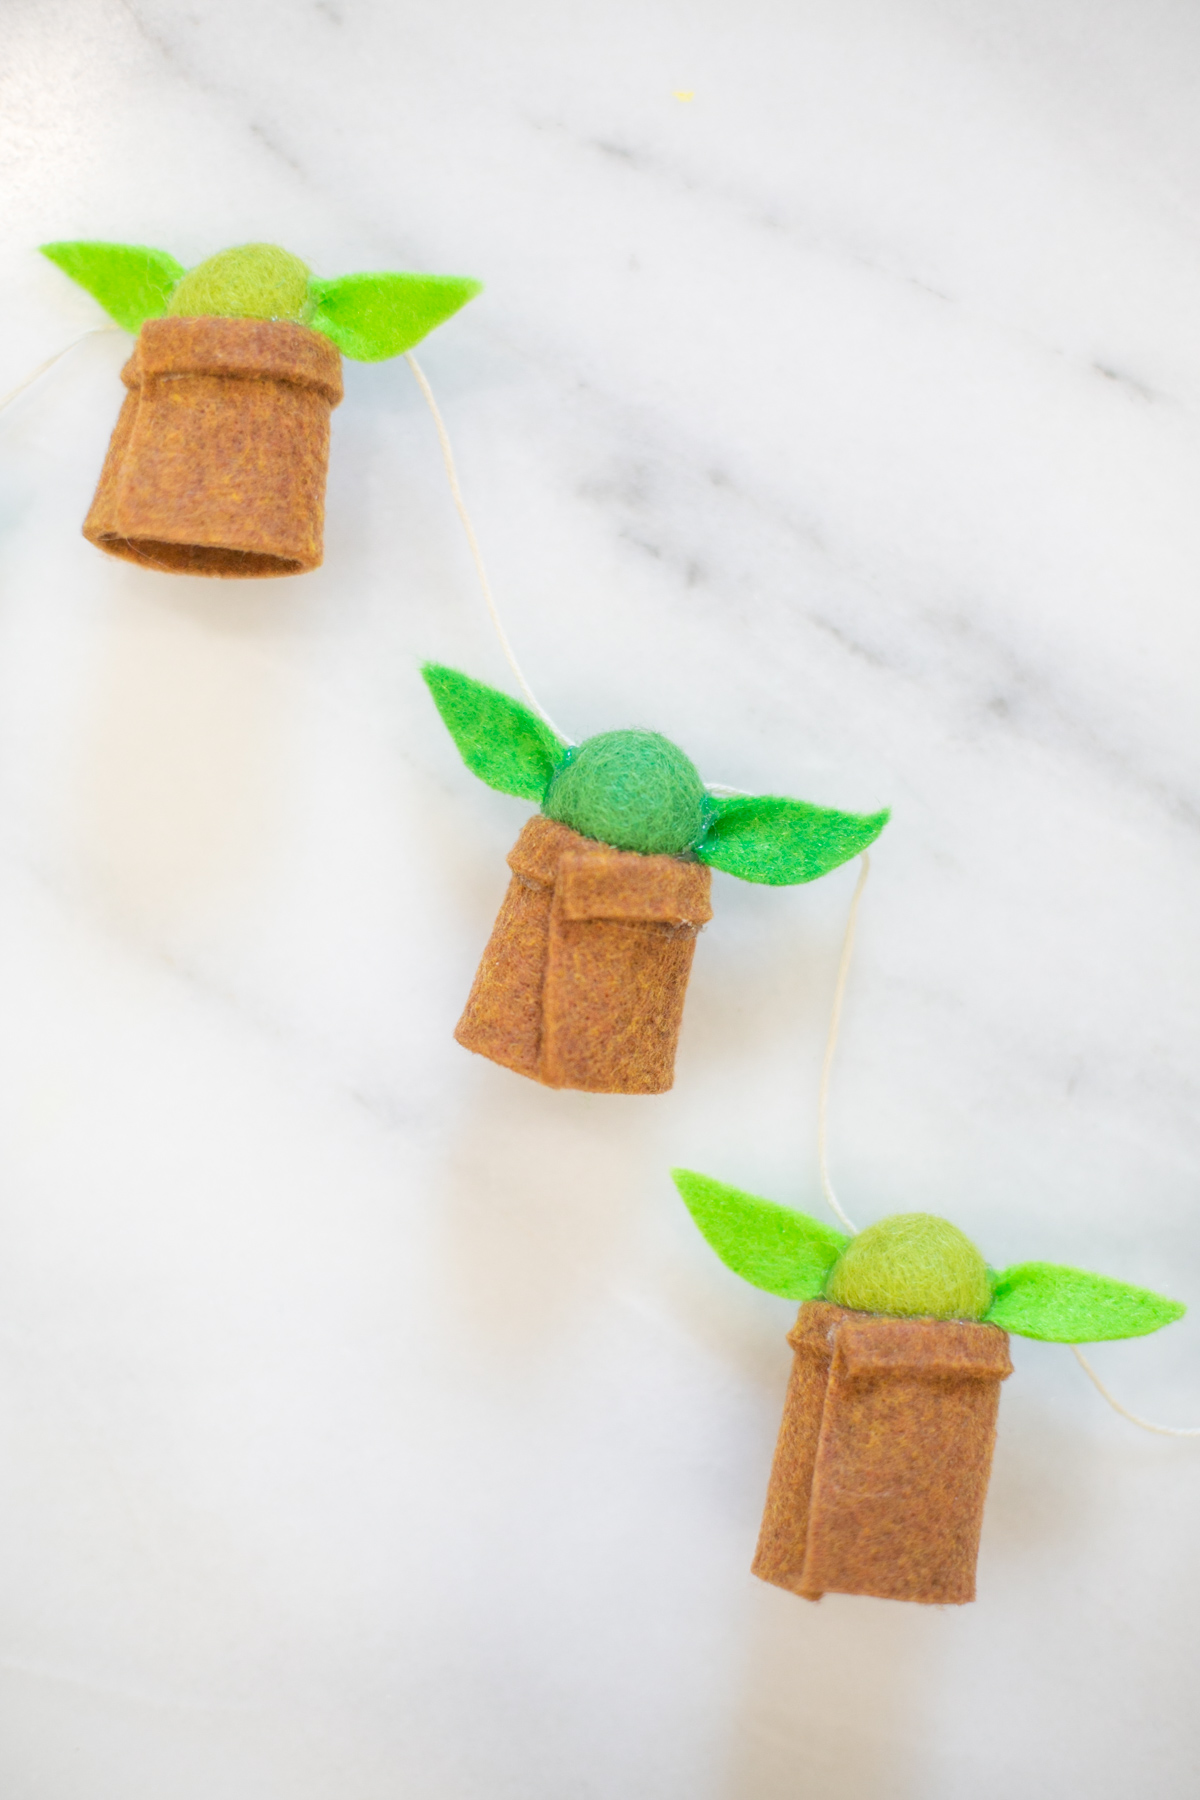
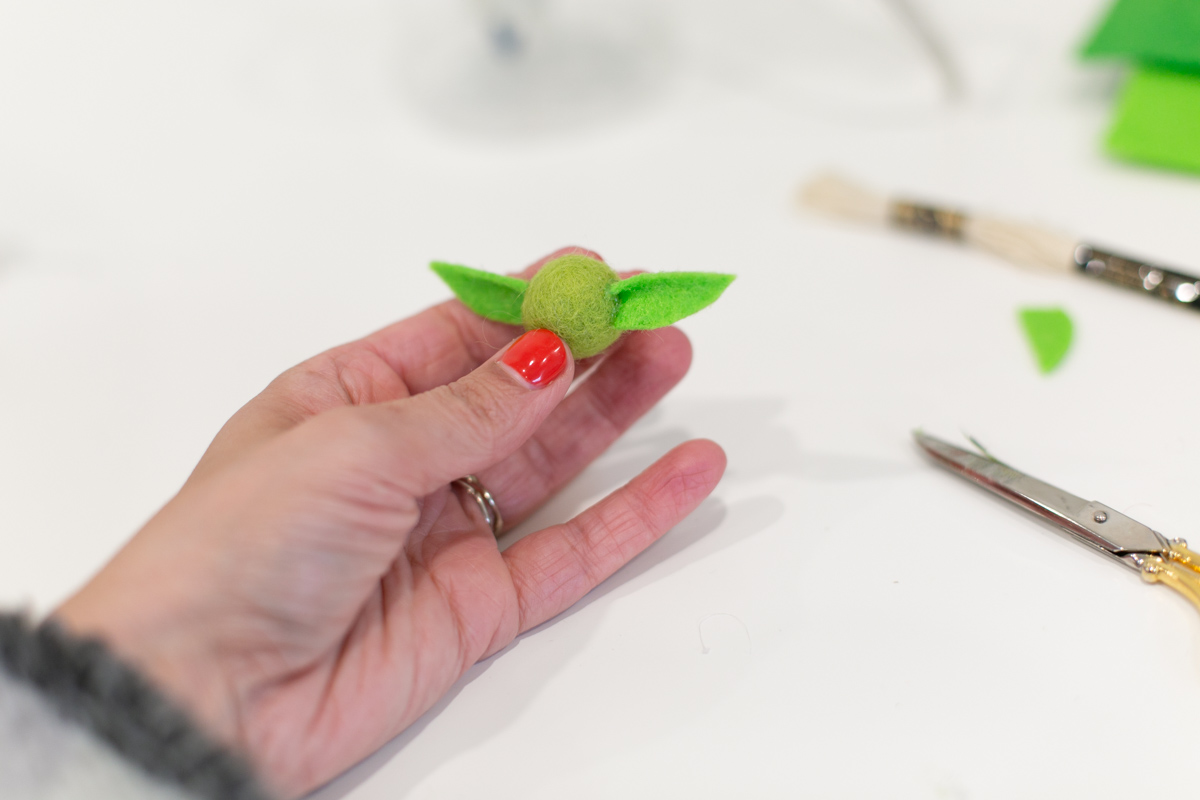
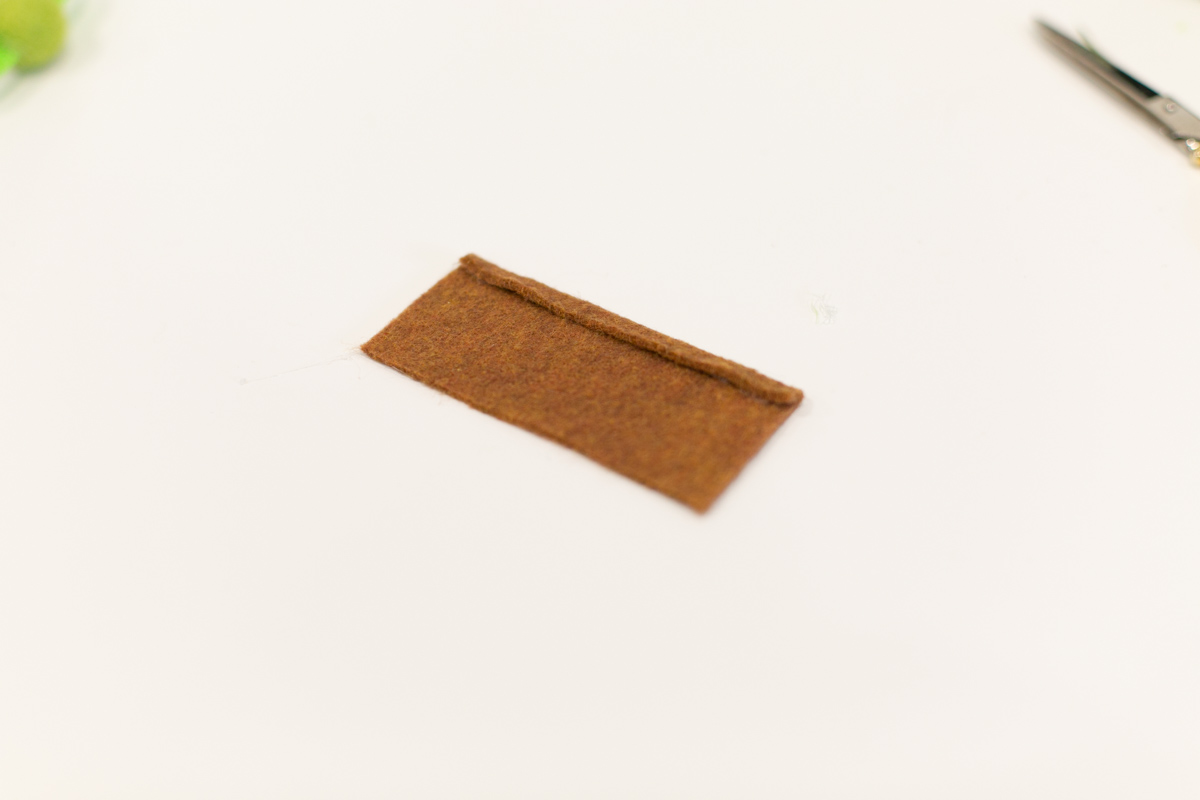
Step 1: Start by cutting all of the pieces for your Baby Yodas. For each felt ball, you’ll need two green pieces to create the ears, and one brown rectangle to create the cloak. The ears should be about an inch long, with one pointy end and one flatter end, and a curve along the bottom. The brown rectangle should be about 3 1/2 inches by 2 inches.

Step 2: Glue the ears onto the sides of the felt ball. You’ll want to glue them slightly above the center of the ball on each side, to allow enough room to eventually glue the head onto the cloak. To glue, place a dot of hot glue on one side of the felt ball. Pinching the flat end of one of the ears in between your fingers so that the top is folded forward and down, press the pinched felt into the dot of hot glue. Pinching and folding is what creates the “Yoda” shape of the folded ears. Repeat with the other ear.
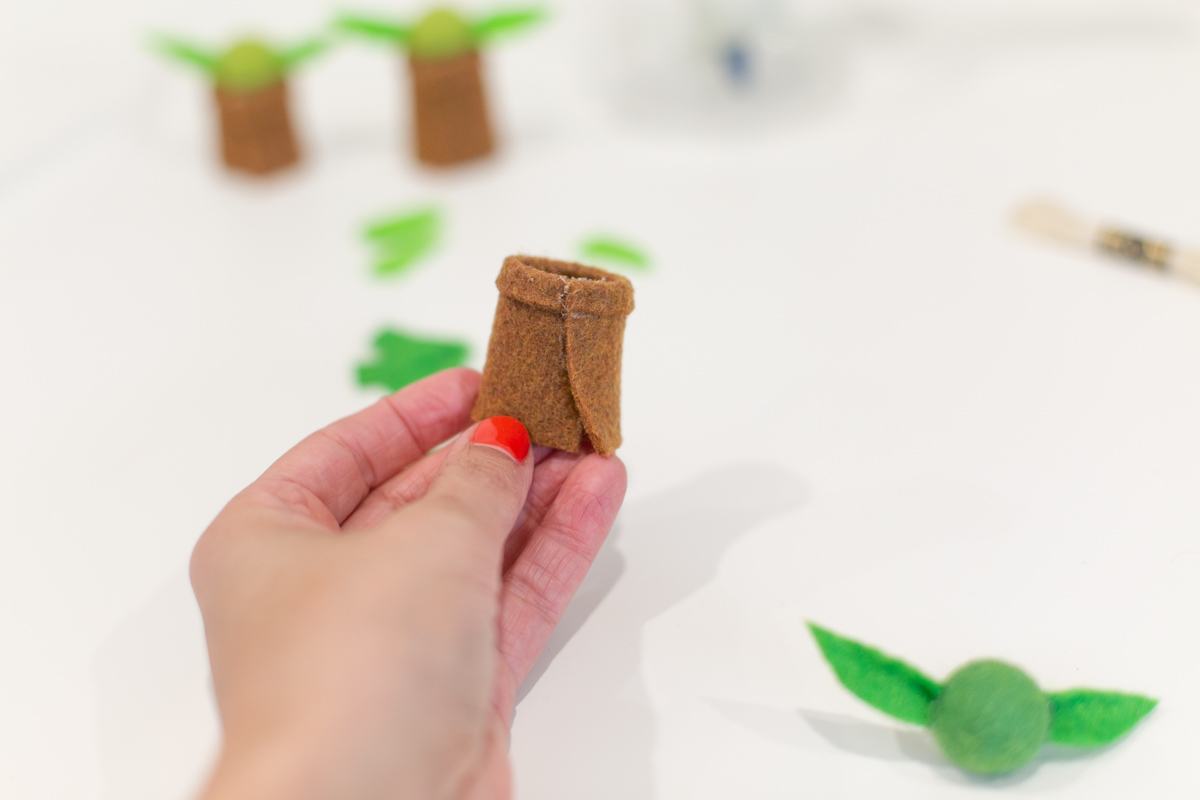
Step 3: Place a line of hot glue along one long edge of the brown rectangle. Fold the felt over on the glue, creating a 1/4 inch fold along that side.

Step 4: Wrap the brown felt into a cylinder to create the cloak. Place a dot of hot glue on one side of the front at the edge of the felt, and overlap the other edge slightly. Hold in place until the glue dries. You only need to glue the top of the cloak, on the edge where you made the fold. You can leave the bottom unglued.
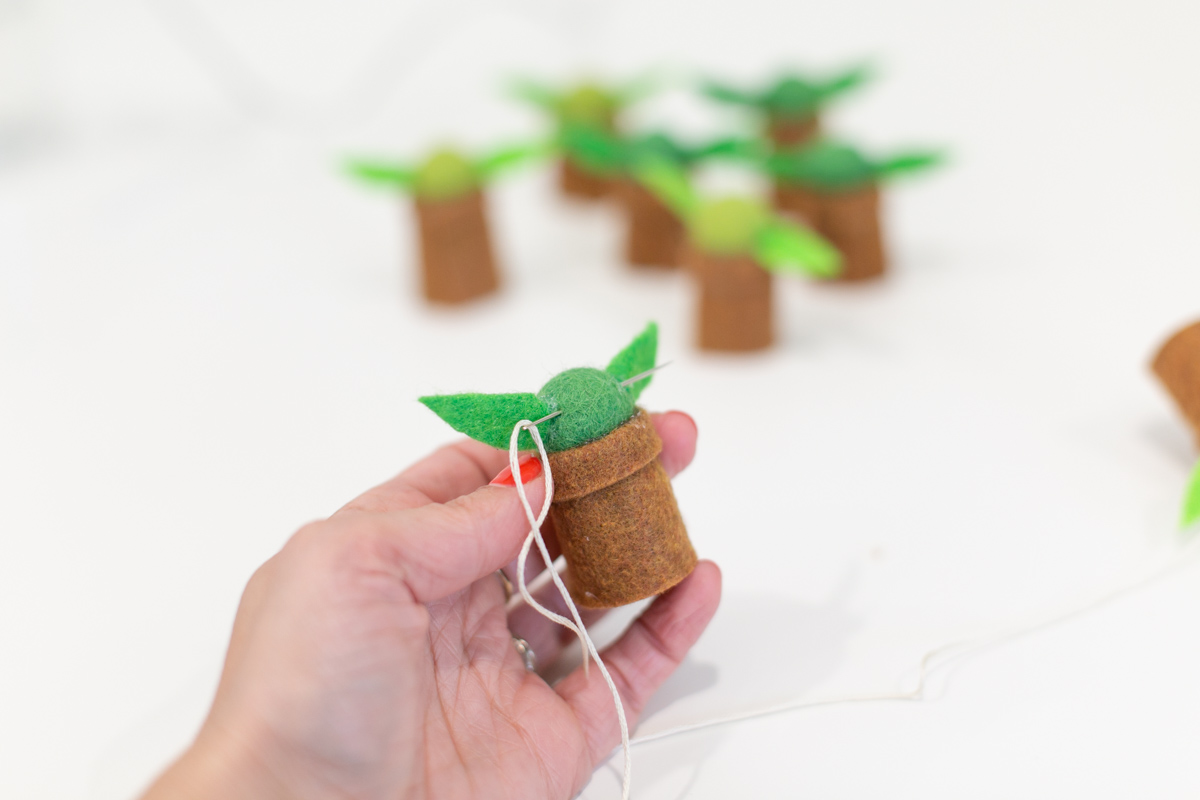
Step 5: Place a line of hot glue around the inside of the collar of the cloak and sink the Baby Yoda head down into it. I found that if you don’t sink the head down far enough, it looks more like the original Yoda, but if you push it down quite a bit it looks more like Baby Yoda. (Almost like the cloak is oversized and too big for him.)

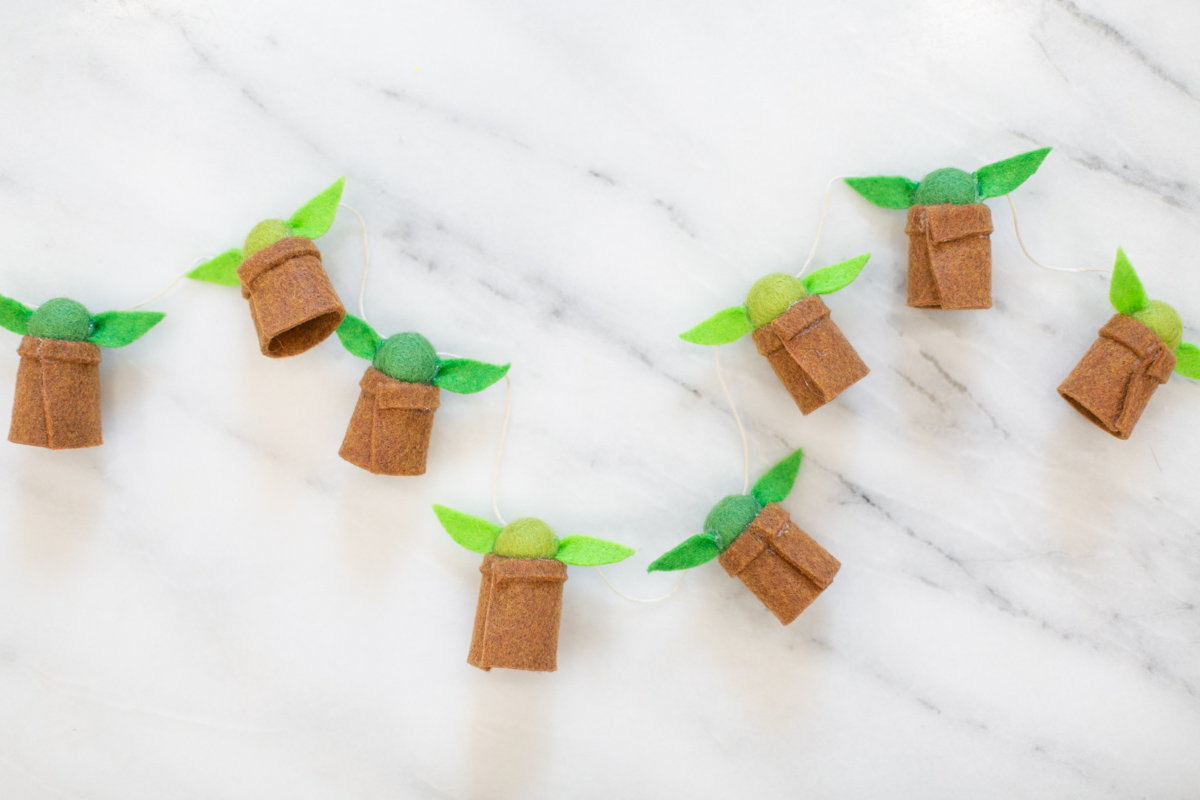
Step 6: Once you have all of your Baby Yodas created, start stringing them on the garland. To do this, thread your needle with embroidery thread. Insert the needle through the upper part of each Baby Yoda’s head, kind of behind the top of his ears. Keep stringing them together until you have your garland full. Then hang it and enjoy!

Read More About ‘Star Wars’:
- 11 Ways We’re Passing Our Star Wars Obsession On To Our Kids
- Newborns Feel the Force, Dress Up For New ‘Star Wars’ Movie
- The Coolest-Ever Star Wars Birthday Party Ideas