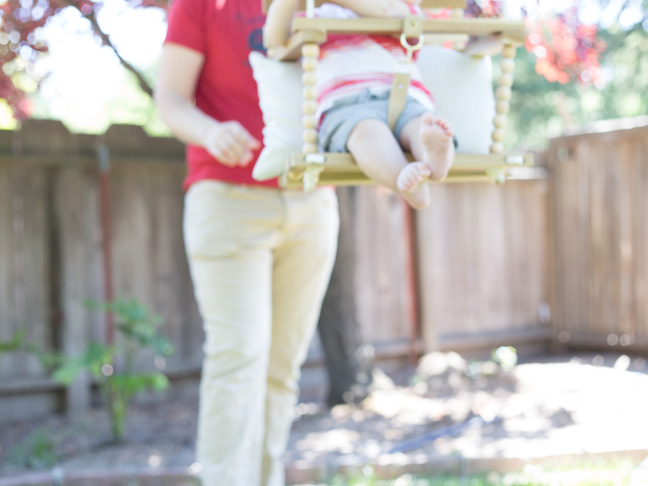

My neighborhood has some killer trees, so I have been dying to make a tree swing ever since we moved in. Since my baby boy is still only a few months old, I decided to make a child’s swing that he would fit in for a while. He needs a pillow behind him to swing in it now, but it turned out amazing, and I can’t wait to swing him in it all summer long. Here’s how I did it so you can make one of your own.
Disclaimer: Momtastic and TotallyHer, LLC hold no liability if you create a child’s swing according to these instructions. It is up to you to make sure your knots are tied correctly and your swing is hung properly. Only you can be responsible for your child’s safety, so please be careful and proceed with caution.

Supplies:
- 20 feet of 1-inch x .75-inch wood planks
- 1-inch wooden beads
- 20 feet of ⅜-inch braided nylon rope
- drill
- ⅜-inch drill bit
- leather
- clasp
- grommets
- mallet
- staple gun
- sand paper
- 2 weight rated caribiners
- polyurethane sealer (optional)
- tree swing hanging apparatus of your choosing
Instructions:
Step 1: Start by cutting your wood down to the proper sizes. You will need eleven pieces of wood cut to fifteen inches in length, and two pieces cut to thirteen inches in length. Then, using your sandpaper, sand all the hard edges down to rounded corners.

Step 2: Drill ⅜-inch holes in the wood as illustrated in the above image. In the two shorter pieces of wood, drill a hole on the long edge of the wood one inch from the edge. Drill the same holes on a single long piece of the wood. On the remaining ten fifteen-inch long pieces, drill a hole on the short edge ¾ of an inch from the end. Drill three sets of holes on one piece of wood, each an inch farther in toward the center of the wood plank. Drill two sets of holes on another piece, each an inch farther in toward the center. And on the last piece, turn the wood on its side and drill an additional set of holes on the long edge an inch farther in toward the center.
Step 3: Depending on the wooden beads you can find, you may need to drill their holes to be ⅜ of an inch as well. The best way to accomplish this is to put them in a clamp and then drill the hole. You will need thirty-four beads in total.
Step 4: Cut your rope into two four-foot sections and two six-foot sections. You want a nylon rope that is rated to carry a large amount of weight, and one that won’t unravel when being threaded through these holes. When you cut the rope, wrap the ends in masking tape to hold the outer layer together—you will burn the ends to seal them when the swing is complete.
Step 5: Starting with the plank with three holes in it, string a six-foot length of rope through the holes, leaving about three feet on either end of the plank.

Step 6: Alternate stringing wooden beads and planks on the rope.

Step 7: Before the third planks that act as the back of the swing, add one of the shorter planks to act as the armrest.

Step 8: Continue string planks and beads onto the rope. The second to last plank should be the one with the holes on all four sides, and the last plank should be the one with two sets of holes. Thread the rope through the second hole on the last plank and tie off the end of your rope with a double overhand knot.


Step 9: Repeat the process on the other side of the planks.
Step 10: With your shorter pieces of rope, thread one end through the hole in the second to last plank, and tie a double overhand knot on the bottom of the swing seat.

Step 11: String seven wooden beads, then the armrest plank, and lastly the cross front piece of wood. Repeat on the other side, and your swing should be fully assembled. Attach the top ends of your ropes together by tying them to some carabiners. The height of each will be adjusted later, but this will keep your swing together.

Step 12: Cut your leather into two strips, and prepare your grommets and clasp.

Step 13: Grommet your clasp onto the end of each piece of leather.

Step 14: Attach your leather straps to the front planks of your swing using a staple gun and wrapping them around so they are the proper length. This will keep your little ones from slipping through the front of the swing.


Step 15: Optionally, you can seal your wooden swing with some polyurethane to protect it from the elements and give the wood a fine smooth finish. Once that is done, it is time to hang your swing. Even out the lengths of your rope that the swing is hanging from so that the swing hangs level and even, and attach them to either your carabiners or a metal ring using an anchor bend knot. Then you can hang them from a tree or your ceiling using appropriate hanging equipment. (I found some great tree swing straps online that won’t hurt the tree limb and are super safe.)

That’s it! Now remember to be safe and properly test all of your knots and connections before placing a child in the swing. Be sure to use properly rated weight-bearing products and only use the swing under direct adult supervision. Keep your kiddos safe and have fun!


More DIYs for Outdoors:


