These pillows are probably just about the easiest things you can make even if you have little-to-no sewing skills. Making this simple envelope pillow was actually the first sewing project I ever took on (unless you count those jam shorts I made in middle school…I’m trying to forget that ever happened). Once my first son arrived, it was obvious that my glorious cashmere knit pillows had no place in my house anymore. I couldn’t keep agonizing over keeping all the accessories in the family room spotless. Obviously, turning to this beginning sewing project was the solution—I still switch out my pillows seasonally, and when a pillow or two inevitably gets ruined by my kids, it’s no big deal to wash (or toss) these decorative pillow cases. I actually end up sewing one extra case every time I make these in a specific pattern, so if one pillow gets ruined I have another at the ready and don’t have to lug my sewing machine out again.
This easy tutorial for envelope pillows is the perfect beginner project if you’re looking to learn how to sew. With no zippers or fancy enclosures, it’s perfect if you like to (or are forced to) change out your pillows often.
RELATED: DIY Easy-Sew Infinity Scarf
Supplies:
- favorite fabric (I’d use a cotton for a beginner; it’s easier to work with)
- pillow insert
- scissors
- matching thread
- iron
- sewing machine

Instructions:
You’ll need to cut three pieces of fabric.
Step 1: Measure your pillow. Mine was 13 x 13 inches, so I cut one piece of fabric that was 2 inches longer on each side (15 x 15).
Step 2: Cut two smaller pieces that will eventually form the envelope. You want them the same, height but shorter in width by about 5 inches. So for my 13 x 13 pillow, I cut two 15 x 10 inch pieces of fabric.

Step 3: Lay down the large pieces on the bottom and then layer the two other pieces on top. This is just to get a sense of what your final pillow will look like. Trim any edges so that the four sides of the square are pretty matched up.

Step 4: On each of the smaller envelope pieces you’ll create a nice finished seam on one of the longer sides. With the backside of the fabric facing upwards, fold a 1/2 inch of fabric down and pin it, then iron it flat. Do the same for the other smaller piece of fabric. Remember you’re only creating a finished seam on ONE long side for each piece. Sew along those seams.

Step 5: After the finished seams are done you’ll lay down the larger piece with the right side facing up. Then place one of the smaller pieces on top, right side down. Place the last small piece on top of that right side down.

Step 6: Now pin along all four sides of the pillowcase. The middle flaps are left open to get the pillow insert in and out. Sew 5/8ths of an inch around the perimeter where you’ve pinned.

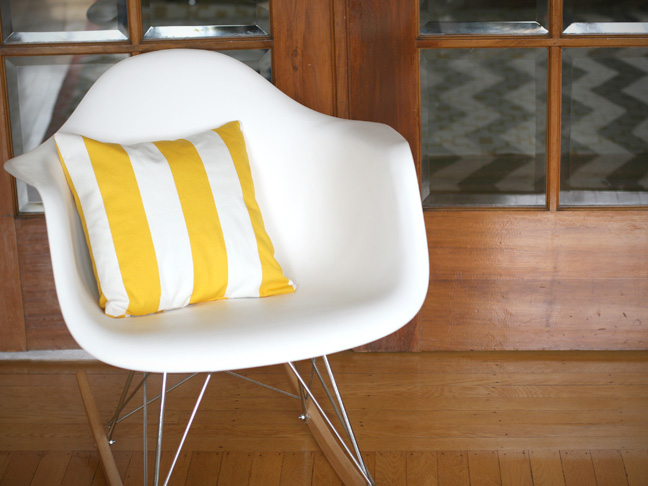
Turn it right side out and it should look like this:

Now you just have to stuff your pillow inside the envelope and you’re done!

More Easy Sewing Projects: