My husband and I are just starting our little family, but I can see a day down the road when we have a couple of kiddos and multiple schedules to keep track of. I imagine we’ll be busier than ever, juggling work and meetings, practices and playdates, and much more. Already doing the juggling act? Try this easy and affordable DIY to stay on top of your family’s comings and goings.
Supplies:
- One piece of white foam core board
- Chalkboard paint
- Foam paintbrush
- Painter’s tape
- Ruler
- Chalk in various colors
- Rope or twine
- Duct tape
- Scissors
- Various decorations — pompoms, tassels, etc.
Instructions:
Step 1: On the foam core board, measure out the size and shape that you’d like the days on your calendar. Cut painter’s tape into strips and use the ruler to be sure the strips are applied in straight lines. Mark off 5 weeks with 7 days each, and a large rectangle at the top for the name of the month.

Step 2: Apply chalkboard paint using the foam brush. Fill in all of the untaped areas with a thin coat of the paint and allow it to fully dry. Once dry, apply another coat, creating brush strokes that are perpendicular to your first coat in order to get a thorough cover.

Step 3: Carefully remove the painter’s tape from the board.

Step 4: Allow the chalkboard paint to fully dry and cure. Cut a length of twine or rope, knot the ends, and secure the rope to the top-back of the board on either side. This will be your hanger.

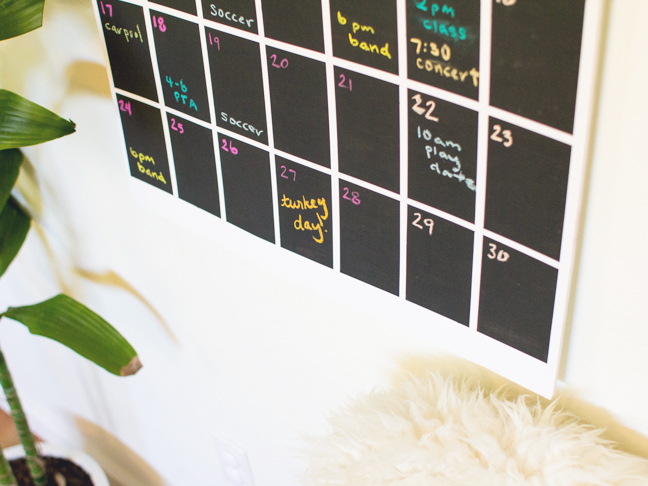
Step 5: Start filling in the dates on your calendar! Find some chalk in fun colors and use monthly color themes if you like. Write the name of the month up at the top of the calendar. You can also make the weekend dates stand out by using a different color than what you use for the weekdays.


Step 5: Assign each member of the family a chalk color. Then, as you are filling in the month’s activities, use each member’s color to jot down his or her schedule. It’ll help you know at a glance which activity belongs to which person.


Step 6: Don’t forget to add some fun decorations to the calendar each month! Pompoms, tassels, and other hanging items will all dress it up a little. Or use seasonal pieces like pinecones during the holidays, paper hearts in February, and more. Be creative and let your family help decide what they’d like to see on the calendar each month. Your schedule never looked so good!