Since the 70’s, we’ve seen children and adults twist, turn and bunch together just about any fabric or garment to make the perfect tie-dye pattern. With more time at home, the art of tie-dying made a roaring comeback in 2020 and is still strong today. Instead of infusing color into the fabric, I tried a new technique (with bleach and ice) to remove color from the fabric. The best part about tie-dye is that you can never really mess up. Each time I tie-dye, a unique design is revealed. This time was no exception – I tie-dyed two sweatshirts, and they turned out completely different. Grab a sweatshirt from your closet, a thrift store, or grab one at local store and let’s start!
Bleach Ice Dye Sweatshirt
Materials Needed:
- Bleach zero splash packets (or Clorox bleach crystals)
- Sweatshirts (90%-100% cotton)
- Ice
- Sink, or container
- Cooling rack
- rubber gloves or disposable gloves
Directions:
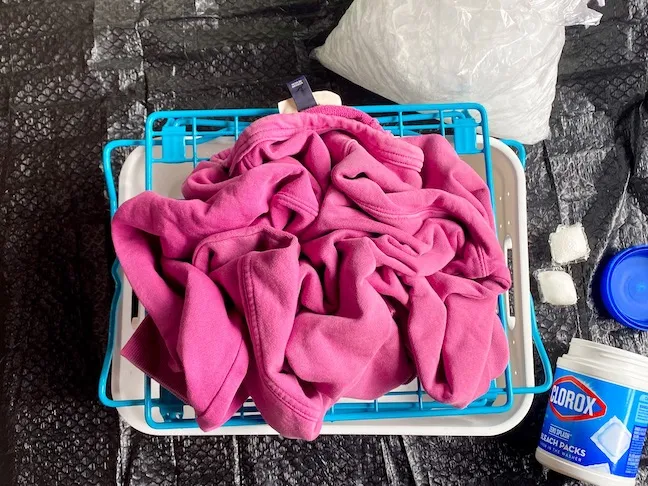
Step 1: Gather materials. Scrunch and twist a sweatshirt together, and place on top of a cooling rack. Make sure you put the cooling rack in the sink or somewhere with ventilation. I used a white container with a rack on top, and put it out on the porch, so there were no fumes inside the house.
Step 2: Cover with ice. Unfortunately at the time I did this project, my ice machine was broken, so I used small ice I bought from the store. But, I do think the larger cubes would work best. Don’t be sparse with the ice. Make sure the sweatshirt is covered.

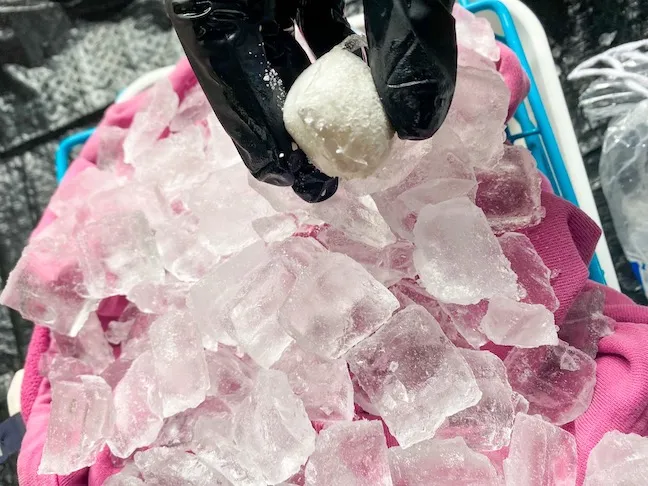
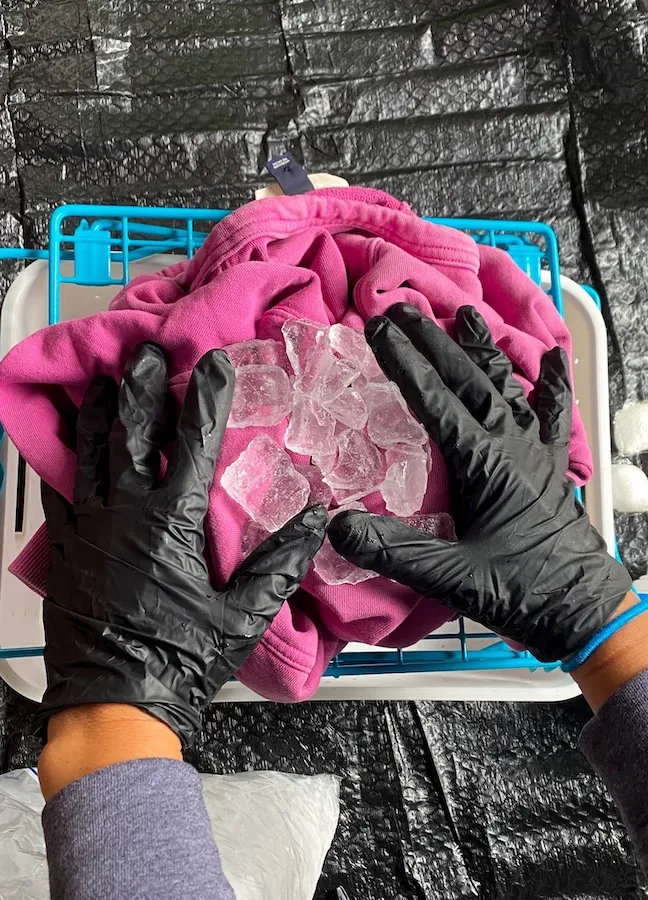
Step 3: Put on the disposable gloves, cut a corner of the bleach packet, and begin to pour the powder over the ice. It’s best to put larger amount in some areas, and then smaller amounts in others. Leave some areas with no bleach crystals.
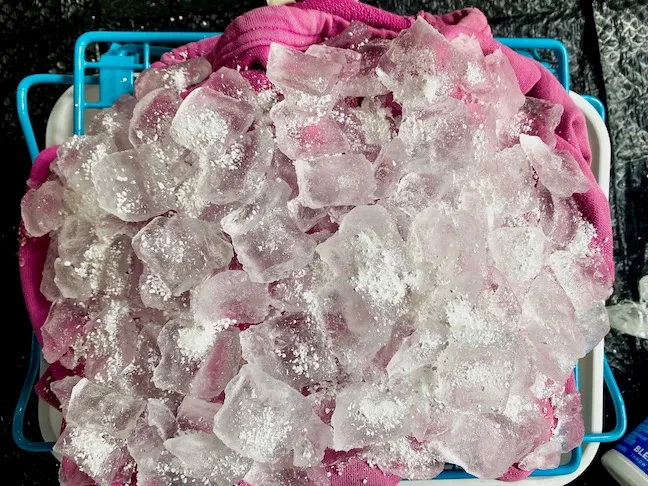
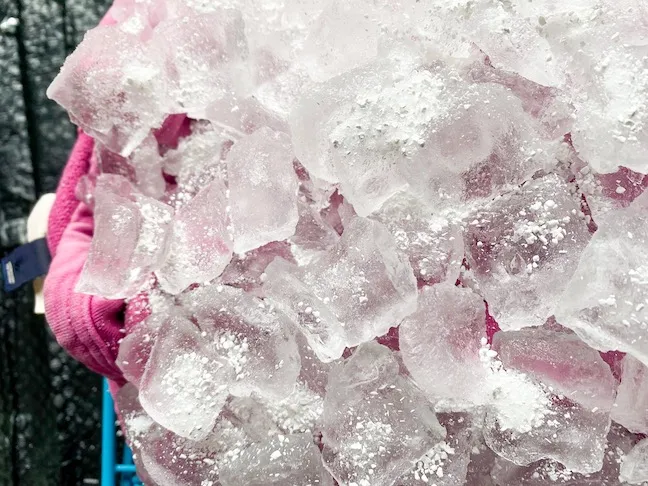
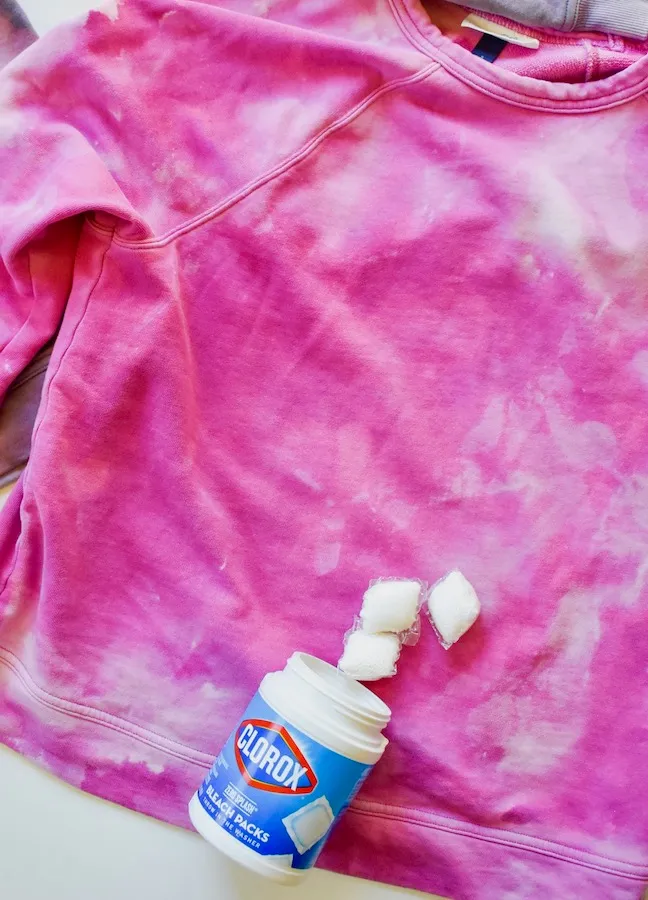
Step 4: As the ice melts, you will eventually see the color change. It’s not immediate. It’s likely that some of the powder won’t completely melt, so just use a spray bottle to spray warm water on the “chunks” to help them melt. Leave the bleach on the sweatshirt for at least 8 hours. I let mine sit for about 12 hours. Once the color is to your liking, rinse out with cold water in the sink. Then, wash the sweatshirt by itself in the washer machine on cold.
Note: For the pink sweatshirt, I had to add ice and bleach packs to the back of the sweatshirt (basically repeating steps 1-4 for the backside). For the faded black sweatshirt, the bleach soaked through and I didn’t have to repeat it on the backside. I also expected totally different colors for the faded black sweatshirt. I thought it would turn more of a tan; instead, I got colors of pink and purple.

This is a really fun project for tweens. Tie-dye is all the rage, so making their own is fun to not only wear, but to make, too!