
Want to dress up your holiday presents with something sweet? Well, how about dyeing your gift tags with oh so saccharine Kool-Aid?! Easy to make, these ombre gift tags even smell lovely after you’ve finished them. Try mixing up different flavors for different color combinations that create even more colors when they begin to bleed into each other. Finish it off by adding an upgraded look with a gold ink rubber stamp design and a soft stripe of gold paint at the bottom.

Supplies:
- paper tags, preferably made of thicker card stock
- individual packs of multiple flavors of Kool-Aid
- water in small glass bowls
- rubber stamp and ink
- gold paint and paintbrush

Instructions:
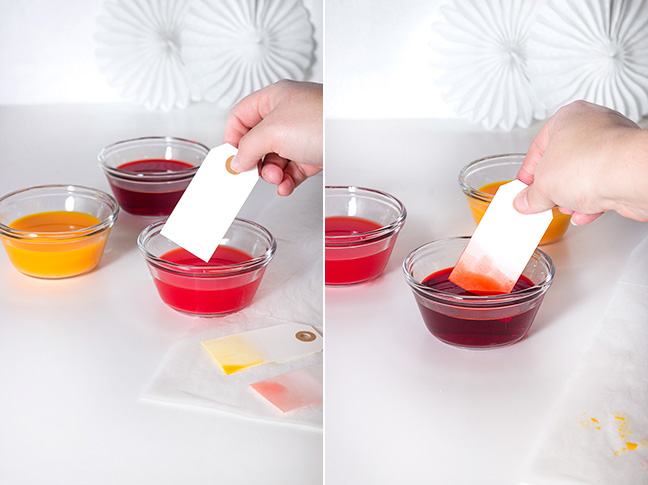
Step 1: Dilute individual packs of Kool-Aid into small bowls of water. Do NOT dilute per instructions—start with about two or three ounces of water and test the color saturation with a spare bit of paper towel if needed. If you want a lighter shade, add small additional amounts of water until you get your desired color.

Step 2: Dip your tag 2/3 of the way into your first desired shade of Kool-Aid, and then set aside to dry. Repeat with the remainder of the tags, switching colors as desired.
Step 3: When the tags are dry, dip them again 1/3 of the way into the next color. Set aside to dry again.

Step 4: When the tags are completely dry, use a rubber stamp (like this gift tag rubber stamp from Splendid Supply Co.) to put a design over the dipped color wash. Set aside to dry.
Step 5: With a dry paintbrush, paint a thin stripe along the bottom edge of the tag. When it’s dry, you’re done!
More DIY Gift Tags: