
A while back, I was invited to the press event when IKEA opened in my hometown of Orlando. I was so excited. Finally, I was going to be able to get my hands on inexpensive yet modern furniture. Years later I still love going to IKEA (especially weekday mornings, when you basically have the place to yourself and you can wander aimlessly in peace and quiet). When I go now, instead of being so excited that Orlando finally got an IKEA, I wander the maze looking for pieces that I can make my own with a couple of simple DIY enhancements.
The simple Lack side table ($7.99) is an IKEA staple. Each year new colors are offered, but the basic white, black, and brown are always available. While I do love plain white furniture, the Lack table poses a couple problems: For one, it’s super recognizable as a cheap, staple IKEA piece of furniture. And beyond that, it seems like everyone has at least one in their house somewhere. I love adding pops of color to furniture, but color trends change WAY too quickly, which is why this IKEA Lack coffee table hack is perfect: You can tailor it to the most on-trend color of the moment, and as soon as your taste or style changes, you can switch the color up quickly with a fresh new coat of paint.
However, I am sometimes fickle when it comes to the colors I want to show off. So I thought I’d enhance the Lack table by adding a touch of color (two colors, actually) that I can switch out whenever I feel the need to change it up a bit.
RELATED: 101 Epic IKEA Hacks for Your Home

Supplies:
- 2 IKEA Lack tables
- white paint
- 2 bottles of your favorite colored paints
- mini paint roller
- Liquid Nails
Instructions:

Step 1: Prime the bottom of both tables white with your mini paint roller. I found that the mini roller is the quickest way to apply the paint over large surfaces like this. Let dry. Apply a second coat.

Step 2: Paint the bottom of one of the tables one of your colors. If you’re feeling feisty, paint a pattern or a design. Let dry.

Step 3: Paint the bottom of your second table your other favorite color. Let dry.

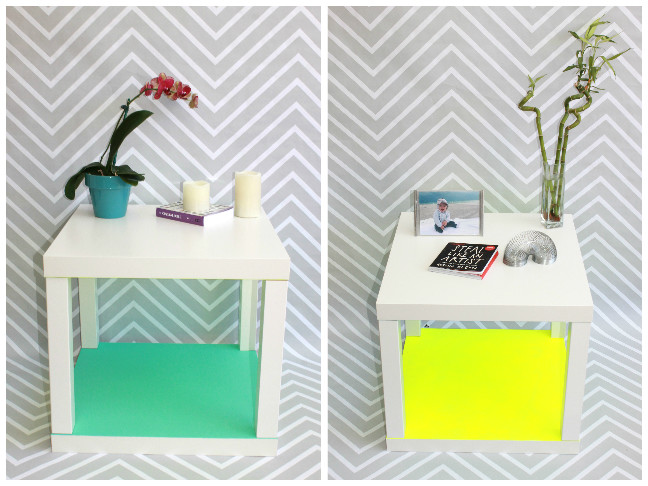
Step 4: Build one of your tables according to the package directions. (You’ll only need one set of legs for this project.)

Step 5: Dab Liquid Nails on the bottom of each leg, then place the second tabletop on top of the legs with the paint facing down. Another option is to keep the painted side up so you can see both accent colors at once. Let dry.
Project complete!


More DIY IKEA Hacks: