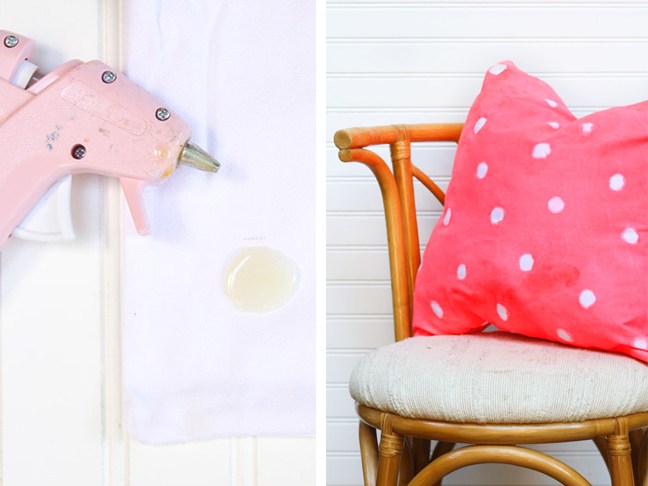


If you’ve ever used wax resist crayons to create patterns on textiles, you know that the technique is pretty addictive. But those special crayons can be difficult to find, so I thought I would try a new resist idea using something I already have in my craft closet: a hot glue gun.
Yep. It turns out, hot glue works like a charm as an easy to use (and inexpensive) way to create cool patterns with textiles, like scarves, blankets, and pillows. Here’s how you can create a patterned pillow using the hot glue resist technique.

Supplies:
- pillow cover, any size (and pillow insert)
- paintbrush
- fabric paint (or watered down craft paint)
- hot glue gun and glue sticks
Instructions:
Step 1: To create a polka dot pattern, like the one shown in the example, create circle shapes with hot glue directly onto the pillow cover, one polka dot at a time. Note: A thin layer of glue will be much easier to remove in a later step, so keep that in mind when creating your circle shapes.

Step 2: Once all of the hot glue polka dots have been created, paint over the entire surface of the pillow cover with fabric paint or watered down craft paint. You can paint directly over the hot glue dots.

Step 3: Once the pillow cover has been completely painted, it will look something like this (below). Wait for the paint to dry completely before moving on to the next step.

Step 4: Now that the paint is dry, remove the glue dot by pulling up an edge of the glue, getting a grip on it, and pulling the glue dot away from the fabric. A white area is left where the glue once was that did not receive any paint. This is how the resist is created.
Repeat this process until all of the glue dots have been removed. Note: If you have trouble removing thicker dots of glue, use a pair of needle nose pliers.

Step 5: Unzip pillow cover, add pillow insert, zip back up, and enjoy.

More DIY Pillow Projects: