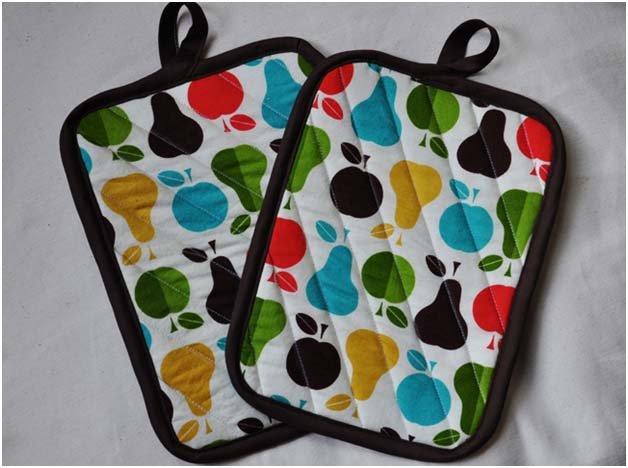
They are a snap to sew up and the fabric combinations are endless.
MATERIALS:

FOR 4 HOT PADS:
- 1/2 yard of top fabric
- 1/2 yard bottom fabric
- 1/2 yard Insulbright
- 2 packages extra wide double fold bias tape
INSTRUCTIONS:

Layer the pieces sandwiched together as they would be sewn. Bottom fabric wrong side up, 2 layers of Insulbright, and top fabric right side up

Cut out your rough piece of 8.5: wide by 11″ long

Draw a diagonal line from the top left to bottom right. I used a water soluble pencil

Pin along the line and sew a line right down the mark

Using your straightedge, draw another line 1″ away from the first line. Sew.

Continue across the whole piece

Now cut the piece down to 7″ wide by 9.5″ long. This is your final size. Make sure to cut straight and that your fabric pattern is straight

Using a spool of thread as your guide, round each corner

Pin your binding at the top of the pad, just to the left of the middle

Sew the biding all the way on the front of the pad. Leave a tail about 5″ long past the meet up point at the top

Now fold the biding up over the edges (trim the corners a bit if needed)

Now, flip it over and pin the trim down. Make sure to use alot of pins so you can catch the fabric while sewing in the next step

Flip the pad over and sew from the top right where the bias tape meets the end piece. Keep your sewing line as close to the edge of the biding as possible, making sure you are catching the fabric underneath

Once you sew all the way around and meet up at the top again, just follow the bias tape upkeeping it pulled straight. Sew all the way down the 5″ tail that you kept, to close it up.

Adjsut the size of the tail to your liking for the loop. Loop the fabric to the back and sew down. Voila! Completed hot pads in the colors of your choice.

One gift down! How many more to go?