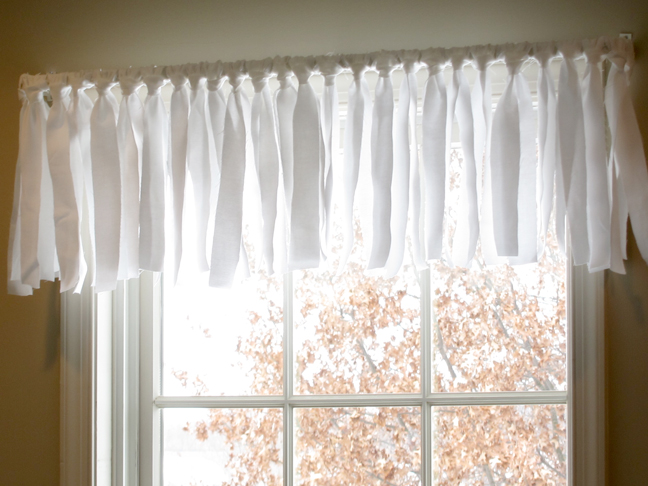
I recently visited my local Pottery Barn and came across a window treatment that I loved, but was a bit too costly for my budget. When I looked closer, I thought it would be so easy a no sew window valance myself at a fraction of the cost.
I already had white drapery panels on my window at home and just needed to add some interest to the top. I chose to use cotton duck to make my version, but you could use any fabric, felt, ribbons, or even an old pair of jeans to create this one of a kind treatment for a window. For less fraying of the fabric, choose a fabric with a tight weave. The inset photo (below) was my inspiration: Pottery Barn’s Textured Fat Tie Drape.

Inset photo: Pottery Barn
After I made the white valance above, I started playing with adding some color to the valance and cut strips from a printed yard of green fabric I had. When I added those strips to the all white valance it totally changed the look and added more interest and playfulness. It would be an inexpensive way to decorate a nursery or child’s room.

Supplies:
- 1 yard of white cotton duck fabric (If your window is wider than 38” you will need more fabric)
- 1 yard printed cotton duck fabric (optional – if you want the color mixed in with the white fabric strip version)
- Curtain Rod and hardware
- Ruler or Yardstick
- Scissors
Instructions:

Step 1: Cut 25” x 1 ½” strips from fabric. You can make the strips as long or short as you like depending on the size of your window.

Step 2: Lay curtain rod on work surface and extend to width of window. Begin tying fabric strips onto the rod following the steps below.
Step 2a: Fold a strip in half and place loop end on bottom of rod, lift rod so strip is under the rod and ends are at top as shown.
Step 2b: Lift loop end with one hand and thread the two ends of the strip through the loop with your other hand.

Step 3: Straighten fabric so right side of fabric is facing out, if needed use your fingers to adjust.
Step 4: Pull ends to tighten knot on rod.

For the color version: I started with a white strip and then added the green print and continued to fill the rod in this manner for more visual interest.
Step 5: Install curtain rod brackets on window. Place covered rod into the brackets over pre-hung drapery panels or by itself as a simple topper on a window. Fluff and arrange as needed with your fingers.
More Easy No-Sew Home Projects:
DIY No-Sew Curtains: Step By Step