With ticket prices averaging over $8 a ticket (the highest ever!), plus the added cost of popcorn, drinks, and babysitting, going out to see the latest blockbuster becomes pretty costly.There is always the option of downloading a flick off Netflix or Apple TV but … somehow slumping on the sofa doesn’t quite capture the magic of the cinematic experience.
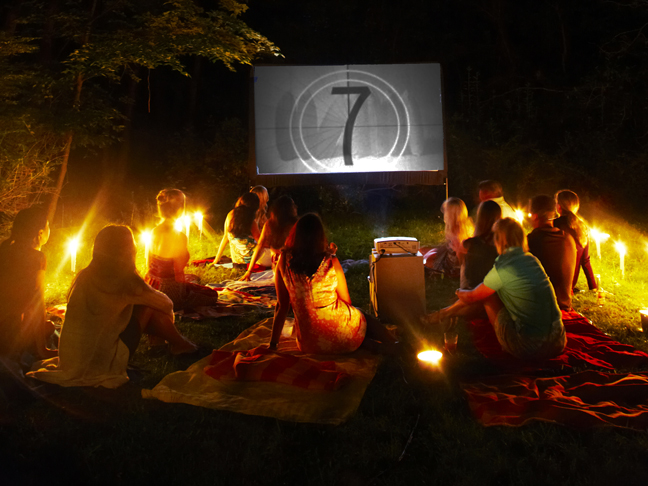
If you’re looking for the big-screen buzz without the expense or hassle, a backyard movie theater is just the ticket. Gather with friends and family—snuggle under the stars—and enjoy a true movie experience in the great outdoors.
As wonderful as outdoor home movies may sound, putting together the perfect viewing scenario is a bit more complex, so we’ve broken it down into the basics: essential tech gear, step-by-step instructions, and even a few DIY projects to make it as easy as possible.
Step 1: The Supplies
Here’s what you’ll need . . .
If you’re using a DVD Player:
- Screen
- Digital Projector
- DVD or Blu-Ray Player
- Computer Speakers with Subwoofer or Amplifier with Speakers
- Appropriate cables (1 video adapter + 1 RCA cable) to connect your DVD source to the projector and audio. Your local electronics shop can easily help you find the right cables if you’re confused.
- Extension Cord
- Power Strip
If you’re using a Laptop:
- Screen
- Digital Projector
- Laptop
- Computer Speakers with Subwoofer or Amplifier with Speakers
- Appropriate adapter cables: VGA, DVI, or HDMI video cable (+ adapters for Macs) along with Mini Stereo or Mini-Stereo-to-RCA cable for audio
- Extension Cord
- Power Strip
Step 2: The Location
There are three considerations when deciding where to set up. First, you need a wall or place to hang a large screen (like the side of the garage or between two large trees). Second, you need a decent-sized flat area to seat the audience. Third, you need an area with easy access to electrical outlets. Additionally, you should steer away from street lamps or other lights that may interfere with viewing.
Step 3: The Power
Aside from easy access to outlets, you should invest in an extra-long heavy-duty extension cord and a surge protector. In addition to powering a projector, you need to power a video player or laptop and speakers – a surge protector will protect the setup from power spikes.
Step 4: The Screen
This can be the trickiest component of all since a flimsy or wobbly screen renders your movie unwatchable. You have three options that vary widely in terms of cost from under $100 to over $4000. You must also consider aspect ratio (the width-to-height size). ProjectorCentral.com offers a rundown of aspect ratios, resolution, luminosity and other tech standards—for beginners or the tech-challenged—it is worth browsing.
Boiling it down to basics, here is what you need to know: 16:9 is the most common ratio and the choice for viewing all HDTV. However, many movies are in 2.35:1 and if viewed on a 16:9 screen, there will be black bars at the top and bottom (fine for many people, but a distraction for purists). Once you have sorted out the tech specs, there are three screen options:
Option 1: Ready-made screens range from less-expensive, stand-alone versions, like those from Camp Chef (several hundred dollars) and Elite, to top-of-the-line retractable models like Oasis from Stewart which run in the thousands. For families on a budget, this isn’t a feasible option. Which leads us to . . .
Option 2: An inflatable screen. Fairly inexpensive ones can be found online at Amazon, Target and elsewhere from $190 and up. Fans of this design like the ease (inflates in just a few minutes) and convenience (folds up into a tidy package that can be easily stowed). There are drawbacks, however. Inflatable screens must be staked to the ground or they will tip and lean at the slightest breeze—this renders them unusable on pavement or driveways. They also require electricity to inflate and the fans stay on during the movie so there is a mild noise factor to deal with. For those who find that a nuisance and want an even more streamlined alternative, you can actually make your own screen . . .
Option 3: A DIY screen. There are dozens of DIY screen projects floating around the Internet (wood, PVC, sheets, mirrors), but be cautious before you dive into one. If the screen is not large, taut, or opaque enough, the movie image will fall flat or be difficult for viewers to see. Pottery Barn has a terrific tutorial on creating a screen by stitching together a pair of crisp, white king-sized bed sheets. Blackout fabric can also be used – it is coated with vinyl on one side and you project onto the vinyl (a 10-foot wide, 16:9 screen costs a mere $20 – $30 so it’s cost-effective as well). If you are more comfortable with a video demonstration, check out Howcast’s detailed tutorial using PVC pipe.
Step 5: The Projection
In order to project your movie, you need to connect a laptop or DVD player to a digital projector. There are three keys to choosing the right projector: Resolution, Brightness, and Cost.
• Resolution: The bigger the screen, the higher the resolution needed to get a quality picture. The all-around best choice is a High Definition Projector with a resolution of 720p or 1080p. Panasonic and Epson make solid, affordable versions.
• Brightness: Look for a brightness rating of 2,000 lumens or more. Experts say this is as important as resolution since problems with brightness can render the movie image faded and unwatchable.
• Cost: The projector is generally the priciest part of a home theater. A 720p projector is the choice for those on a budget since it delivers quality hi-def images for under $1000 (and as low as around $200). For those who want the sharpest and most detailed picture possible, 1080p projectors are the pick, and they rise quickly into the $1000 – $4000 range.
• Extras: Consider a projector with a built-in DVD player or iPod dock for all-in-one convenience. Look for one with an HDMI input for easy connections. A projector with ‘lens shift’ allows you to adjust the picture without moving the projector, which can handy.
Step 6: The Audio
Good audio is as essential to the movie experience as good picture. It’s all about volume—and keep in mind that without walls to bounce the sound you will need more volume outside than you do indoors. If you want something practical and easy to set up, go with a pair of basic computer speakers. They are easily moved, easily powered and often have a built-in subwoofer (for richer bass sound). Computer speakers are the most versatile and affordable option – and for most people they do the trick.
If outdoor viewing is something you’re serious about, consider purchasing outdoor speakers. We love the faux-rock speakers that blend in with your landscaping and are tailor-made for frequent outdoor entertainers—they look great and rate well with consumers, plus you can snag a pair for less than $100. For more speaker inspiration, check out this feature from Apartment Therapy, a good resource for design-savvy tech solutions.
Step 7: The Seating
Hit up Pinterest for ideas on how to create seating out of everything from hay bales to wood pallets and plywood. Of course, there’s always the old standby of blankets and pillows or comfy lounge chairs which do the trick just as well!
Step 8: The Snacks
Again, Pinterest is the place to go shopping for ideas. Search on “backyard movie night” and you’ll come up with a wonderful array of party ideas for munchies, snack stands, and more.
Now, you’re ready to plug in and play your favorites, whether your film picks include Jaws and James Bond, or Monsters Inc. and Madagascar, you can pull off the perfect movie night right in your own backyard!
image: Dan Hallman / Getty