
Holidays are a busy time (I mean, an even BUSIER time) for us mamas. With the cooking and cleaning and prepping for family and friends to arrive, there is hardly time to even shower. Most of us will still be scrambling around the house in a panic and greeting guests with uncooked food in our hair by the time everyone arrives.
If you’re hosting for the holidays this year, there's no need to look like you just spent the entire day running around. With this 10 minute holiday makeup tutorial, a few simple steps will have you looking (and feeling) super glam.
What I used:
- Moisturizer: Clinique Dramatically Different Moisturizing Lotion
- Liquid foundation brush: MAC 130 Short Duo Fibre brush
- Eyeshadow brush: MAC 217 blending brush
- Primer brush: MAC 239 eye shader brush
- Liquid foundation
- Cover up: Revlon Photoready Concealer Stick
- Powder foundation
- Blush
- Primer: MAC Pro Longwaear Paint Pot in Painterly
- Light champagne eyeshadow: Sephora Collection MicroSmooth Baked Eyeshadow Trio in 01 Natural Light
- Medium eyeshadow: MAC Eye Shadow in “soft brown”
- Liquid eyeliner: Revlon Colorstay Liquid Liner in “Blackest Black”
- Mascara
- Red lipstick
- Red lipliner
Step 1: Coverage

Start off with a clean, well moisturized face so your skin is prepped, then use your favorite liquid foundation and apply it with a brush like the MAC 130 Short Duo Fibre brush for a lighter, more natural appearance. Place your foundation on the brush and massage into your skin in a quick, circular motion. The quicker the stroke, the fewer streaks will appear on your face.
 Next, cover up those dark circles with the Revlon Photoready concealer stick. I love this stuff because it lasts a long time, and has great coverage of unwanted blemishes. It's also good for contouring the face. Put the product in a triangular shape underneath the eyes and pat the concealer from bottom lash line to upper cheekbone, extending the triangle for a highlighting effect. This will give the illusion that your cheekbones are more prominent.
Finally, lightly brush on the powder foundation and blush of your choice for a flawless look.
Step 2: Prep and Prime the eyes
 Using the MAC 249 brush and MAC Painterly Paint Pot, apply the primer from your lid to brow bone. This will help keep your colors in place, and keep you looking fresh and vibrant all day long.
Step 3: Eye shadow application
 Using a light champagne eyeshadow, take the lighter color and cover the entire eye from lid to brown bone, as well as the inner corner of your eye to help to brighten it up.
Next take a light brown eyeshadow like MAC "Soft Brown” and a using a big fluffy brush, apply it gently into the crease. This is a great transition color, so your colors will look well blended.
 After you have evenly applied the light brown into your crease you are going to use a darker brown generously. Finally, using the MAC 217 brush and the same dark brown eyeshadow you used previously, apply the color from the outer lid to crease in a circular motion. Although we just applied it in the step above, this step ensures your colors are well blended. This is my favorite eye shadow brush because it blends out all harsh lines so effortlessly; it’ll have your shadow looking like a professional did it.
Step 4: Eyeliner
 To really make your eyes appear larger (and have you looking more awake), apply your favorite liquid eyeliner on the top lash line. I prefer Revlon’s Colorstay Liquid Liner in “blackest black” because the tip is solid and pointy, making it easier to control the line. Some liners have flimsier brushes that are hard to control.
Step 5: Mascara
 To finish your eyes off, use the best mascara you've got to open those eyes up and give you the final punch you need to complete this look!
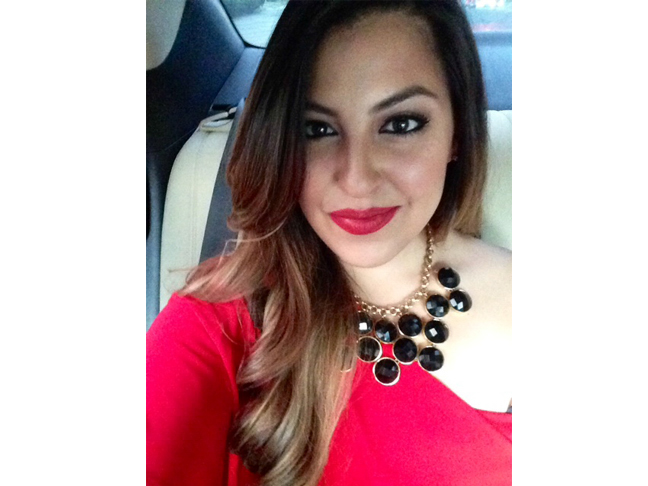
Step 6: Lips
Since the eyes are neutral and it's the holidays, a sexy red lipstick will make you go from drab to fab in seconds.
Apply your desired red lipstick, and don’t forget the lip liner—this is a must! Lipliner will give your lips a cleaner look (and not to mention, have them looking more scrumptious!).
That's it! These 6 simple steps will give you a 10-minute look that appeared to take much longer. Go forth and entertain, supermom!