
While I love the summer, I for one am pretty pumped to trade in my iced tea for something hot and pumpkin-flavored! Feeling the same way? There’s something about the season of boots and scarves, falling leaves and hot coffee, that’s extra magical. So I thought an easy DIY to celebrate it all was totally in order.
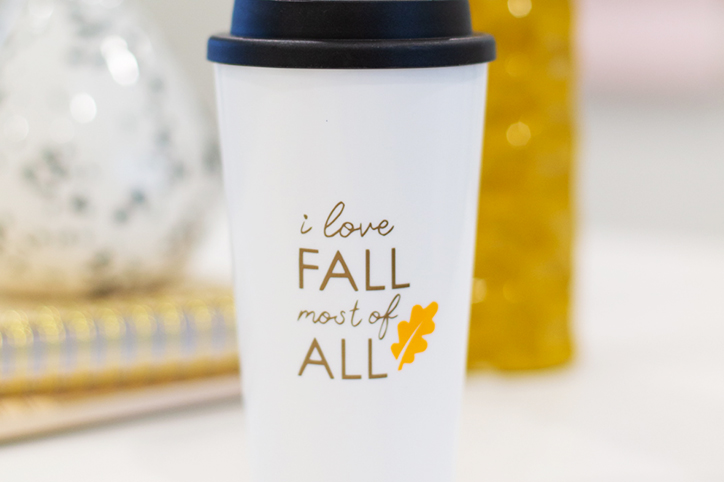
This easy and fun vinyl DIY is the perfect way to customize your travel coffee (or tea!) mug for the autumn season. The Cricut machine is such a versatile tool, and it’s used here to create an intricate font that looks clean, pretty, and totally professional! In fact, you’ll probably have to pinky swear to people that you made it yourself and didn’t buy your mug from the store, it looks so good. Check out the easy tutorial and grab our free design files to download and create your own.
Customize Your Travel Coffee Mug with Vinyl:

Supplies:
- plain travel coffee mug
- adhesive vinyl in various fall colors
- Cricut machine
- cutting mat
- vinyl transfer tape
- Design file: I Love Fall Most of All
- Design file: Fall Leaf

Instructions:
Step 1: Start by downloading our free design files: I Love Fall Most of All and the Fall Leaf.
Step 2: Open Cricut Design Space on your computer and upload the design files. Start with the text file. You’ll need to deselect all of the negative space, and choose “Cut Only File” to tell the Cricut machine to cut the text properly.

Step 3: Insert the file into the design space and resize it to the right size for your particular travel mug. Ours here is about 2 1/2″ tall and 1 1/2″ wide. Each cup might be a little different. Set your Cricut machine to the vinyl setting, and mount your chosen color of vinyl onto the cutting mat. Insert the mat in the machine and cut.

Step 4: Once the words are completely cut out, remove the mat from the machine and peel the vinyl with the backing off of the mat. Then weed away the extra vinyl until just the words remain.

Step 5: Cut a small piece of vinyl transfer tape and place it over the vinyl words. Burnish the tape firmly so that the vinyl adheres to the transfer tape. Carefully peel the tape away from the backing, making sure that the vinyl words adhere to the transfer tape.

Step 6: Place the transfer tape onto your travel mug and again burnish the letters so that they adhere to the mug. Gently peel away the transfer tape and you should have your lettering transferred onto the mug.

Step 7: Repeat this whole process with the Fall Leaf file, inserting it into Cricut Design Space, cutting it out of another color of vinyl, and applying it to your travel mug.

Step 8: Fill your cup with something delicious and celebrate the coming of fall!


