Moms and teens can never have enough tote bags. Maybe they hold different things (groceries and Kleenex for Mom, a treasure trove of makeup and retro sneakers for teens), but the end goal is the same: To carry as much junk as possible in the cutest accessory possible.
See, the tote is the perfect go-to bag because it can travel with you to Target, the beach, or to the playground, and is still stylish enough to pinch-hit for your purse. Plain canvas totes are pretty inexpensive, so you can customize them however you want.
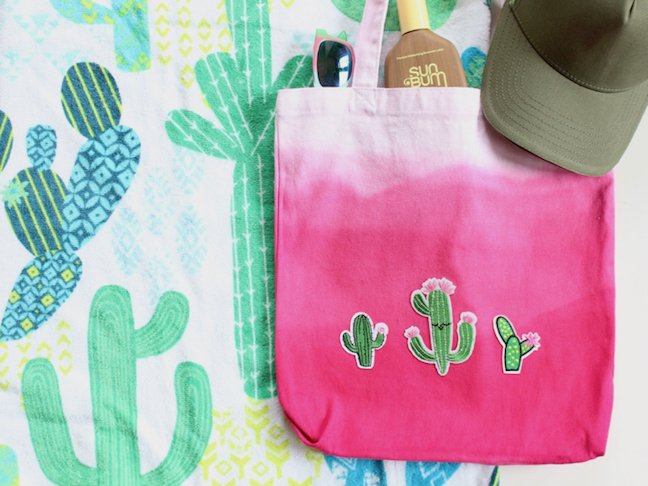
Now, I happen to be obsessed with cacti lately, so that’s where I went with my latest DIY tote concept. I played around with some dip-dying and iron patches for this easy project, and I was thrilled with the result.
If you’re mad about cacti like I am and want to update your accessory wardrobe with a brightly colored tote, this no-sew, no-fuss DIY project is tote-ally for you. Trust me, it’ll make you look sharp.
Materials:
- RIT dye, fuscia
- ½ – 1 cup salt
- Water
- Bucket
- Disposable gloves
- Stir stick
- Canvas tote, white
- Cactus iron-on patches, found here
- Iron
Directions:


Step 1: Put on the disposable gloves and dip-dye the white tote the color of your choice. I made my tote an ombré pink. To do this, follow the instructions on your RIT dye bottle to get the water and dye bath right. I added about three gallons of water and half a cup of salt into a large Home Depot bucket and used an old ruler for the stir stick. For an ombré look, dip about three-quarters of the bag into the water. Every few minutes, lift the bag about an inch or two higher, so each lower section of the bag is in the dye bath for a longer period of time (thus a deeper color than the top layers). I held the bag from the handles with my hands for the first couple layers, then hung it on the sink faucet for the last layer (to give my hand a break). If you can find an area in the garage, or another space, you can use a clamp to hold the bag up, and adjust the clamp for each layer. Each layer will be in the dye for a couple minutes. However, the last layer (the bottom) can sit in the dye longer. You can alway pull the bag out of the dip dye bath to check the color.

Step 2: Once the bag is dyed to your liking, rinse it in cold water until the water is clear (no dye). Then, follow the RIT dye instructions for washing the bag before use.


Step 3: Iron the patches on the bag. To do this, place the iron-on patches where you want them on the bag, cover them with a thin sheet, and then press down with an iron for 20 seconds. Once you iron them on, pull the bag inside out, and iron them on the backside for 15 seconds each.


Step 4: Pack your bag and head to the market, pool, library or store! My blank tote didn’t have pockets, but how cute would it look to embroider them, too? Maybe next time!