
Have you ever heard of raised salt painting? I came across it recently on Pinterest and I was immediately intrigued. As you can tell from the name, this kid’s craft project is more salty than it is sweet, but that’s only because salt is a main ingredient. Its sweetness stems from the fun moments shared with children, as well as the happy art it creates. I’m a big fan of projects that can be appreciated by all ages because it means none of my kids are excluded when we do this at home. There’s also an educational element to raised salt painting which is a big win in my house. And while this can get slightly messy, you aren’t limited to creating masterpieces outside because raised salt painting can be done indoors or outdoors.
Most of the materials for this Raised Salt Painting Craft can be found in the kitchen and art drawer, which means it is at the very least, worth a try. After attempting it just once, your kids (and maybe even you) will be hooked. It’s a favorite around our house, that’s for sure!
Supplies:
- Table salt
- Elmer’s Glue
- Cardstock
- Liquid watercolors (or food coloring mixed with water)
- Dropper or paintbrushes
- Pyrex (or a large container to catch the excess salt)
Instructions:

Step 1: Gather all of the materials.


Step 2: Print or sketch a design on cardstock paper. You can free-hand sketches like we did, or leave it blank and sketch directly with the glue. This can be a great educational craft for young children just learning to spell their names, or learning about shapes and colors. Trace the design or create a design with glue.


Step 3: Cover the entire glue design with salt. For this part, set the paper in the Pyrex as you sprinkle the salt to prevent a giant mess. Wipe and gently shake away the excess salt (similar to a glitter project).


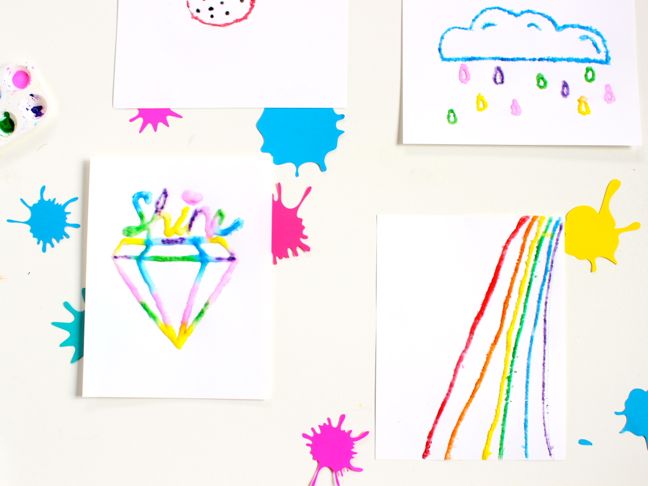
Step 4: Apply the watercolors onto the salt design with a dropper or a paintbrush. This is the best part because the way the color spreads along the salt and glue is mesmerizing. Continue until the entire design is full of vibrant color. You will notice the art is raised off the paper, which is good!


Step 5: Create, create, and create some more.