
It still feels a lot like winter in Minnesota. The kids frolicked in a fresh blanket of snow before school, while my husband pulled out the snowblower to clean off the driveway before work. It’s 20 degrees, and my feet are perpetually freezing these days. While I pop my vitamin D tablets and daydream about lazy days on the lake this summer, I’m getting desperate to see some actual greenery.
So, the kids and I decided to bring a little green goodness into our home with DIY mason jar terrariums. I found a couple of old mason jars in the basement and grabbed a few other supplies so we could makes these kid-friendly, super affordable terrariums on our snow day. If you’re expecting a picture-perfect mason jar terrarium that looks like it came out of a catalog, this isn’t the tutorial for you. This DIY mason jar terrarium how-to is so simple that a child could do it. My girls got their hands dirty, their minds racing, and their creative juice flowing as they designed mini living quarters for their little toy friends.


Supplies:
-
- mason jars
- white sand
- colorful pebbles
- large stones
- reindeer or sphagnum moss
- activated charcoal (for closed terrariums)
- potting soil
- small plants
- ornaments (optional)

Instructions:
Step 1: Pour about 1″ of white sand onto the bottom of a clean, dry mason jar. Gently pat to level the sand.
Step 2: Add a layer of large stones on top of the sand. Arrange them in a flat, single layer. (Yes, little hands are especially good for reaching inside a mason jar!)
Step 3: Add a layer of small pebbles to fill in the gaps between the large stones. Pat pebbles to level out the layer.
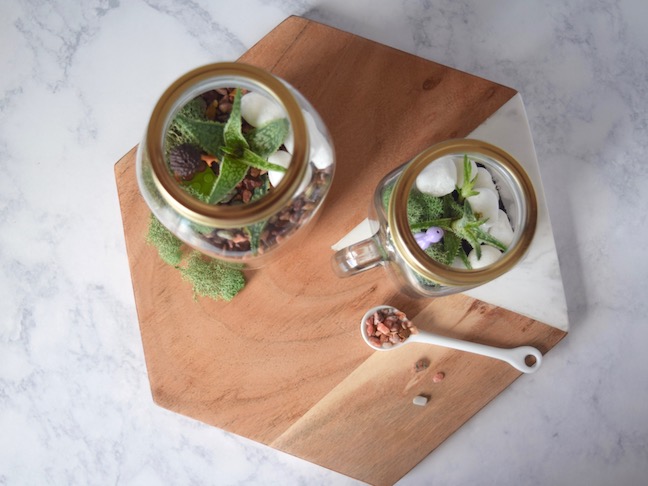
Step 4 (optional): If you are using plants that enjoy humidity, like ferns, you will want to tightly seal your mason jar after it’s assembled. To control the moisture levels and fight mold growth, add a layer of activated charcoal. DO NOT add this step for desert-hardy plants, like succulents and cacti. In our jars, we planted succulents. We added the gold rim of the lid to the jar, but left the lid insert off so that air could circulate in our jar and dry out the soil, which succulents love. (see pic 4)
Step 5: Add a layer of moss to keep the next layer (soil) from seeping down to the bottom of the jar. Pat moss into place.
Step 6: Add about 2″ of potting soil to the jar. Gently arrange the plants into the soil, and pat soil around the roots.
Step 7: Add a few more small pebbles, clumps of moss, and other ornaments (small toys, shells, or figurines) to design a unique look for your garden.