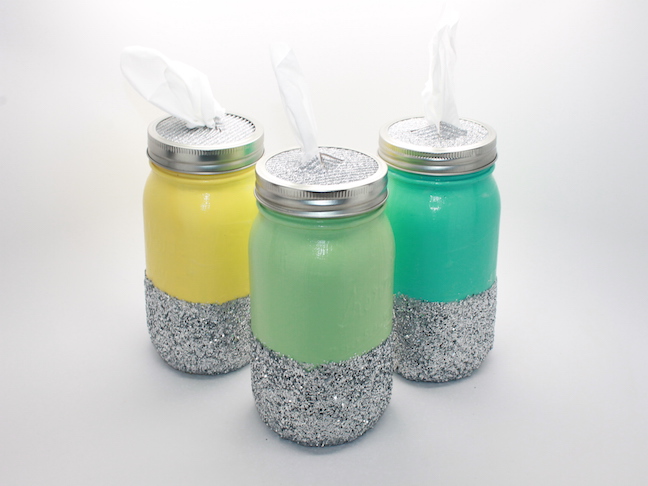

Tissue boxes are trying to become hip with fun and bold patterns, but to find one that truly matches your decor is sometimes hard, and they often end up sticking out like a sore thumb. Instead of buying one that’s sort of close to your color and design scheme, make one that you can reuse again and again that adds a fun touch to your bedside table, bathroom, office—or wherever you need a tissue.
These DIY mason jar tissue holders are sure to make you feel better when you’re feeling under the weather.
Supplies:
- 1 quart mason jar
- Craft paint
- Paintbrush
- Mod Podge
- Foam brush
- Glitter
- Craft knife
- Thick card stock
- Washi or painter’s tape
- Tissues (I prefer Kleenex Perfect Fit because it’s already in a cylinder shape.)
- Scissors
- Pencil
Instructions:

Step 1: Paint the outside of your mason jar with your craft paint.

Step 2: Trace the top of the mason jar on the back of the thick card stock. Cut out the circles.

Step 3: Cut an “x” into your thick card stock with your craft knife.

Step 4: Wrap washi tape around your jar. Spread Mod Podge onto your jar and then pour glitter all over it. Once dry, shake off excess glitter.

Step 5: Once dry, remove the washi tape.

Step 6: Place your tissues in the mason jar.

Step 7: Put the top back on the mason jar and pull the tissue through the paper.
Project complete!

More DIY Crafts for Home: