 Children always receive a certain joy out of seeing their names displayed, especially in their own room. It personalizes it for them and makes them feel at home.
It’s also a great way to let your child claim their own territory, especially if they share their room with a sibling. You can display them above a headboard or over a designated wall hook for their coat and backpack, or even just on their dresser. Letting you child choose the fabric is a great way to get them involved in the creative process, and a great excuse to run to the fabric store with them.
Let’s get started…

Materials:
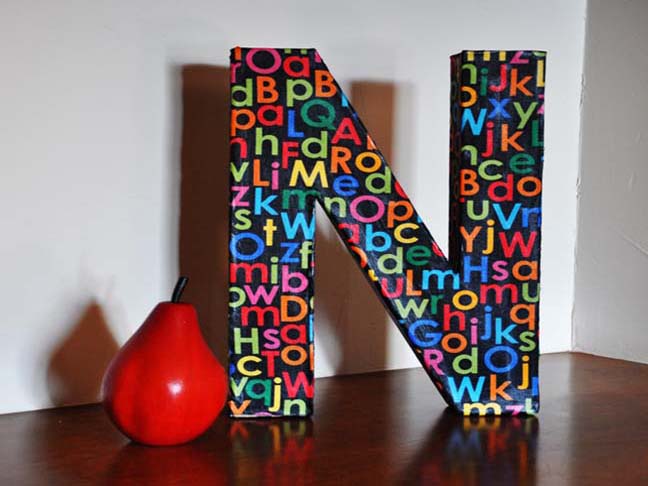
Paper Mache letter(s)
1/3 yard fabric
Mod Podge
Foam Paint Brush
Scissors
Instructions:

1. Begin by measuring all of the outside edges to calculate how much fabric for the perimeter of the letter. For mine I measured 62 inches and then I added 6 inches to be safe. I cut the perimeter fabric at 2” width. You will need to cut at least 2 strips for the perimeter since most fabric widths are 45”.
2. Take your letter and place it BACKWARDS on the fabric, making sure that the orientation of the fabric is correct. Trace the letter with a sharpie

3. Cut out the traced letter

4. Here are all your pieces so far. Strips of 2” fabric, fabric initial and paper letter

5. Pour about 4 oz. of Mod Podge into a container and start brushing it on to one of the sides of the letter. Make sure to get enough coverage of the mod podge before you apply the fabric.

6. Place the fabric directly onto the mod podged letter and smooth it down. Your fabric width is at 2” and will be a little long. You want to overlap it to the BACK of the letter. 
7. After the perimeter is complete, cover the entire front side with mod podge and carefully situate the fabric letter on top and smooth out.

8. Turn letter over and clip any corners that need it so the fabric will lay flat.

9. Apply mod podge to the edges of the backside of the letter and smooth the fabric down to stay.

10. Turn letter over to the front and apply a healthy coat of mod podge to the entire letter covering the face and the perimeter. Allow to dry overnight. 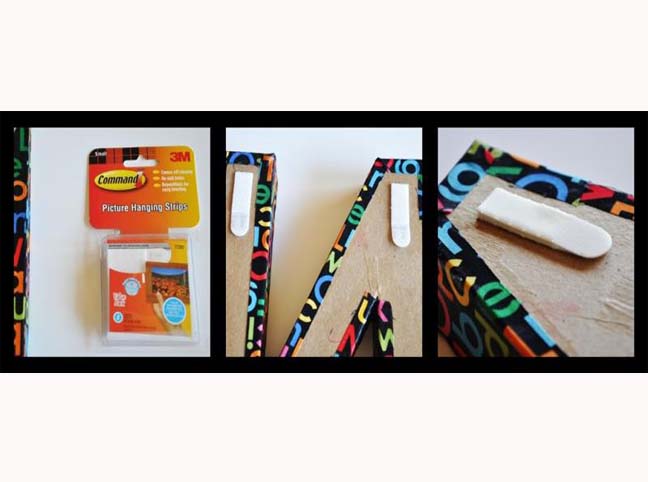 11. Because they are so light, I always use 3M brand to secure to the wall. They are easy to use and removable.

12. Hang and enjoy!


