This time of year I always get the urge to buy school supplies. When I was growing up I loved getting new pencils, notebooks, and folders along with some new shoes and clothes to start the new school year off right. Since I have no need to buy school supplies anymore I came up with a project that would have me needing to take a stroll down the school supply aisle to buy some very elementary school supplies – crayons.
I recently saw a very avant garde canvas where the artist melted crayons to create art. I thought it was so unique and wanted to try it out. Creating this piece of art is a little bit like when you made Spin Art as a kid – you don’t know how it is going to turn out. You just have to keep your fingers crossed and hope you like what reveals itself. The only sure thing is the colors you choose.
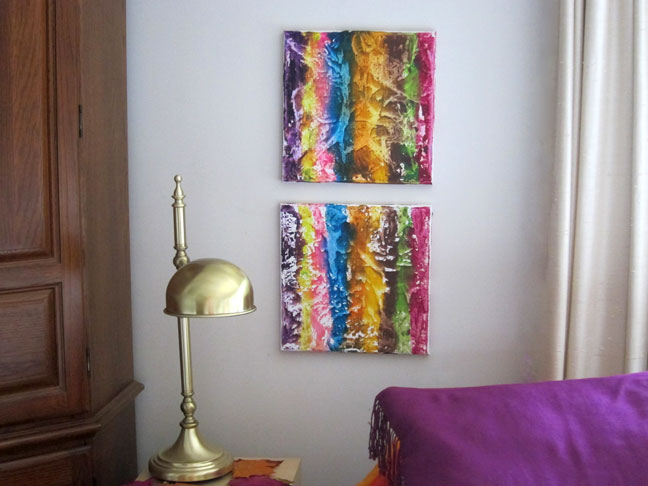
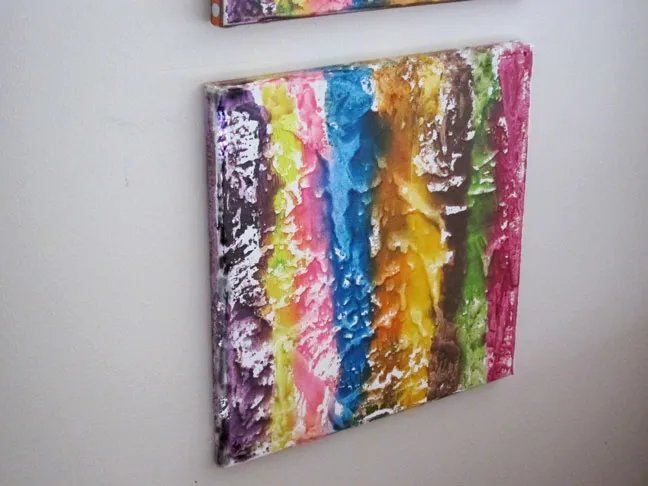
This is what I ended up with. I am calling it Autumn Leaves as it looks like I pressed leaves into the wax to create the design, but I didn’t just wax paper and an iron over grated crayons.
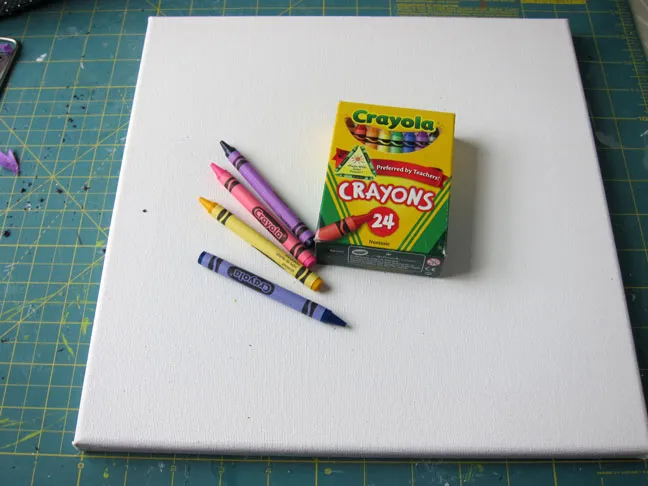
Supplies Needed:
- Stretched Canvas
- Crayons
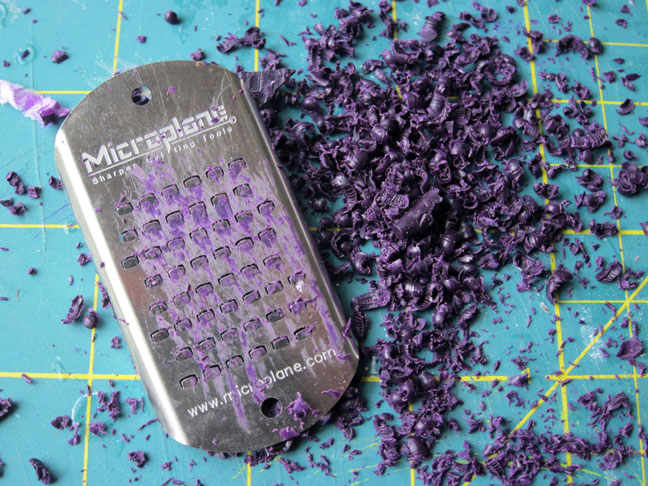
- Cheese Grater
- Wax Paper
- Iron
- Optional: Ribbon, Thumbtacks, Hammer
1. Remove the paper from each of the crayons you plan to use.
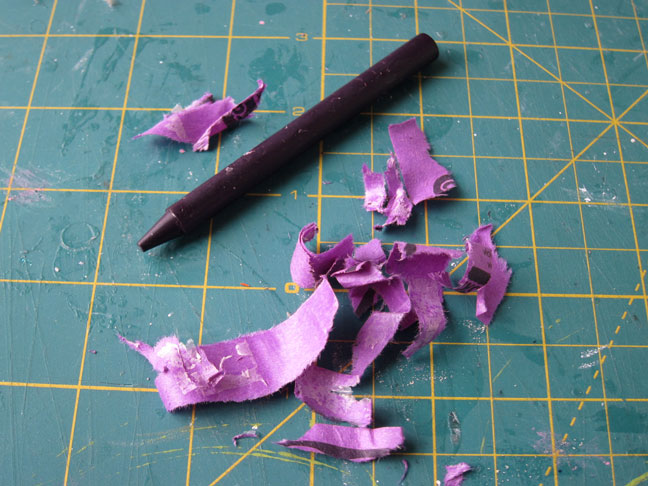
2. Grate each crayon. If there are some big chunks mixed in that is ok. The big chunks will create more texture to your finished art.
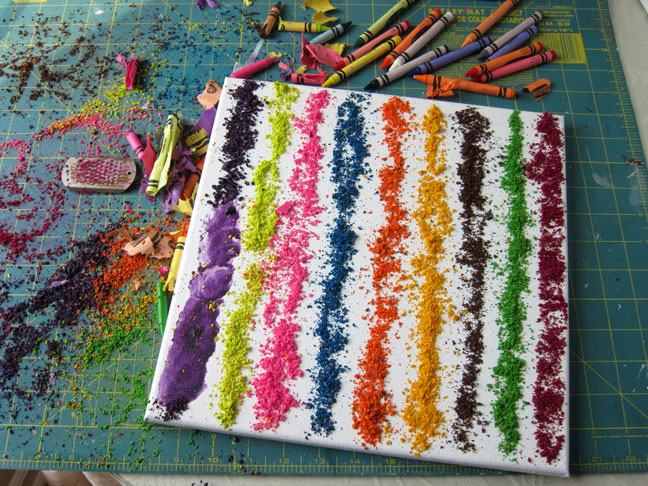
3. Figure out what kind of design you want to create. I did simple vertical lines. You could do anythng. You can even draw a simple design like a flower with big petals on the canvas with a pencil and then fill each petal in with the crayon shavings to create something truly unigue that is still a recognized image
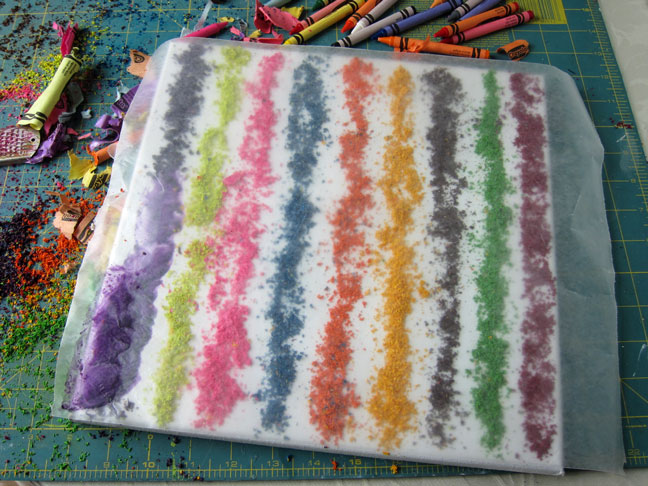
5. Once you have the crayon shavings arranged the way you want cover the entire canvas with wax paper – wax side down.
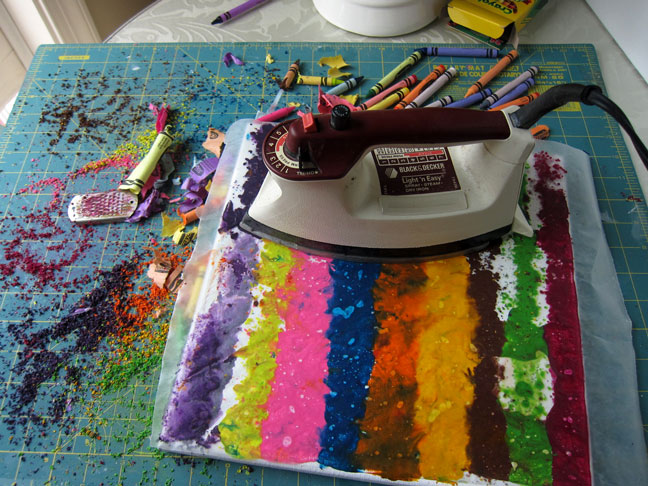
6. Use a low temperature on your iron and press the canvas. Start by gently pressing the iron up and down instead of back and forth. If you really want to mix the colors – then go back and forth. It will look like this – melted.
7. Wait a few seconds and then slowly remove the wax paper. There will be lots of melted crayon residue on the wax paper. This is what I used to make my second canvas. Once the wax paper was cool, I placed the crayon side down over a new clean canvas and pressed over it with the iron. I created two pieces of art!

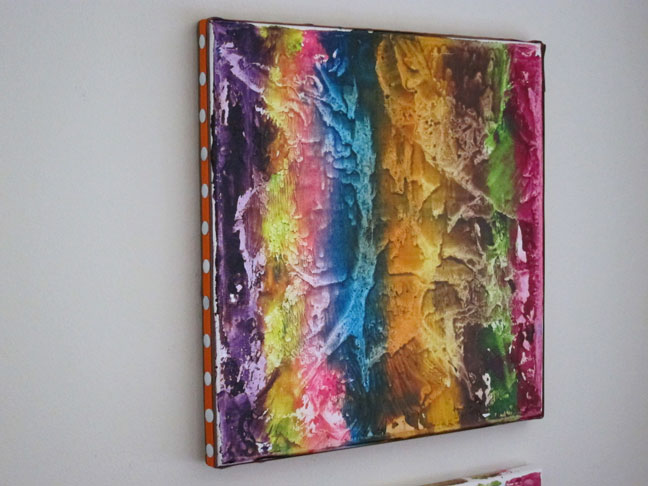
At first I was thinking – YIKES that didn’t come out as I thought it would and then the image started growing on me. I loved how vivid the colors came out – unlike paint they are very clear, transparent, and jewel toned.
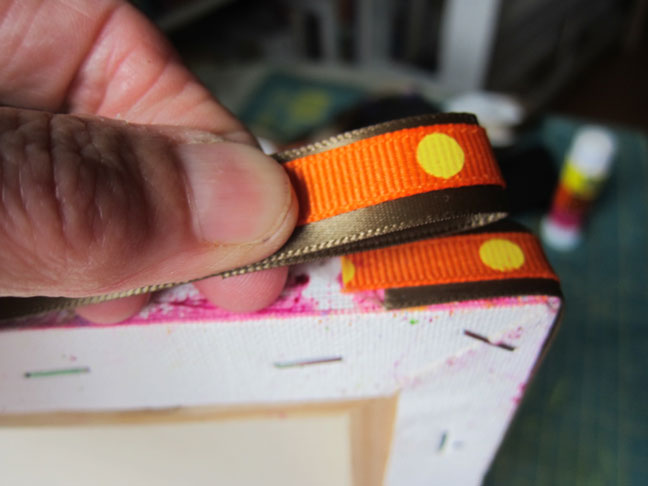
Optional: I opted to take the canvas up a notch on the style scale and added ribbon around the sides. I used the polka dot pattern on the ribbon as my placement guide for the thumb tacks.
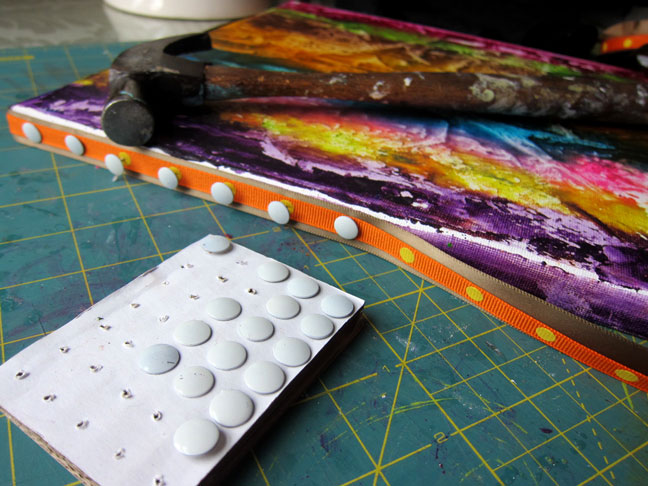
I finished the ends of the ribbon off by folding over the end section of the ribbon and placing it over the starting end. I used a thumb tack to secure.
If you look closely you can see the top is the original canvas – it has more color. The bottom one is the canvas that I re-used the wax paper from the first one on. It has less color. I only bought a package of two canvases. I would have loved to have had a third so I could have created an elementary trio to hang on this wall.