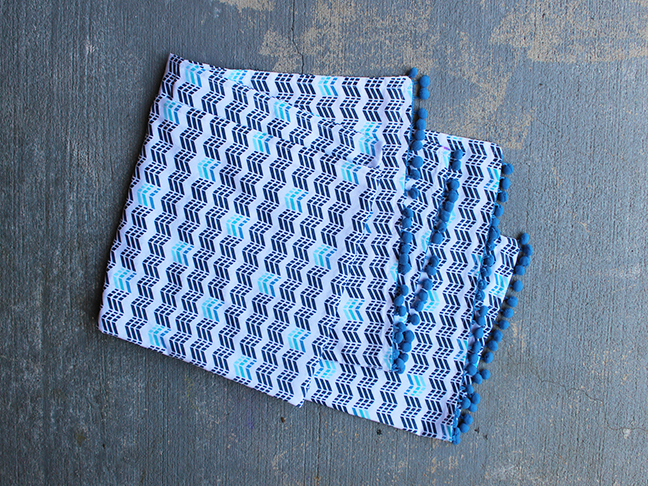
Hello summer! Need a light throw blanket? How about an attractive table runner for an upcoming party? Or maybe a lightweight shawl for an evening soiree?? Well, grab a cup of coffee—this DIY tutorial is for you. In under two hours you can make this stylish and oh so handy three-in-one pom pom summer scarf.

Supplies:
- Lightweight cotton fabric – 2 yards
- Pom pom trim – 2 yards
- Pins
- Scissors
- Rotarty cutter, cutting mat, and ruler
- Disappearing fabric ink pen
- Sewing machine
- Iron and ironing board
Note: Two yards for fabric and trim is an approximation. The amount depends on how large your throw will be.

Instructions:
Step 1: Determine the desired length for your throw. Place the fabric on your work surface and fold in half. Fold in half again. Hand press any wrinkles out. Cut the ends off using a rotary cutter, ruler, and cutting mat. By using a rotarty cutter and ruler, you will ensure super straight seam allowances.

Step 2: Re-fold the fabric so it has just the main center fold. Right sides are facing each other. Press along the fold so you have a line/indicator where to stop your pom pom trim. You can also mark a dash at the top and bottom using a disappearing fabric ink pen.

Step 3: Cut the pom pom trim to be the length of each end.

Step 4: Lay the pom pom trim along one end at a 1/2″ seam allowance. The pom poms need to face toward the inside of the throw. Pin the pom pom down. Place into your sewing machine and stitch. Try to stitch as close to the pom poms as possible. Press with an iron.

Step 5: Trim away any extra pom poms that may sit in the seam allowance.

Step 6: Lay the other half of the fabric on top so that right sides are facing each other again. Pin together. Place into sewing machine and stitch together. Follow the previous stitches made while sewing the pom pom trim in place. Press the seams. Repeat for the other end of the throw.

Step 7: Turn right side out. Wiggle the pom poms into place. The pom poms should now face outward and lay flat. Press in place with an iron.

Step 8: Turn the fabric to be wrong sides facing each other again. Pin along the long edge of the fabric (should be the selvage). Place into sewing machine and stitch together. Leave a small opening, approximately 4 inches, so you can pull the throw right side out.

Step 9: Press seams with an iron. Pull the throw through itself. Wiggle into place. Press the throw all over. Turn under and pin the seam allowances of the small opening closed. Make sure seams all sit flat. Place into sewing machine and edge-stitch around the outside edge.

That’s it!

More Sewing Projects: