
I love activities that keep my kids’ attention for a long while, and this rainbow bubble wrap stained glass project is one of those. For such a unique process, it uses really basic materials, and even better, it’s a way to teach kids about the science behind color theory. When they’re finished, this science experiment makes for a colorful decoration to hang in a window. When the sun shines through, it looks gorgeous! For sanity saving purposes, hang the bubble wrap on the outside of your window, that way if it gets bumped or falls, it doesn’t stain your floor.
What is color theory?
For an in-depth explanation, visit the color theory Wikipedia page. Here’s the explanation that I gave to my kids that relate to this science experiment:
There are primary colors (red, yellow, and blue), from which all colors stem. Primary colors can be combined in many ways to create secondary colors, and tertiary colors. A cool way to learn about what happens when you mix different colors is to see it all happen at once, and this science experiment for exploring color theory with bubble wrap does just the trick. We’re spending the afternoon together combining the three primary colors to see what, and how many, colors we can come up with.
RELATED: 19 Spectacular Rainbow Crafts

Supplies:
- bubble wrap, (the kind with big bubbles)*
- scissors
- tape
- pipettes
- liquid watercolors or food coloring in primary colors (red, yellow, and blue)
- water
- little cups
- towel
*The little bubble bubble wrap will work, it just requires more hole snipping and more precision with the pipette. Small bubble wrap is not recommended.
Instructions:

Step 1: Take the scissors and cut a small hole in the top of each bubble on the sheet. Make sure all the cuts are on the same side of bubbles.
Step 2: Use tape to hang the bubble wrap on a window or on an outdoor surface.


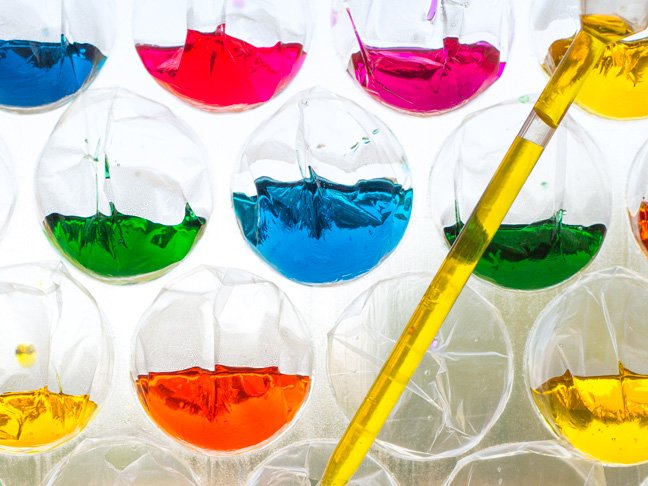
Step 3: Fill the bubble pockets with color with the pipettes. Special note: You can rinse out the colors and reuse the bubble sheet over and over.

Pretty simple, right? Here are some tips to ensure maximum success.
Water down the colors. Err on the side of too diluted colors. Deep color tone doesn’t allow light through very well, which makes it hard to see the color. And mixing dark tones with dark tones makes even darker colors. Stay light!

Keep it simple for little hands. For the five and under crew, just fill the bubbles with color, any which way they want. They will mix colors on their own to create new colors and love it. It’s a good fine motor exercise filling the pipettes and putting the pipettes in the holes cut in the bubbles.

Teach an art lesson. For the older group, this can be an exercise in very basic color theory. Use only the primary colors, red, yellow, and blue (remember, dilute them!). With these colors, many more colors can be created.

Make an infinite amount of colors. Fill a row or two with red, a row or two with yellow, and a row or two with blue. By adding varying drops of colors, other tones and colors can be created. Start with just a drop or two in one bubble, and then in the next bubble try four drops.
Red + blue = red violet, magenta, jam, fuchsia, plum, violet, eggplant, purple, wine
Red + yellow = bittersweet, burnt orange, gold orange, orange, tangerine, marigold
Yellow + blue = spring green, pea green, kelly, lime, chartreuse, shamrock, emerald

Just add water. Adding extra water to the bubbles will lighten the colors and fill the bubbles more (making it look really, really cool!).
More DIY Crafts for Kids: