Ever wonder how those models in magazines always have such amazing cheeks and jawbones? It’s not always plastic surgery that does the trick, but contouring and highlighting your face using makeup! Don’t know what that is? A cheaper and pain-free solution to concealing what we believe are our imperfections. Contouring and highlighting is all about creating dimension and the illusion of depth on the face. If you hate a certain aspect of your face, such as a broad nose, contour it! This will create shadows on your face to help make your nose appear smaller, disguise that double chin, or make something like your cheekbones seem more prominent. Kim Kardashian is most famous for using this technique daily to obtain those gorgeous cheekbones.
Here is a step-by-step guide to contour and highlight your face.
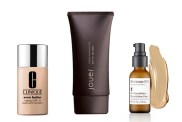
Before beginning you need to head to your favorite cosmetic store and ask to be color-matched for cream foundations to use to contour. I recommend MAC Studio Fix Powder Plus Foundation because it is the perfect consistency for contouring and highlighting. You will need two cream foundations—a really light one and a really dark one. Don't be scared! I know it looks scary, but I promise you it's going to look amazing once it's all blended in!
What You'll Need:
- Classic Foundation Brush
- Loose Powder Brush
- Light & Dark Cream Foundation
- Translucent Powder
- Facial Moisturizer
- Facial Primer
Step 1: Begin by prepping and priming the face. Using your fingers, gently lather your favorite moisturizer onto the face. Let set, then apply the face primer all over your face. (If you have wrinkles, get a silicone-based primer because it will fill in all the fine lines, giving you a youthful, smooth appearance.)
Moisturizing is important to a long lasting contour because the skin will soak in the moisturizer, and the primer will sit on top. If your face is well hydrated it will keep it from soaking in all the other products, so do not skip this step!

Step 2: Using your classic foundation brush and your lightest cream foundation, make triangular shapes underneath both eyes going down your laugh line and extending up to outer eye. Apply a quarter sized amount onto center of your chin, and draw a line down the bridge of the nose and your jawline on each side, as well as an upside down triangle onto the forehead.

Step 3: Using your classic foundation brush and your darkest cream foundation, suck your cheeks in like a fish and apply the foundation into the creases of each cheek, along with the right and left sides of your forehead and beneath the light foundation from the bottom of your ears along your jawbone.

Step 4: Using the same foundation brush blend the colors into your skin, pulling the lightest foundation out toward the dark around the face in a backward "3" shape. Keep blending until you no longer see any harsh lines.

Step 5: Lastly, using your loose powder brush and translucent powder, set your face by brushing the powder all over your face.
Do not use regular powder foundation because it will conceal all your contour and basically erase everything you just did.

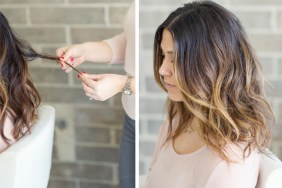
And here's the before and after:

More Makeup Tutorials & Products:
