

If you’re anything like me, your makeup bag is a bottomless pit of bobby pins, old brushes, half-used pencils, and various other flotsam. I needed a quick way to get things organized, so I dreamed up the easiest DIY ever. It’s a piece of cake! And true story: it shaves a little time off of my morning routine because I’m not rooting around looking for things in the bottom of my makeup bag any more. Here’s how to customize & organize your makeup bag.

Supplies:
- zipper pouch
- colorful elastic
- E-6000 glue
Instructions:
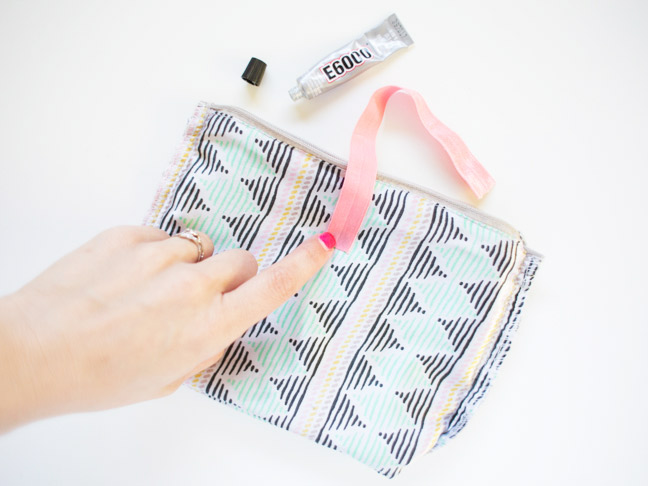
Step 1: Turn your makeup bag or zipper pouch inside out. Cut a piece of elastic that’s about 4″ long (longer for an extra large bag).

Step 2: Put a little dab of glue on the right side of one end of the elastic, and press it firmly on the inside of your bag, centered and toward the top.

Step 3: Create elastic compartments by gluing the elastic down in loops. Every inch or so, place a small dab of glue on the wrong side of the elastic and press firmly into the bag. At the end, put another dab on the right side of the elastic to finish the loops.


Step 4: Allow the glue to dry and fully cure. Flip the bag right side out. Put all of your makeup bag in your bag, and rejoice at how organized you are!


More DIY Makeup Organization Ideas: