Kids love puppet shows, but puppets can be expensive to buy. Here’s a simple way to make your own!
This tutorial will give you a basic puppet design so you can make a couple cute animals to start your puppet collection. They’re simple to make and only require basic sewing skills. See the end of the tutorial to see an example of an easy puppet show curtain to make with these puppets!

Supplies:
Scraps of felt
fabric glue
sewing machine and matching thread
pen or chalk roller to trace
pins
scissors
Print out of puppet pdf

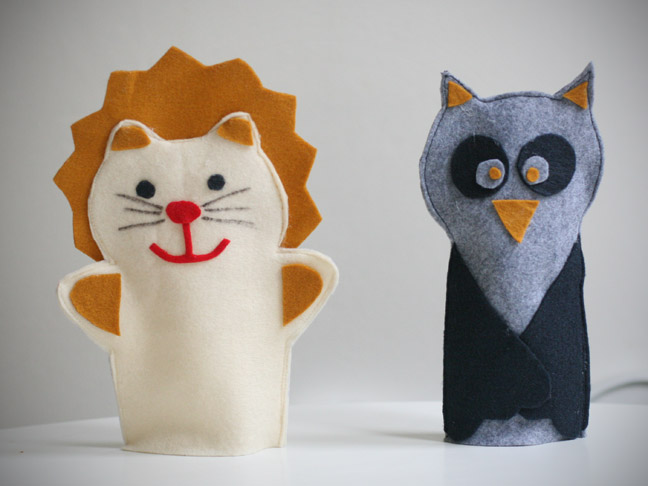
First we are making the lion. Print and cut out the puppet pdf found here and pin the paper pattern to two pieces of felt. You want to cut out the back and front together if you can.

Next cut out some of the features for the lion and the mane.

Glue the mane to the back of the bottom puppet piece.

Glue the facial other features on the top puppet piece.

Place the back and front on top of each other and carefully sew around the edge, but not the bottom. You’ll need that spot to put your hand in and animate your puppet.

Optional: Use a permanent marker to draw some whiskers on the lion.

For the owl puppet, you’ll want to slightly adjust the puppet pdf by omitting the arms and making the ears more pointy.

Cut out the owl features.

When you glue the wings on, overlap them like they’re folded in front. Sew around the edge through both layers like you did with the lion.

You can make several other animals based on this basic puppet shape like a cat, frog, monkey, etc. Use your imagination! You kids will love putting on puppet shows with these fun felt animals. This photo from Country Living is an example of a great puppet show curtain you can make and attach to a door frame using either ties to small nails or a tension rod.