My niece loves to get her nails done—in theory. Once she gets over the initial excitement, the reality of having to sit without moving for half an hour takes its toll, and she either falls asleep (the best case scenario) or gets antsy and complains about being itchy, overtired, or hungry, or a combination of the three.
Luckily for us, at-home nail art has exploded over the past couple years (thank you, Pinterest), and there are no shortage of easy DIY nail art ideas you can accomplish at home with your kids. These easy DIY nail designs do double duty: They look adorable on little fingers yet ladylike on the rest of us. Best of all, you don’t need to hit the nail salon at all. Try these fun nail art tutorials with your daughter or niece in the comfort of your home—since short attention spans can sometimes get in the way, you’ll be able to move on to the next project without having dropped $40 at the nail salon.
Speaking of manis, have you seen this hilarious viral video of a toddler, her Barbies, and a potential mani-mess? It’s way too cute!
Share your favorite mini-and-me manicure tutorials in the comments.
Pin it:
More Beauty Ideas:
- 6 Chic & Easy Braids You Can Do Yourself
- 11 Brilliant Concealer Hacks You Probably Haven’t Heard Of
- 9 Gorgeous, No-Heat Hairstyle Hacks
Easy Nail Art Tutorials To Do With Your Daughter
-
Chick Nails
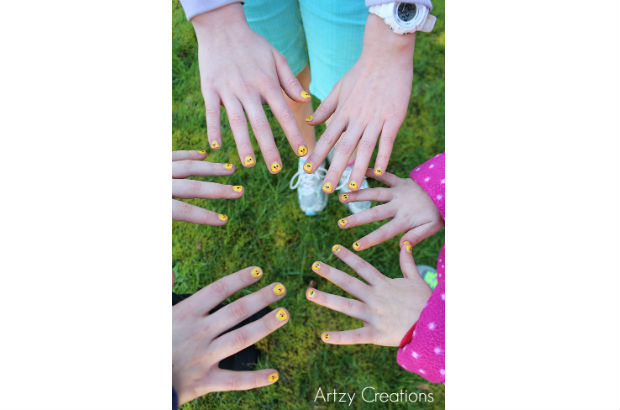
There is no doubt that kids will love this adorable nail look. You need nail polish in yellow, black, and orange shades, plus a bobby pin and a bottle of top coat. Easy part first: Coat those nails in a vibrant shade of yellow. The real fun begins when you artfully add cute chicken designs to each nail.
Image credit and full tutorial: Artzy Creations
-
Dotty Accent Nails
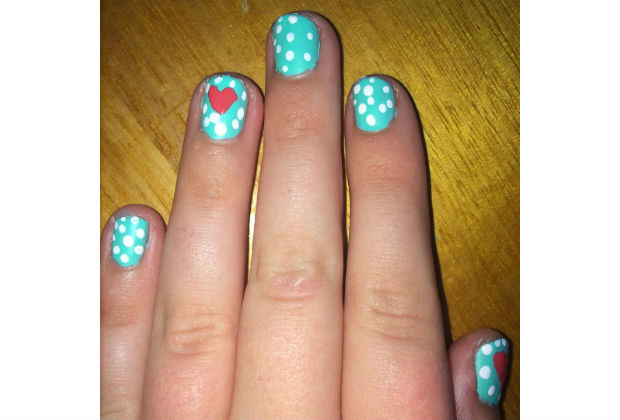
It doesn’t get simpler---or cuter!---than this. Two bottles of contrasting nail polish are all you need to achieve a perfectly polka-dotted manicure with plenty of pizzazz. Coat nails with the first color. After it dries, dot nails with the contrasting shade in a haphazard fashion (no need to be too neat here). Add a cute design to your daughter’s accent nail for a charming finishing touch.
Image credit: Instagram/@_polish.perfect_ -
Watermelon Nails
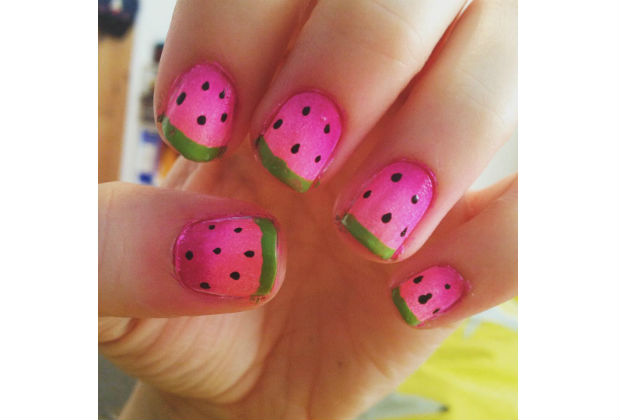
It’s amazing what three shades of nail polish can do when they conspire together. In the case of this awesome look that is sure to make kids giggle with delight, it’s vibrant pink, green, and black, united to create cool watermelon nails. Begin with two coats of pink nail polish. After it dries completely, add a few black polish “seeds” to the nail. Finish with a thin line of green along the tips. Voila: fresh, juicy watermelon nails!
Image credit: Instagram/@em_see2 -
Sparkly Tips
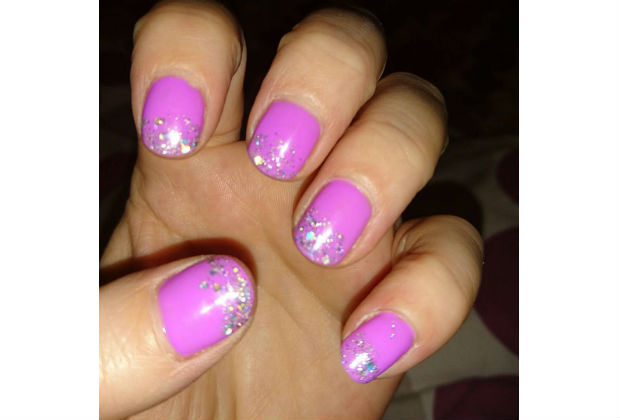
You don’t have to be a professional manicurist to achieve a look as glamorous as this. Kids will love the hint of sparkle---and you’ll love how very easy it is to achieve. Begin by applying your child’s color of choice onto each nail. A fun, peppy shade like fuchsia, green, or blue offers a fun backdrop for the glitter. When the polish is dry, add your glittery polish of choice to the tips only. (A favorite: Hard Candy Pop Art Nail Polish, $4.)
Image credit: Instagram/@loubylovesnails -
Cloudy Nails
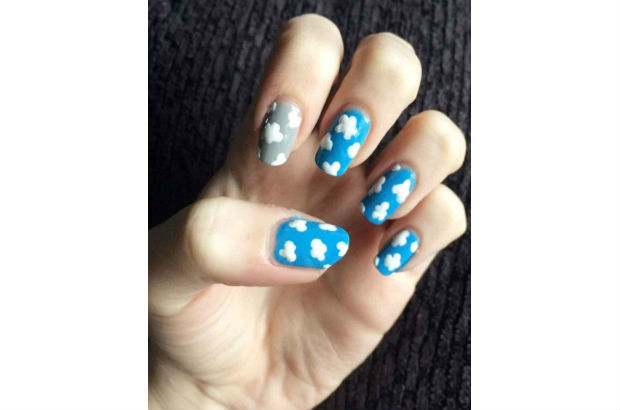
Here’s a rainy day project you and the kids will love. You’ll need bottles of blue and white nail polish, as well as a toothpick to create your clouds. My blue of choice: Rimmel 60 Seconds Nail in Blue My Mind ($1.35). Read the full tutorial here.
Image credit and full tutorial: CollegeFashion -
Strawberry Nails
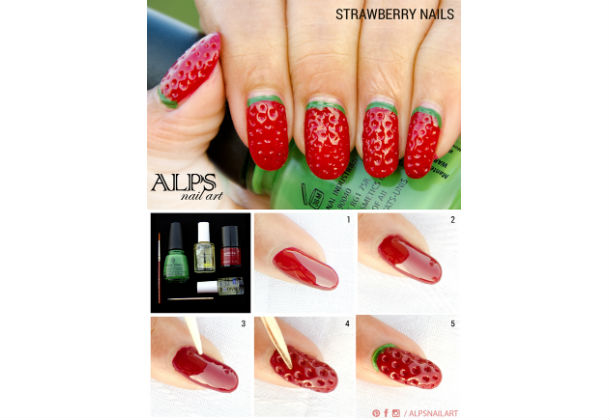
Nails that look this complicated have to be tough to create, right? Not even close! All you need to make these strawberry tips come to life (and put a huge smile on your kid’s face) is red nail polish, green polish, top coat, a toothpick, and a nail art brush. The key here is to create a thick enough layer of red polish that the indentations made with the toothpick (to create “seeds”) are visible. Read the full tutorial here.
Image credit and full tutorial: Salon Fanatic -
Cow Nails
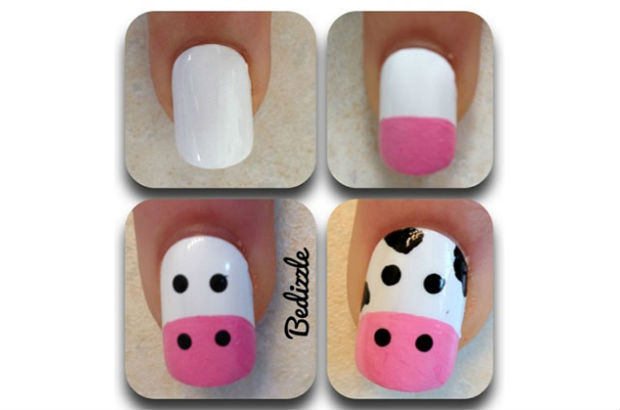
Little ones will adore these fun, colorful nails. Grab bottles of black, white, and pink nail polish, as well as a slender nail art brush. Begin by applying two coats of white polish. Allow to dry before coating just a bit less than half of the nail with pink. Allow this to dry, then paint two uniform black dots on each color. Carefully add the cow’s “spots” along the edges of the white to finish this playful design.
Image credit: Fabnailartdesigns -
Superstar Nails
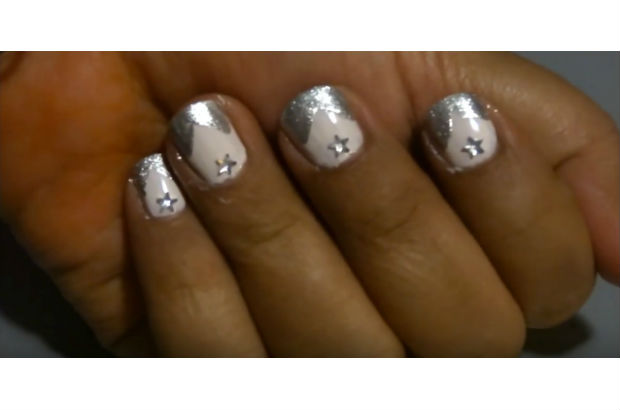
Just when you think fancy nail art is far too complex for kids to really enjoy, along comes this tutorial that shows how simple some methods really are. All you need to give your child’s nails a dose of the superstar treatment are two shades of nail polish and a fun crystal or stone appliqué. Watch the complete tutorial here.
Image credit and full tutorial: YouTube -
Beachy Nails
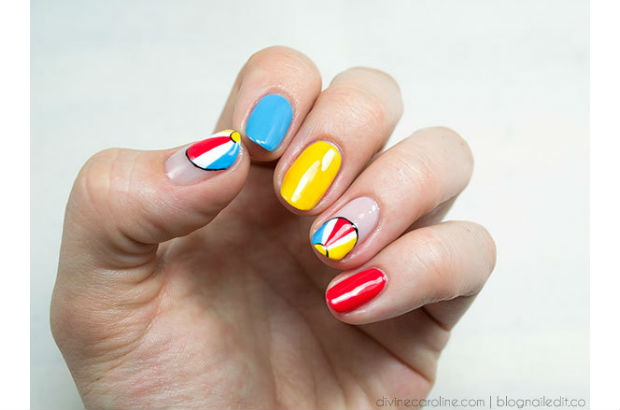
Headed to the beach for spring break? Give your kid’s nails a manicure to match the occasion. This one couldn’t be simpler. Three nails are painted in different solid hues, while two feature fun beach ball designs. Be sure to use a brush with a fine tip to artfully draw the circular balls. Read the full tutorial here.
Image credit: Divine Caroline -
Ombre Sponge Mani
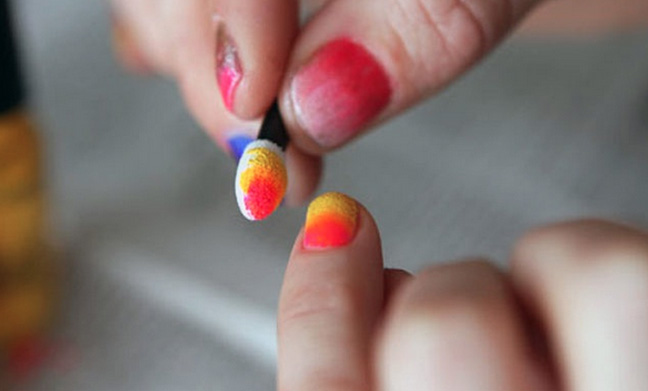
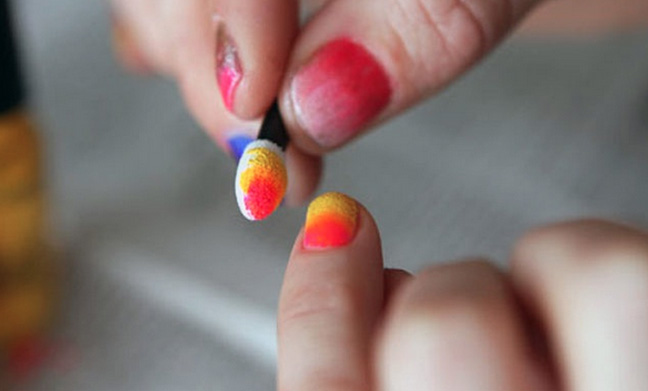
This is a crazy good, super easy at-home DIY. Use an eye shadow sponge to effortlessly create an easy ombre effect. Best of all, it’s hard to “paint outside the lines” (i.e., your daughter's nail bed) as you have greater control with a small sponge than you would a brush. Try contrasting or coordinating colors like this one and this one by Ciate London, $8, Sephora.
Image credit and full tutorial: Brit.co
-
Confetti Nails
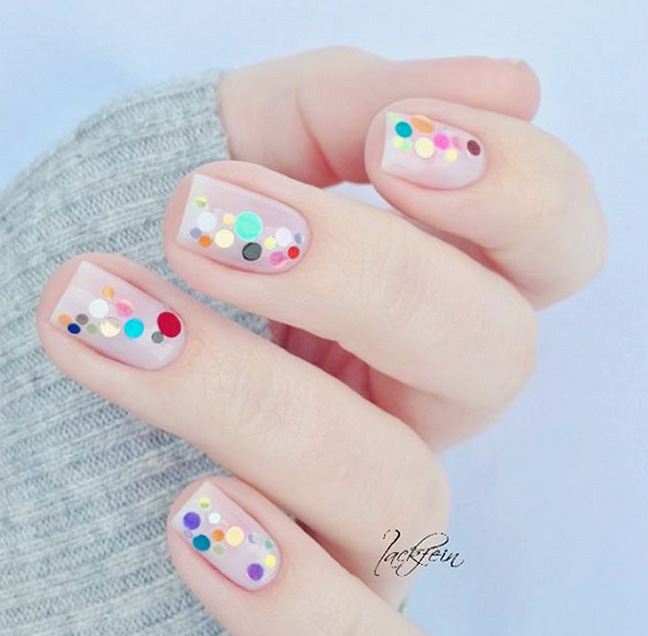
It doesn’t get any cuter than this. Add on some confetti with Premium Nail Art Nailart Manicure Glitter Confetti Shapes for 3D Designs from FASH Limited, $4.98 (while your daughter's nails are drying), or for an easier approach try Desperately Seeking Sequins by OPI, $10.
Image credit: Instagram/@lackfein
-
Two-Tone Manicure
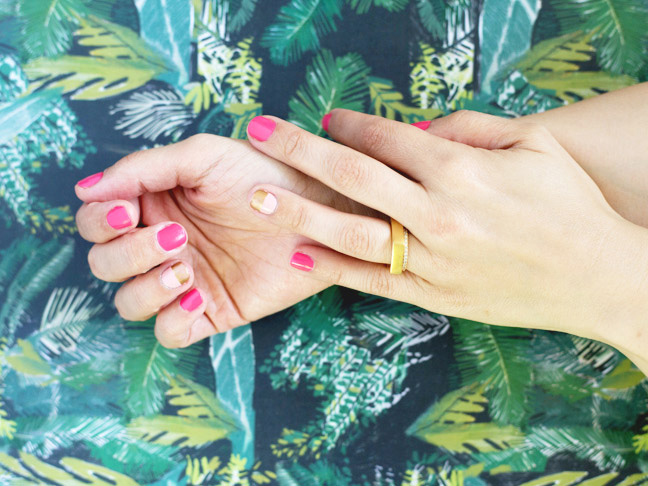
With a short attention span comes the need to figure out a quick design that still makes a big impact. Rather than paint all your nails with designs, focus on your daughter's party nail (her fourth finger) and give it some love with two different shades of polish.
Get the full tutorial at Momtastic.
-
Gradient Color
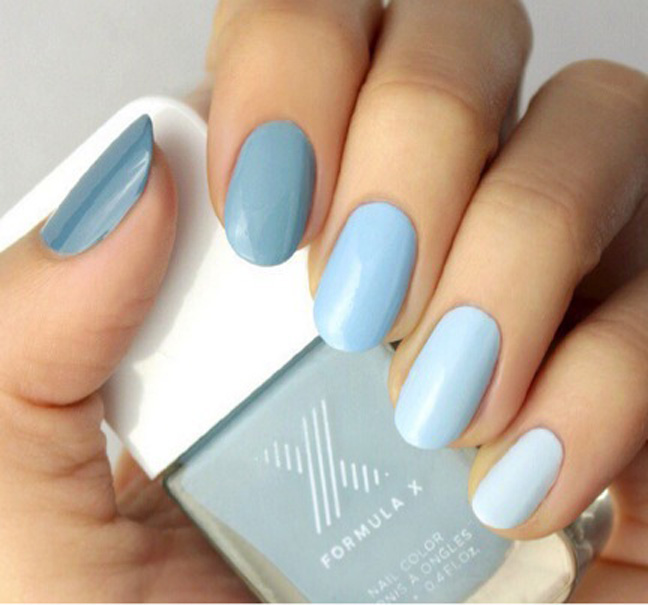
Have fun mixing a few shades of complementary color for high impact in the same amount of time it takes to do a typical manicure. Have fun creating a color scheme with your favorite girl based on mood, season, or outfits. Have fun graduating blues, or create the ultimate blush ombre by using rose quartz, camel, and beige. I’m in love with graduating silvers like chromes and grays by Formula X, $10.50, Sephora.
Image credit: Instagram/@lulus
-
Dot Drama
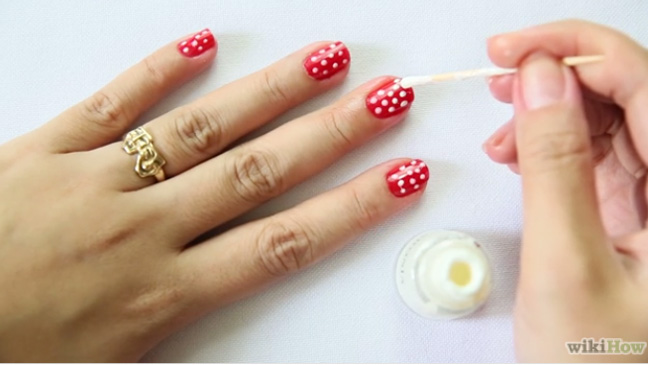
Add some easy polka dots by taking a toothpick or the end of a cotton-less Q-tip and gently dabbing a contrasting nail color onto dry painted nails to create dots that pop. Watch this video for an easy step-by-step demo.
Image credit and full tutorial: WikiHow
-
Crystal Overlay
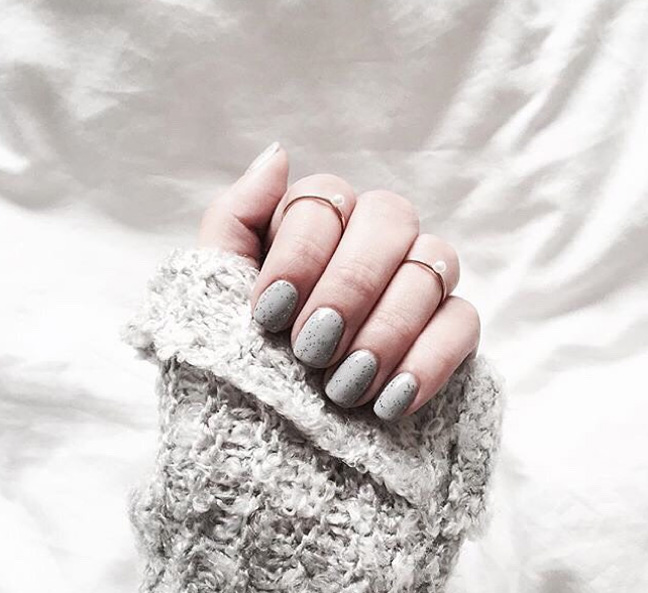
Add a crystal effect over any color for a fun snowflake-like winter accent. Think about using white polish with gold sparkle or light blue with white sparkle for a fun wintery feel. Try China Glaze in Liquid Crystal, $3.15.
Image credit: Instagram/@lulus
-
Colored Tips
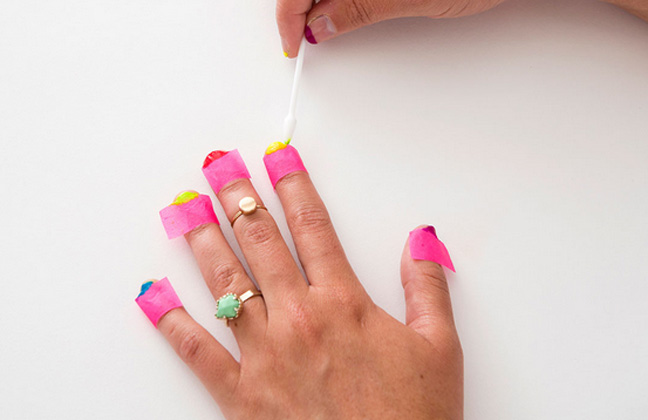
Have fun with your daughter applying colorful washi tape to form an easy “template” to apply goof-proof color accents. This technique provides super quick drying times. Play with neons, textured polishes, or even a simpler color scheme (that’s more appropriate for the office). Have fun choosing each other’s colors for a fun girls' night in any day of the week. Try this fun pop of yellow by Ciate London, $8, Sephora.
Image credit and full tutorial: Brit.co
-
Coordinating Hand Tattoos
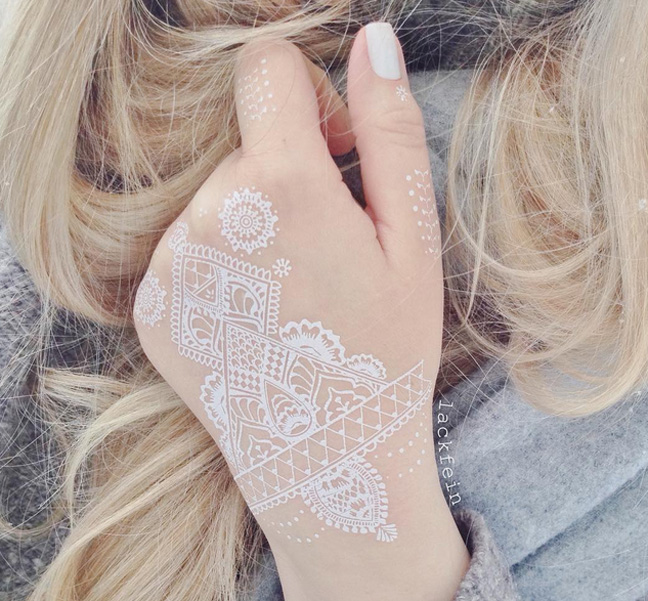
Think of these hand tattoos as extensions of your manicure. If nail artistry is not your thing, try coordinating hand tattoos you can totally DIY at home. Take your mani to the next level with ASOS Orelia White Henna Hand Tattoo, $6, or this fun Arrow and Feather Kit by Zodaca, available at Walmart for $1.69. You and your kiddo will have fun playing with different looks.
Image credit: Instagram/@lackfein
-
Sticker Accents
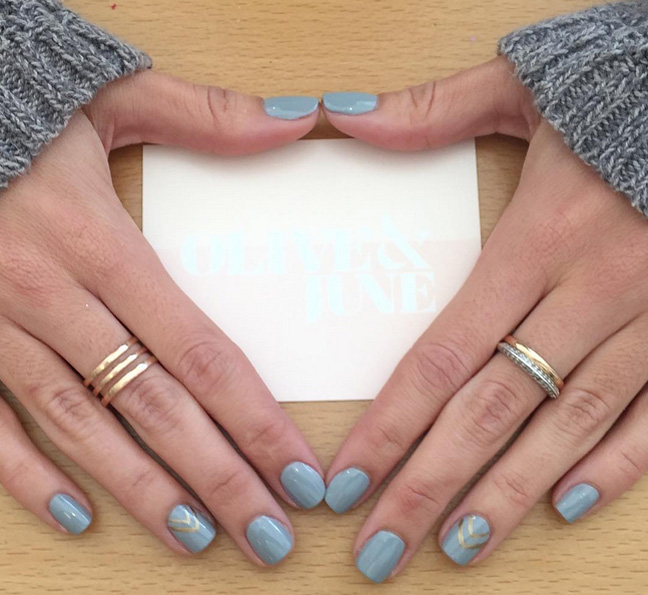
You can’t go wrong with a tiny sticker accent on one or two nails. Try Polish Pop Nail Art by KISS in Wisteria Lane, $3.99, for accenting a stone or a stripe, or try adding full coverage nail-bed stickers without any drying time. Say goodbye to bad nails and hello to some fun nail art at home.
Image credit: Instagram/@OliveandJune
-
Tape It
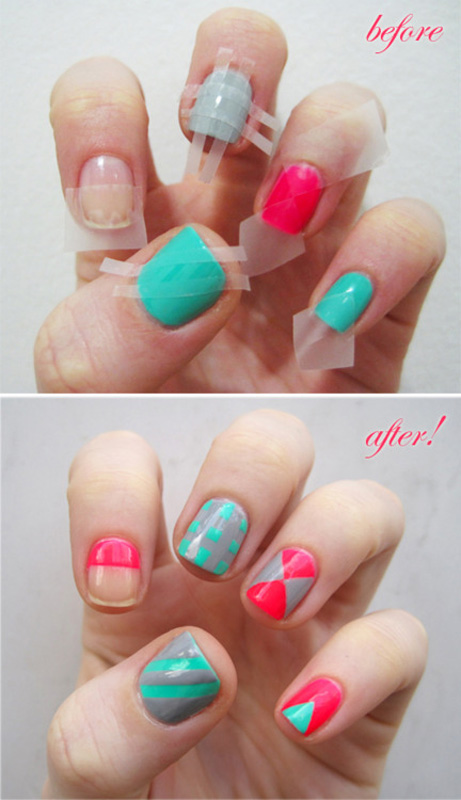
Place small strips of tape in different shapes to create coordinated color-blocking artistry. Try standard nail polish colors, or get quick, precise application with Nails Inc Shoreditch Lane Paint Can, available soon at Nailsinc.com. This spray may just be the fastest way for you and your toddler to get the perfect paint application with less drying time. Note: Excess color on the skin washes off easily when rinsed off in a short amount of time.
Image credit and full tutorial: BirchBox
-
Hint of Sparkle
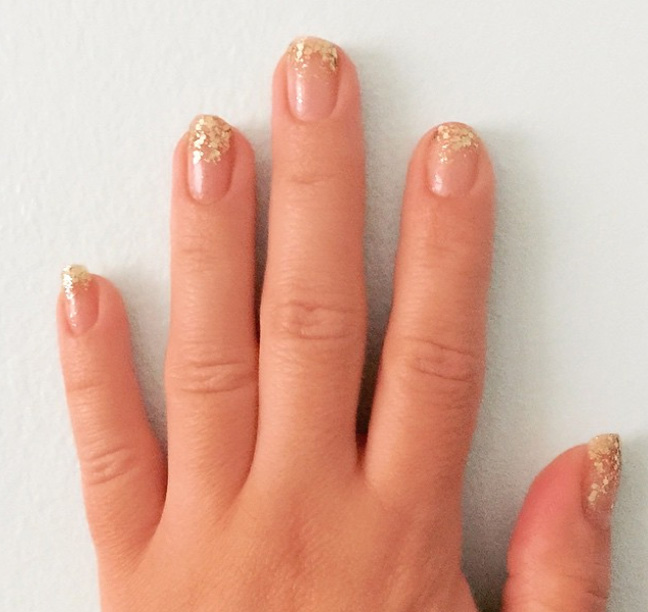
Coordinate by wearing a splash of hers & hers easy sparkle applied with just one stroke on a nude nail. Layer sparkle all over the nail bed or just the tips. Try a color like Essie Lush Effects in 962, $8.50.
Image credit: Instagram/@beautyforbloggers
