
With kids home ALL THE TIME right now, you’re probably feeling a bit of cabin fever. And you may also be sick of hearing your kids beg for new toys at a time when finances are tighter than ever. Luckily, little ones often prefer random household items to the toys they begged so hard for, which makes this recycled bottle craft perfect for kids of all ages. Grab some paper scraps and your kids can make an entire fleet of bottle airplanes to keep them entertained.
Saving money? Check. Using recycled items? Check. Keeping your kid busy for 5 minutes? Check.
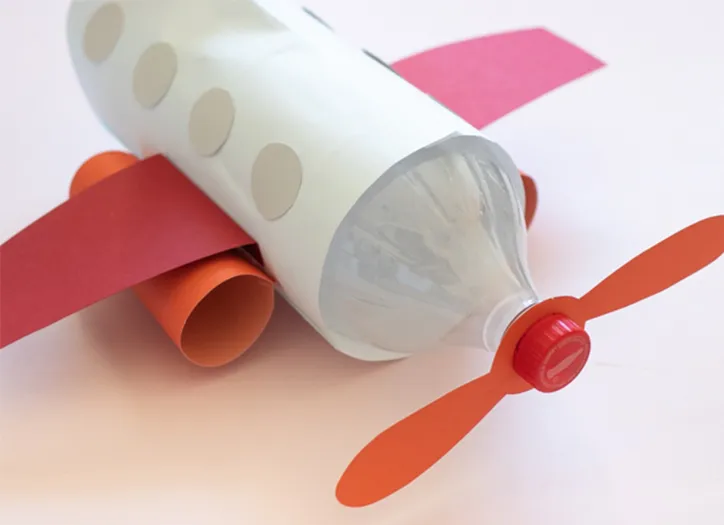
Here’s how to turn any bottle into an airplane with recycled household items!
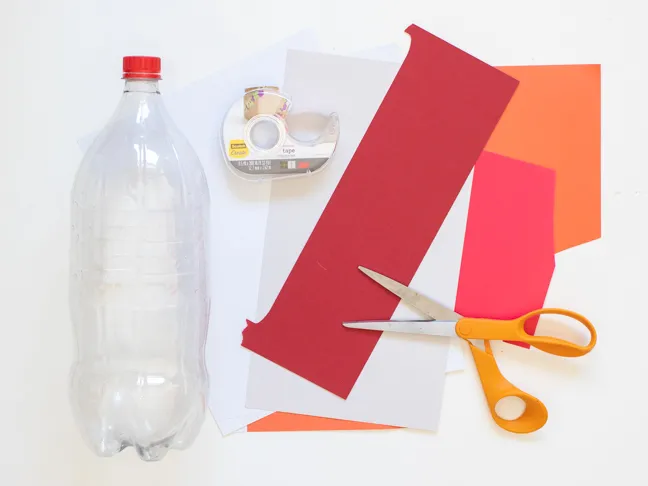
Supplies:
- Plastic bottle, any size (2 liter is featured)
- White printer paper
- Cardstock or construction paper, various colors
- Scissors
- Double sided tape or glue
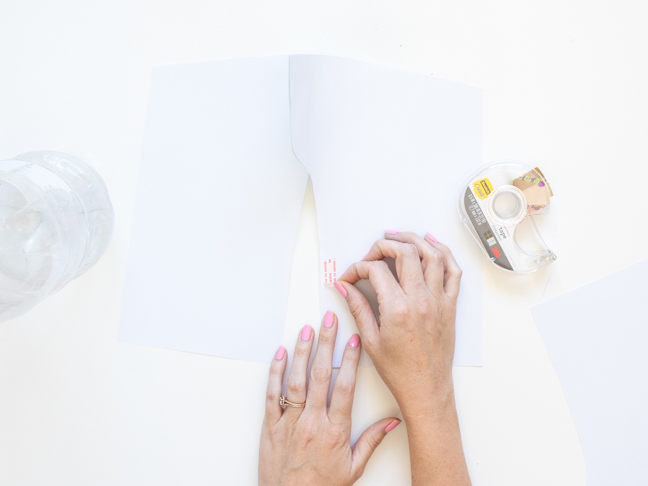
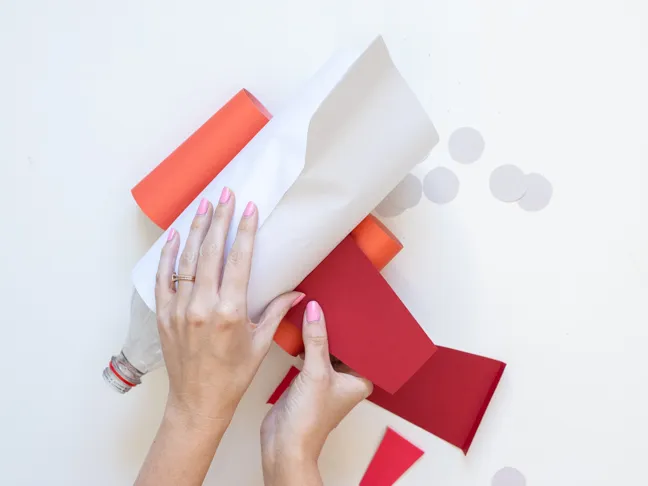
Step 1: Layer two pieces of white paper together (cardstock not recommended). Cut a long rectangle with a back fin to create the bottle airplane body. Use double sided tape or glue to glue the fin section together. Then tape the remaining edge together, overlapping slightly.
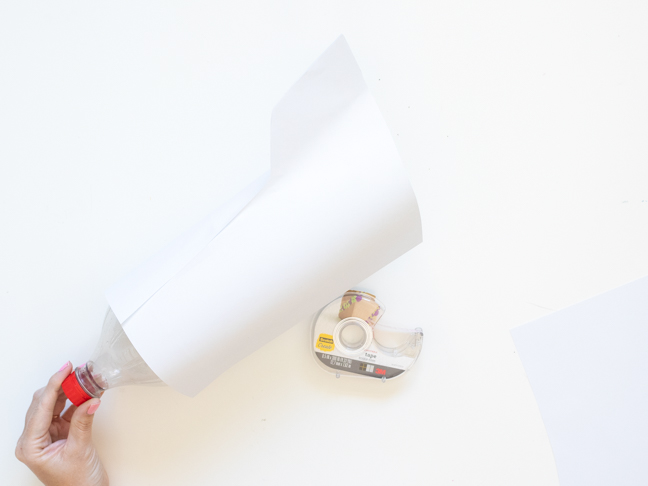
Step 2: Wrap around the bottle and tape or glue in place. The top should start where the bottle begins to flatten around the middle. These pieces alone will not wrap completely around a 2-liter bottle, so fill in the bottom with an additional piece of white paper.
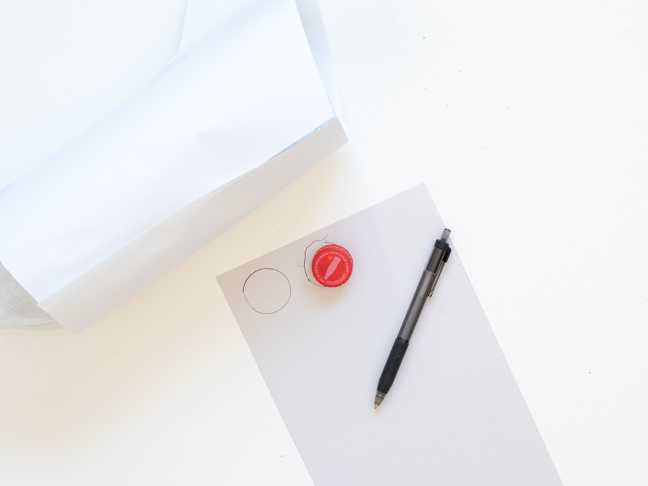
Step 3: Trace the bottle cap on a piece of cardstock and cut out 8-10 pieces to make windows. You can use any color available.
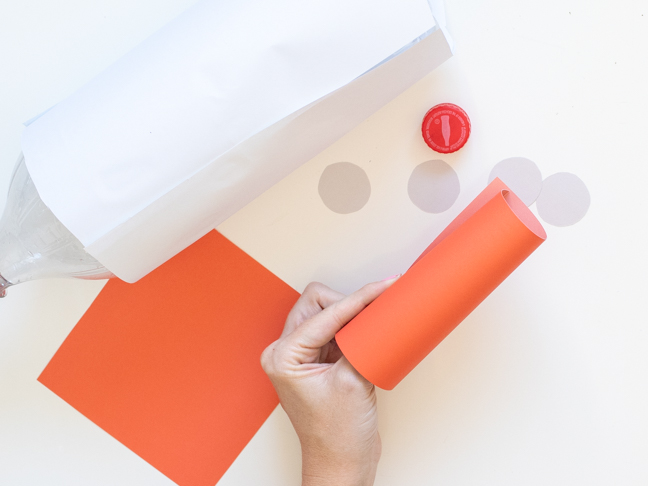
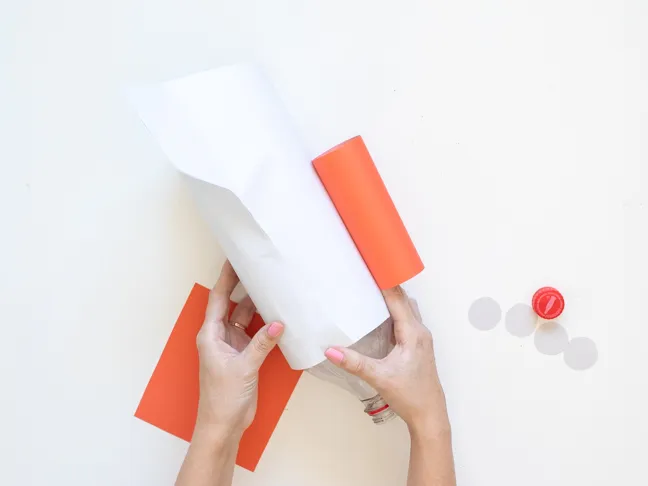
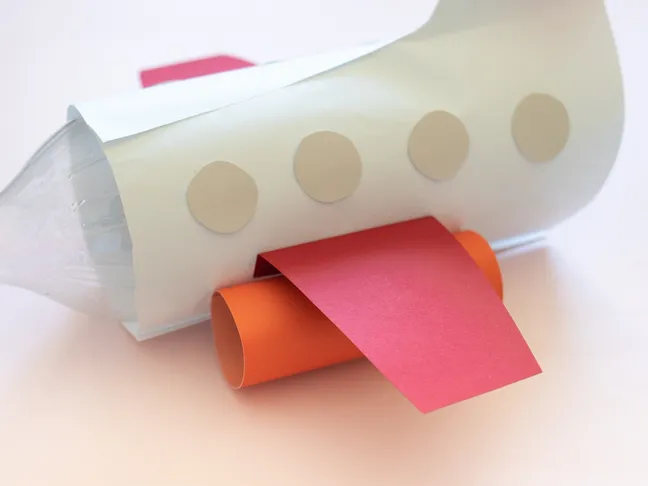
Step 4: Using another piece of colored cardstock, cut two equal sized rectangles. Wrap into tubes and glue or tape. Then glue or tape to either side of the plane (fin facing up) to make the engines. In this example, the tubes are the approximate size of a toilet paper roll.
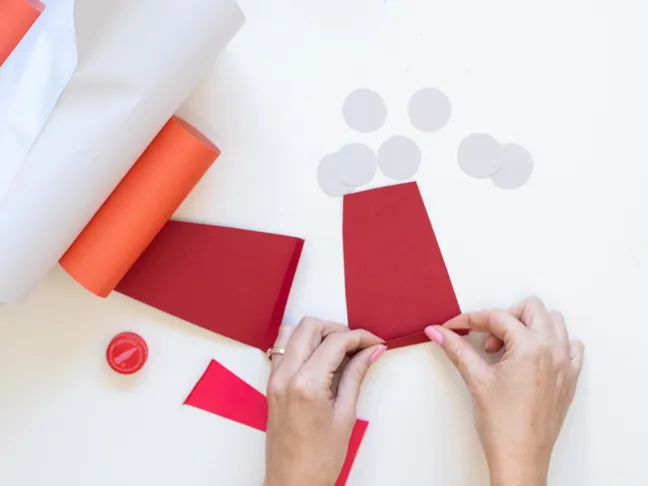
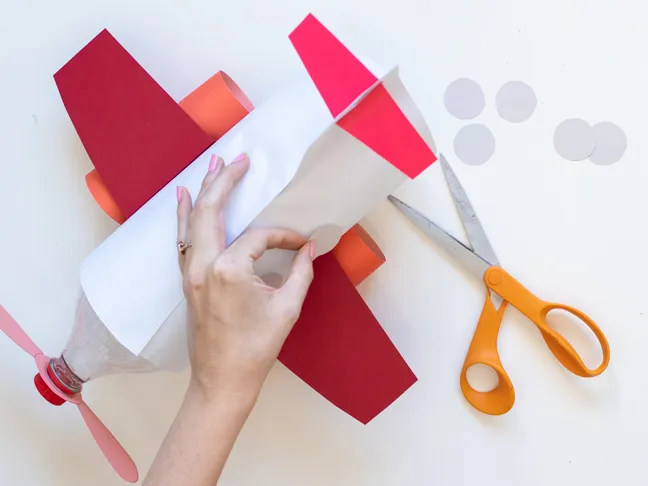
Step 5: Then cut 2 rectangles from another piece of paper. Trim so that they are slightly tapered to look like wings. Create a small fold along the longer end and use it to attach to the airplane base just above the engine roll. Repeat on each side.

Step 6: Cut the same wing shapes but smaller. Fold the longer sides and attach to either side of the back fin.
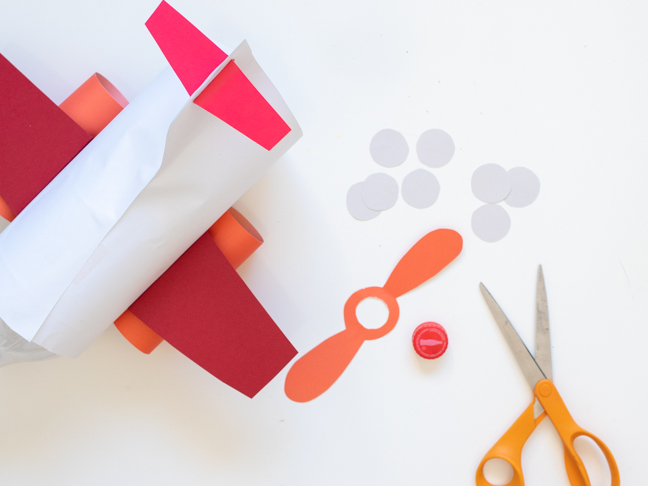
Step 7: On the backside of a piece of colored paper, trace the bottle cap in the middle. Then draw another circle around it. Draw two propeller shapes on either side and cut out the shape. Then cut out the middle piece. It should fit over the open bottle top. Then place the cap back on – the propeller will move if not screwed on too tightly.
Step 8: Lastly glue on the windows just above the wings on both sides of the bottle airplane.
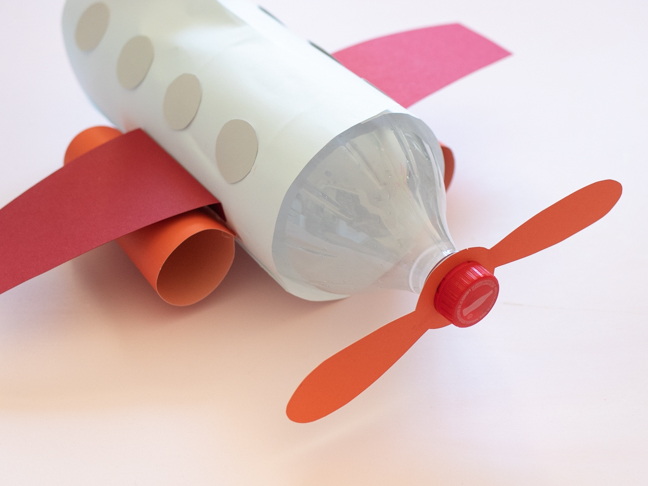
Now it’s ready for take-off! Who needs to buy new toys when you have recycled bottles and paper?! With your help, kids will love helping with the cutting and gluing. Then they still have a toy to play with when the craft is finished!


