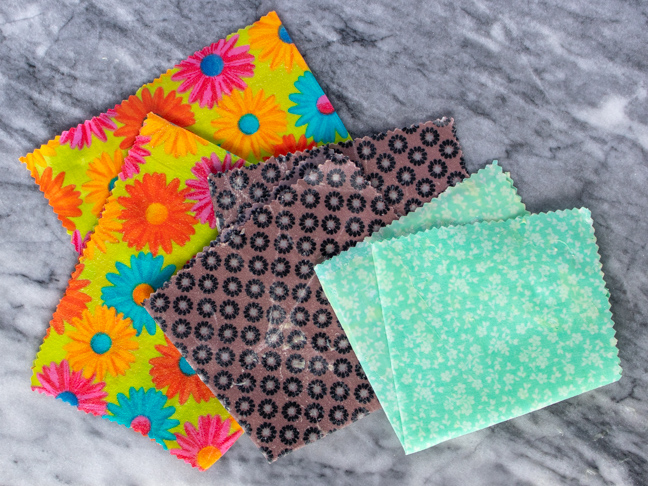

As we start to move toward more environmentally-friendly methods of food storage and cleaning products, you might have already seen the growing popularity of DIY beeswax wraps. As a replacement for traditional plastic wrap, beeswax wraps are a great way to cover and wrap food for storage. And they are super easy to make. These DIY beeswax wraps are made with scraps of cotton fabric, beeswax, pine rosin and oil for reusable food wrap that will take you one step closer to preserving the environment.
Beeswax has anti-bacterial properties that allow these homemade beeswax wraps to be used over and over. Many tutorials call for jojoba oil, but since you more likely already have coconut oil in your pantry, you can absolutely use it to create these reusable beeswax wraps. The pine rosin, which is available on websites like Amazon, is what gives the wraps their stickiness so that they can stick to themselves as well as bowls to preserve your food successfully. Make as many as you can in fun patterned fabric!


Supplies:
- cotton fabric, pre-washed
- pinking shears
- 4 oz organic beeswax
- 2 tbsp powdered pine rosen
- 2 tbsp organic coconut oil
- food grade brush
Note, the yellow beeswax will alter the coloring of your fabric. You can use either white or yellow – it won’t affect the success of the food wraps.

Step 1: Cut out squares of pre-washed fabric using pinking shears (or regular scissors).
Step 2: Preheat oven to 225 degrees F. Line a large baking sheet with parchment paper.
Step 3: Microwave the beeswax in a glass bowl until completely melted.

Step 4: Stir in the rosin and coconut oil. It might clump a little but that’s OK.


Step 5: Place on the fabric on the prepared sheet. Spread the beeswax mixture onto the fabric so that it’s completely covered.
Step 6: Bake the wrap for 5-10 minutes, removing when the beeswax has melted back into the fabric. Remove and use the brush to spread the wax off of the fabric and onto the baking sheet. Carefully pull the fabric off the sheet with tongs and let the sheets dry overnight on top of jars or over a bar to set.

Repeat with as many beeswax wraps as you want in various sizes! After about 24 hours, you can use your new beeswax wraps as a replacement for plastic wrap! Wash in cool or lukewarm water (not too hot or they melt!) and let dry so that you can use them over and over.