Even if you aren’t an expert crafter at home, there’s a very good chance you have a pile of extra string and yarns thrown in a box somewhere from that one project you tried last year. Well, this simple yarn wrapped letter DIY is the perfect way to use up those yarn scraps you’ve been saving AND it makes a colorful piece of decor in your kids’ room. Let your kids pick out a variety of yarn to use to make their own wrapped letter, and before you know it, their little hands will be busy wrapping and wrapping until they have a letter of their own. You can even make multiple letters to spell words or a name!
Upgrade your kid’s bedroom decor with this easy DIY yarn wrapped letter project:

DIY Yarn Wrapped Letters
Supplies:
- Cardboard
- Box cutter/craft knife
- Yarn, variety of colors, sizes
- Scissors
- Glue
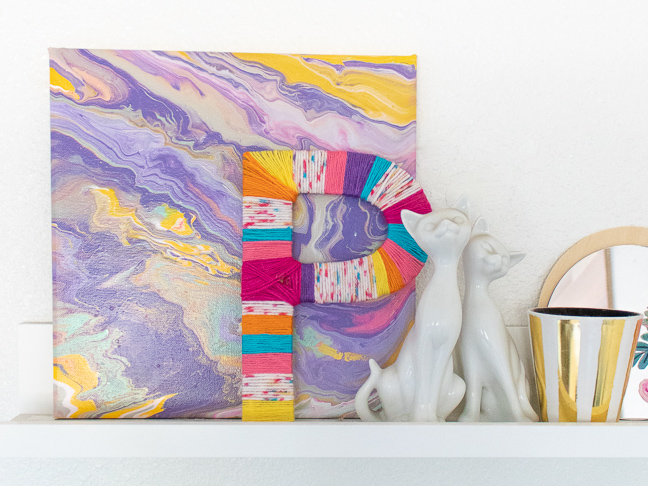
Note, some letters will be easier than others. Any letter that has multiple sections jutting out (as with the rounded part of the ‘P’ as it attaches to the straight section) will be difficult to cover. However, even round letters like an ‘O’ will be fairly easy to create.

Step 1: Draw out a large block letter on a piece of cardboard. Avoid cutting on a creased area, just solid cardboard. Cut it out so that the letter is about 1.5-2 inches thick.
Step 2: Cut a variety of pieces of yarn in random lengths.

Step 3: Starting at the bottom of your letter, add a bit of glue to the front. Hold the end of a piece of yarn over the cardboard and begin wrapping the yarn around the cardboard over and over again.

Step 4: It’s more secure when you can wrap the yarn over a lead cord, but you really only need to for the first one. Wrap until you have a block of color and glue the end of the yarn to the BACK of the letter. Then begin gluing and wrapping the next section of yarn, repeating to create colorful stripes.
Note, when you reach a section that is not straight, you will need to fan out the wrapping and add more glue to secure the yarn. It will be difficult to cover up the area completely. For best results, make those sections thicker to cover more area.

Once you’ve wrapped the letter up in yarn, let the glue dry completely and prop the letter up on a shelf or even hang it on a wall with a Command strip! For top heavy letters like this ‘P’ you may want to use a bit of tape to keep it upright on a shelf.


