As a stay-at-home mom of three young children, I know my way around the kitchen; however, there is one area I need to conquer—the tool bench in the garage.
Many times, I’ve wanted to hack a furniture project, but the amount of work and tools required seem so daunting. Until I have an opportunity to build upon my carpentry skills, I will do what I can with what I have.
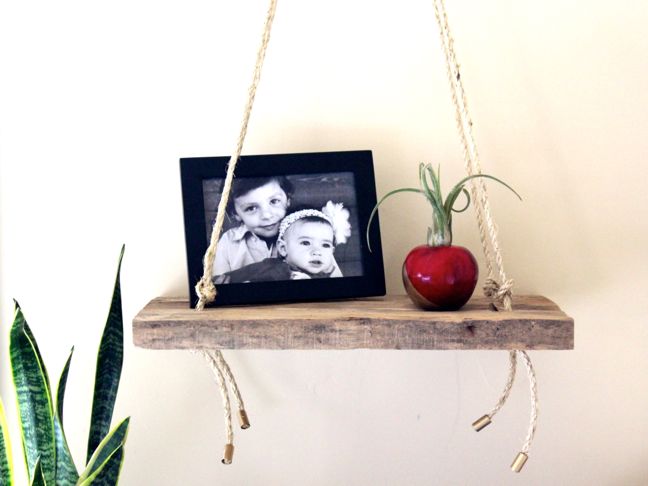
Well, what I have, plus a quick trip to The Home Depot, was more than enough for my recent project. I made a shelf that requires minimal effort and tools, plus it was done in less than one hour. The result is stunning. It’s designed after this simple and chic Teak Swing Shelf from a store I adore, Anthropologie.
For less than $25, I made a DIY swing shelf that retails for $108. Here’s how I did it.
RELATED: 31 Pottery Barn Inspired DIY Projects That Cost a Fraction of the Real Thing

Supplies:
- ¼ in. natural sisal rope, The Home Depot
- ¼ in. copper pressure cup, The Home Depot
- gold spray paint
- wood, 8 to 10 in. deep
- drill and drill bits
- glue
Instructions:
Step 1: Find a piece of wood from your local hardware store. The Home Depot will cut the wood the length you want, and you can leave the color as is or add stain. I’m married to a builder, so I found an antique timber slab from a construction site.

Step 2: Spray paint the copper pressure cups gold.

Step 3: Drill holes in the shelf—two sets on each side, evenly spaced. Make sure the size of the drill bit will be large enough for the rope to fit through the hole, yet small enough for a snug fit. If the rope is a little too snug, add a piece of tape around the tip so it’s easier to fit through the hole.


Step 4: Measure two pieces of rope the same length and long enough to hang the shelf and tie four knots. Push the end of one rope from the top through the bottom of the wood shelf. Tie a knot under the hole. Make sure you have enough string hanging for “the look” of the shelf. Tie another knot above the hole on the top of the wood shelf. (This will hold the shelf up.)


Step 5: With the other end of the same piece of rope, tie a knot above the hole on the other side of the wood. First, measure the distance of the knot you did on the first side, and tie a knot before you insert the rope through the hole. This will be the knot on the top of the shelf, and you have to make sure it’s even with the other side. Push the rope through the hole, and tie a knot under the wood.

Step 6: Repeat the process on the others side.

Step 7: Add the copper cups to the ends of the string that hangs under the shelf. I was able to loosen the ends of the rope to make it wide enough for the gold pieces to fit snugly and not fall off. If the rope is too thin and the gold pieces fall off, add a small amount of E-6000 glue to the rope and slide the gold piece on top of it. Wipe away any excess glue, and let dry.


Step 8: Nail a hook into the wall and hang your shelf.

Step 9: Accessorize, and take a really good #shelfie to show off your DIY skills.


More Home DIY Projects:


