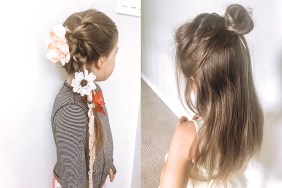
When I was a kid, the obsession with Disney princesses was real. I definitely thought I was one for a while. Though my favorite shifted among Cinderella, Belle, and Aurora, I loved them all. I have the fondest memories of dressing up in my little satin frocks to look like the favorite princess of the moment, and to this day I cherish the photographs my parents took of these princess moments. Now that I’m a mom of a little girl, Disney princesses are again a daily fixture. My hubby and I plan to take our daughter to Walt Disney World for the magical vacation I never got to experience as a kid, and one he remembers dearly from his own childhood. I can’t wait to watch our little princess’s face light up when she meets her idols. (She’s a total Ariel, by the way.)
A trip to Walt Disney World is in the works for later this year, and we’ve already got a visit to Ariel’s Grotto marked on our list of must-dos. I’m not sure who’s more excited. While my daughter finally gets to meet her favorite princess in real life, I get to experience the look on her face when she meets her favorite princess for the first time, and I can’t wait.
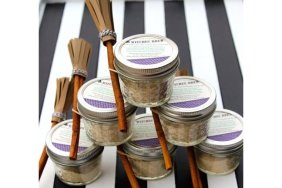
In anticipation of our trip, I’m brewing up creative ways to bring a little bit of Disney into our home. If you’re planning a birthday party, these princess-inspired “makeup” palettes are so much fun. Any little princess will love playing dress-up with realistic, shiny makeup. But moms appreciate the mess-free element even more. For this easy DIY, we’re transforming dollar-store or beauty-supply-shop empty makeup containers and tester jars (I actually bought mine cheap in bulk on Amazon) into Disney princess party-worthy favors. You’ll need to make these DIY play makeup favors a day or two ahead of your party, because they require a full twenty-four hours of drying time. But the actual creative process is super quick and easy, and even if your party’s guest list is huge, you can knock out a ton in no time.
Supplies:
• Empty makeup tester jars. If doing these at home for your own kids, you can simply empty out and wash some of your own old pans. To make party favors, though, I bought a big bag of single eye shadow jars on Amazon at about $10 for fifty.
• Nail polish. Stock up on a bunch of pretty colors at the drugstore—some brands cost as little as $2 a bottle. If you’re like me and have a massive stash in your bathroom, you can just use some lying around. I do find that the fresher the bottle, the more even the color will come out, though. Don’t use any that have started to separate or any near-empty bottles. (If they’re starting to dry up, they won’t pour out as easily and will appear chunky in the jar.)
• Disney princess stickers (optional). Add an extra pop of princess style by decorating ahead or having the girls affix their favorite Disney princess stickers to the lids.
• Drawstring gift bags or cellophane bags (optional). You can dump all the finished jars in a big bowl with a sign encouraging the girls to each take two, or wrap them up for a gift look.
Instructions:

Step 1: Holding the empty jar in your non-dominant hand, use the other to slowly pour the polish in. You only need to cover the bottom of the jar, but I like to fill it about a quarter of the way up when using clear containers so more color shows through from the outside.

Step 2: Lightly tap the outside edge of the jar a few times to help the polish settle evenly. If you see any little bubbles forming, simply work them through with the nail polish brush that you’ve already set aside. Repeat this step on all of your jars, varying colors as you wish. Leave it lid-less for a full twenty-four hours until dry and not tacky to the touch.

Step 3: It’s optional, but I like to make these extra festive with a few add-ons at the end. Apply a thin layer of glitter polish to a few of the palettes; enough so each girl gets a sparkly one. This should only need to dry half an hour, as long as the base is already dry from the day before.

Step 4: Decorate your lids with Disney princess themed stickers to make them look perfect for the party. If you’re creating gift bags, pop two or three palettes into each one and affix a princess sticker to seal them.