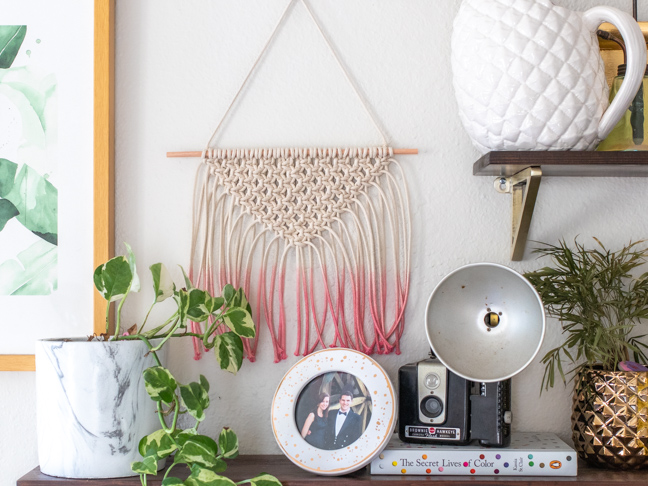
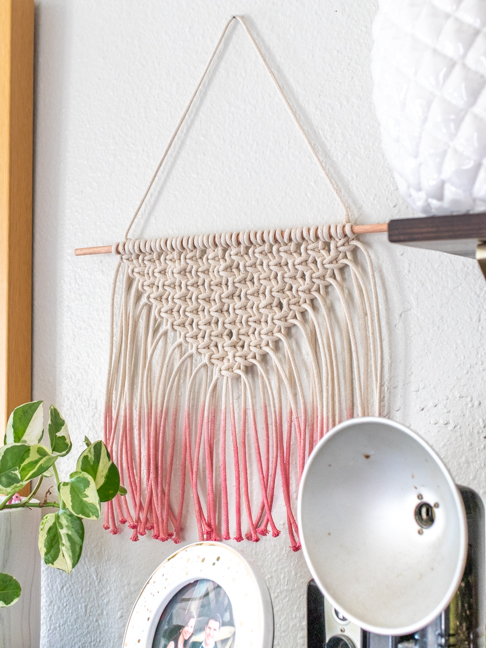
There are some things that just aren’t worth spending the money on. Macrame is beautiful and often very intricate (and expensive), but a simple macrame wall hanging is much more fun to DIY (and budget friendly) than to buy! Using just a few basic knots, you can make your own macrame wall hanging and save your money to purchase a larger or more intricate piece later. Even with just a simple square knot, you can make beautiful macrame pieces that look like they were made by a professional. This macrame wall hanging uses only two types of knots (primarily one), and you can mix up the style with different colors of cord, dyed strands or beads.
The best thing about macrame is that you can’t really mess up. If something doesn’t work, simply pull out the knot and try something else! There’s plenty of room for error when learning macrame. Try out this dip dyed look for a little pop of color on your macrame wall hanging!
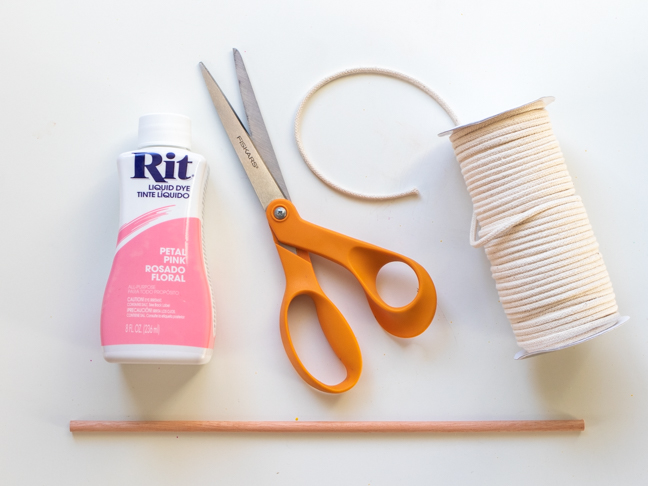
Supplies:
- Wooden dowel, about 12 inches long
- Thin macrame rope
- Scissors
- Colored dye (optional)
- Large bowl
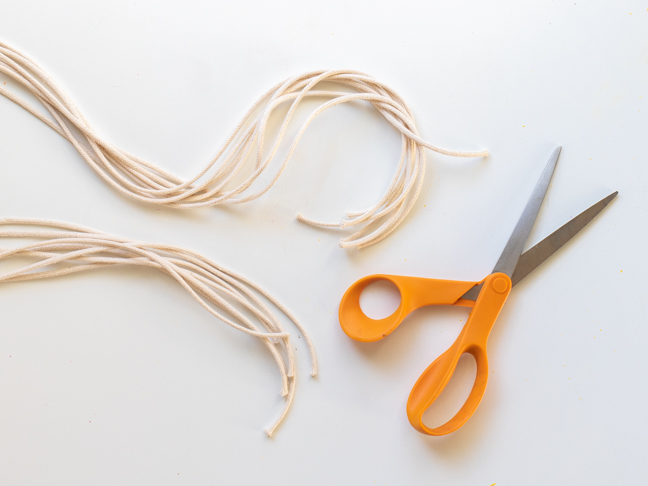
Step 1: Cut 14 pieces of macrame string to the approximate length of your wingspan. No need to be exact! You must have an even number of strands for this design.
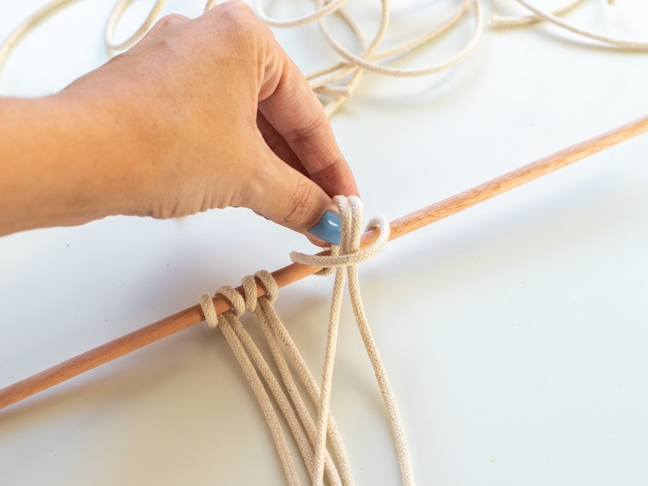
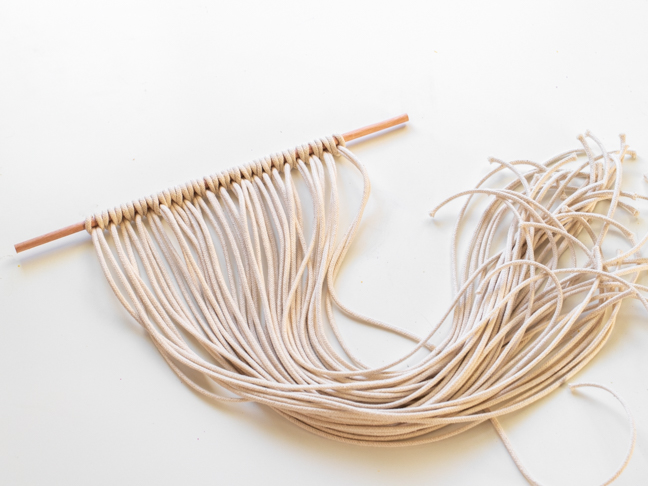
Step 2: Attach each strand to the dowel with a lark’s head knot. Fold a strand of cord in half, loop it under the dowel, then pull the strand through the loop. Pull tight and repeat across the dowel.
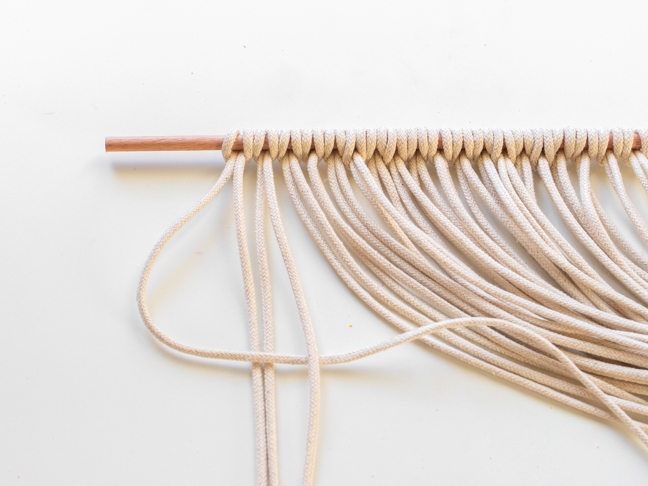
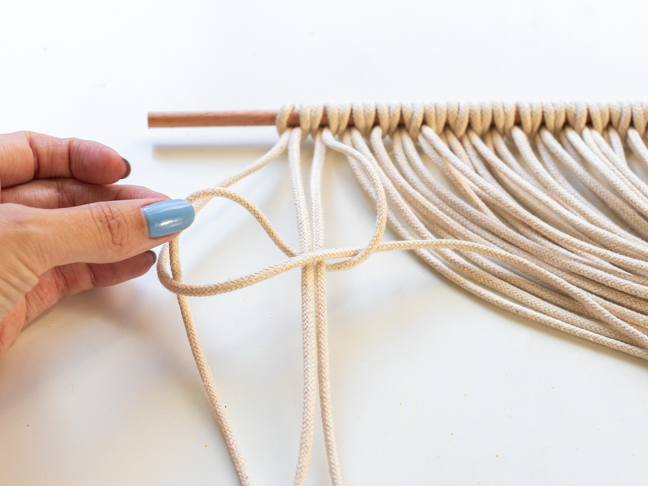
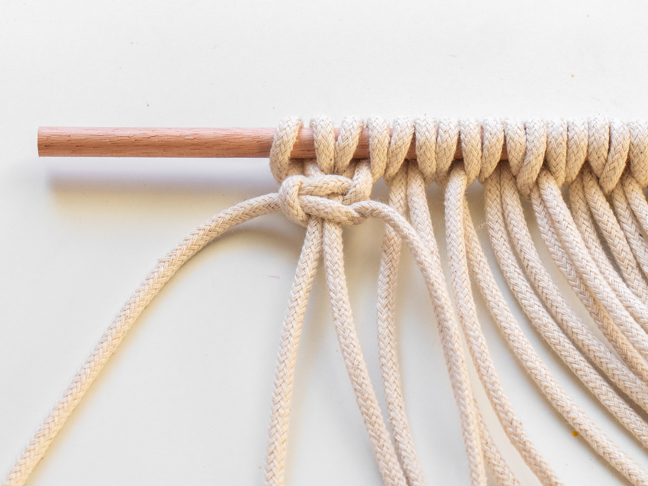
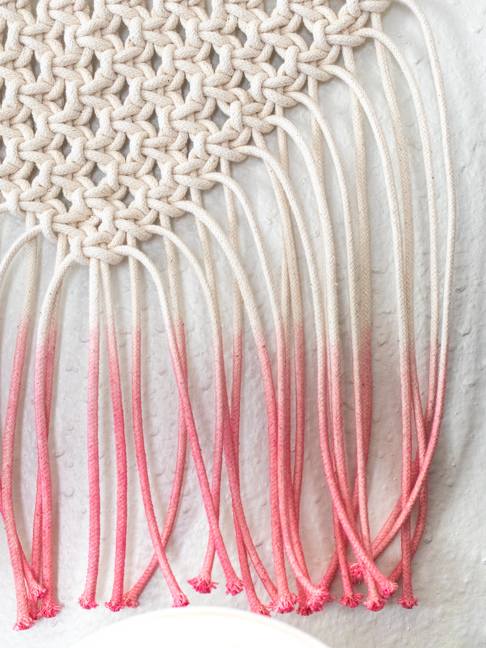
Step 3: Isolate the four outermost strands to create a square knot. Take the left strand over the two middle strands and under the right one. Pull the right strand behind and through the loop, then pull tight so it’s at the top of the dowel. Repeat, starting with the right strand this time, to complete a square knot. Make square knots all the way across.
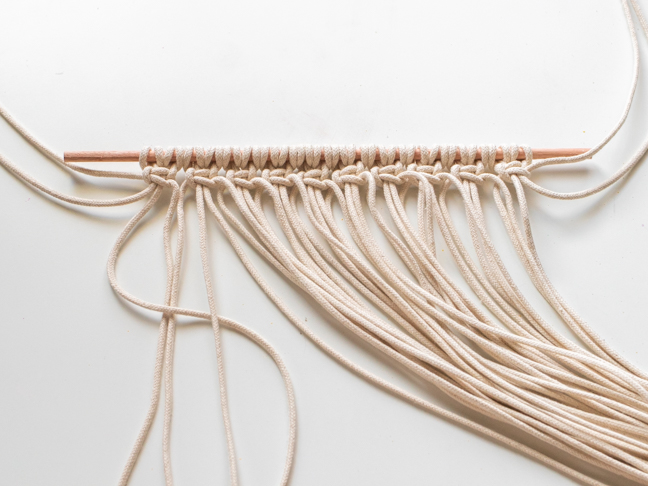
Step 4: Isolate the two outermost strands on either side, and push them aside. You will not knot these pieces. Choose the next four strands and continue making square knots.
Step 5: Repeat this process, pushing aside two strands on either side of your wall hanging after completing each row. This will result in a triangle shape of the knots.
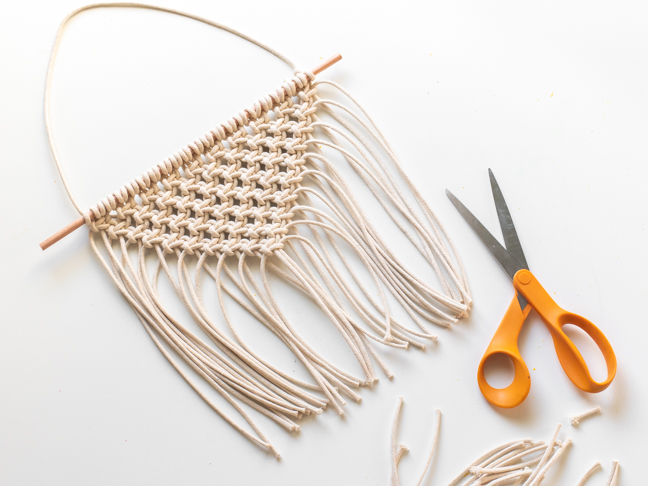
Step 6: Once the pattern is complete, trim the cord in a straight line. Leave as much hanging as desired.
Step 7: Then cut another piece of cord (matching or different) and tie to both ends of the dowel. This will allow you to hang the macrame wall hanging.
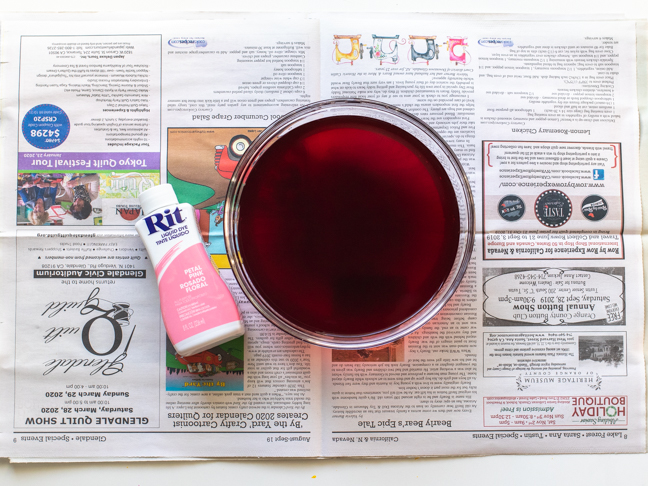
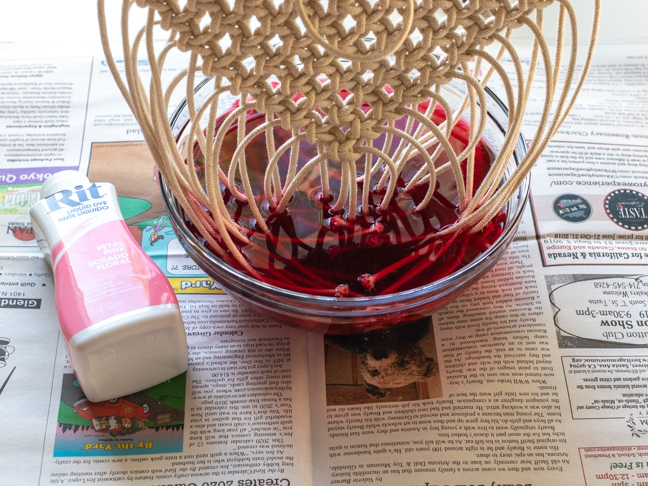
Step 8 (optional): To add a bit of color, mix the dye according to package instructions in a large bowl. Dip the loose strands into the dye and hold in place until your desired color is reached. Then drip dry or lay flat on layers of newspaper until completely dry.
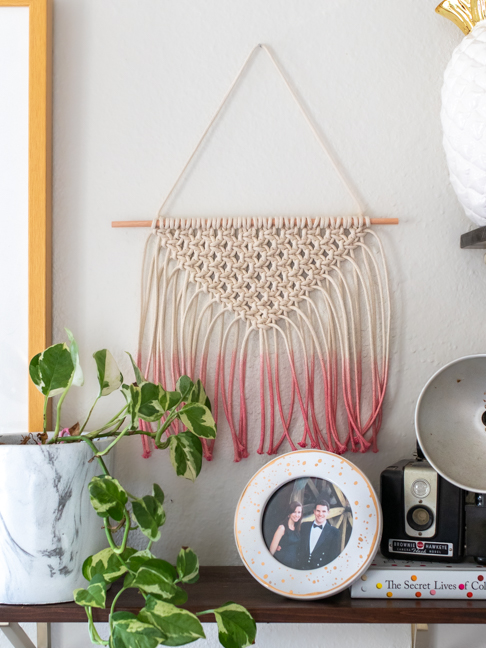
Now you can hang your new macrame decor!