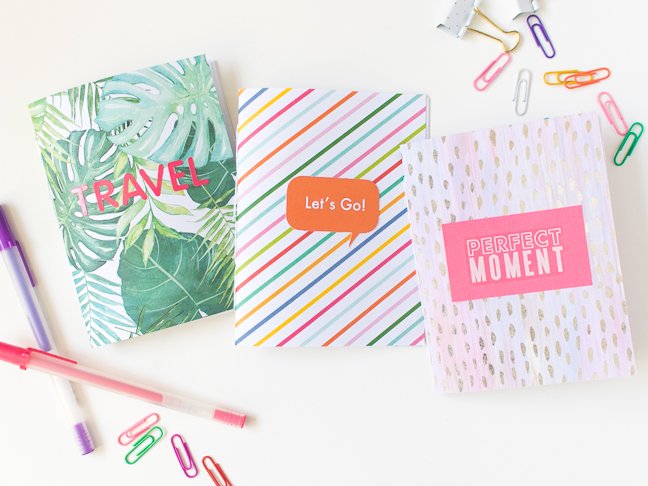
With summer around the corner, you may be gearing up for family vacations or road trips, and it’s the perfect opportunity to let your kids get creative and make their own simple travel journals for documenting their trip with memories and photos. Let them pick their favorite patterned paper and stickers to decorate the cover, and you can even help them create a pocket inside their journal for keepsakes like photos, leaves, and ticket stubs.
Create basic binding with a needle and thread—you will want to help smaller children with this step–and you’ll have a journal that will last through the vacation and beyond! Each day, your littles can draw and write about their adventure in their very own custom journal.

Materials:
- Patterned paper for cover
- White printer paper, about four sheets
- Colored paper for pocket (optional)
- Scissors
- Ruler
- Double-sided tape
- Needle
- Embroidery thread
- Stickers for decorating
Directions:

Step 1: Fold about four pieces of standard 8.5 x 11-inch white paper in half and cut so that there are eight equal sized pieces.

Step 2: Cut the patterned paper and the colored paper to the same size (about 8.5 x 5.5 inches).

Step 3: Fold the white papers in half, then fold the patterned paper over it to create a small book shape.

Step 4: Flip the booklet over. At the inside fold, use the needle to poke a hole at the middle of the fold. Then, poke two more holes on either side so that there are five equally spaced holes for the binding. Use a ruler, if desired, for exact measurements.
Note: If you’re doing this with younger children, you may want to poke the holes for them.


Step 5: Thread a needle with about 12 inches of embroidery thread, and tie a knot at the end. Starting inside of the book, poke through the papers and let the knot catch. Then stitch under-over to one side and then back across. This will create the binding that holds the book together. Then tie a knot to secure when it’s completely threaded.

Step 6: Fold the solid-colored paper so that it has a flap, creating an envelope shape. Use double-sided tape to adhere the sides.

Step 7: Apply more tape to the backside of the envelope, and stick to the inside cover of the book.

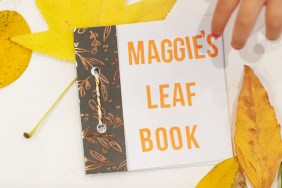
Step 8: Finally, decorate the cover of the journal with stickers, letters or even drawings. Get as creative as you’d like!

Now your kids have mini books for journaling about their adventure and can save small items in the envelope.