As these long winter days get shorter and shorter, I daydream about sunshine on my face, warmth on my skin, bright colors, outdoor fun, and spring break adventures. So as I strolled through Ikea last weekend, Florida (our favorite spring break spot) was top of mind. Although sand was not in between my toes (instead my feet were tucked in a cozy pair of Sorel boots), colorful sand was my inspiration for these DIY Mod Podge Sand Art Frames. I found what I needed in the kitchen accessories department, and with a few other supplies, our unique sand art was born.
Supplies:
- Photos, at least 4×6 in size
- Round stainless steel container with metal back, Ikea GRUNDTAL
- Magnet board or GRUNDTAL magnetic knife rack from Ikea
- Craft sand, various colors from Oriental Trading
- Drill, plus metal bit
- X-Acto knife
- Paintbrush
- Foam Core
- Mod Podge
- Funnel
- Super Glue, Gorilla
Instructions:

Step 1: Remove the photos that come inside the GRUNDTAL metal containers, and trace the circle around the photos you plan to frame. Once the circle is traced, cut the photos inside the line.


Step 2: Trace the circle from the photos onto a piece of foam core. As you will see, the back of the metal container has ridges, which is why I used foam core for a smooth surface. Use the X-Acto knife to cut the circle. Make sure it fits inside the container. For this step, I cut a little inside the lines as well.


Step 3: Use a paintbrush to paint Mod Podge on the foam core. Press the photo on the circle. Seal the photo with another layer of Mod Podge on top.


Step 4: While the Mod Podge is drying, drill a small hole on the top of the containers. I used a metal bit, which worked great. Make sure the bit size is large enough to fit a small funnel. If you want to forego the use of a drill entirely, another option is to use the X-Acto knife to cut a small opening across the plastic on the front of the container. About 1/4 -1/2 way down the plastic, cut a straight line from left to right. This will create a small opening in the front of the container, which will be a great way to add the sand. I opted to use a drill because I wanted the smallest space possible for sand to escape. Either one will work.

Step 5: Add super glue to the back of the foam core with a photo, and push it inside the container.


Step 6: Add super glue around the edges of the container (where the lid fits), and add the lid. Wipe away excess super glue with a paper towel.


Step 7: Insert the funnel in the top hole (or opening in the front of the container), and pour layers of brightly colored sand in. If sand creates a fog on the inside of the plastic, insert a slightly damp Q-tip inside the hole and wipe away any sand dust.

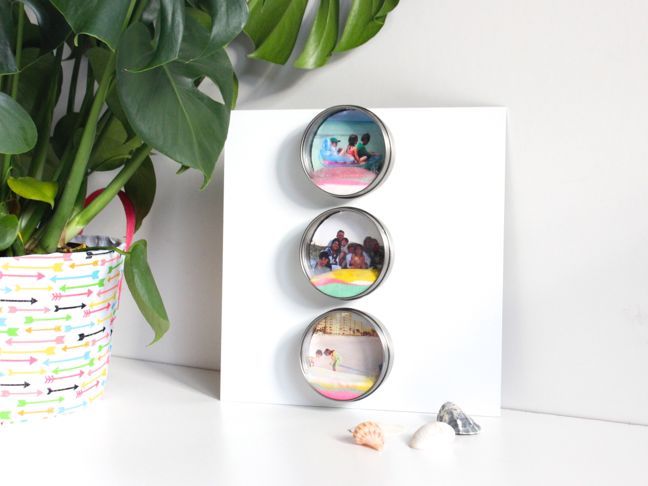
Step 10: Find a home for your new magnetic DIY Mod Podge sand art frames and daydream of colorful memories on the beach.