We’ve lived in the same house for seven years. It was fabulously brand new when we bought it, but it’s definitely started to show its age. I’ve noticed that the kitchen feels dated these days. The dark countertops and cherry wood that we loved when we moved in have given way to my dreams of whitish-grey marble and white cabinets. We’ve started the style transition with new counters. My old stove is still in working order, but the style just doesn’t flow with our renovation dreams, so I want to clean it up and sell it to a worthy owner.
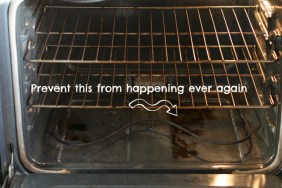
It’s going to take more than just elbow grease to cut through some of the stuck-on residue that plain old soap and water haven’t been able to combat. I’m ready to tackle this tough job with these foolproof, stove-cleaning tips. Let’s just say, I found a lot of gross greasy, residue in places I hadn’t thought to look. If your stove is also starting to look its age, check out how I pulled mine apart and cleaned it to restore it to its former glory. (Oh, and a quick reminder: always read the directions on your cleaning products before you get to work – and use as directed!)
Step 1: Unplug the stove, so you can move it to clean both sides. A lot of food gets slipped between the crack next to your stove and counter. Take this opportunity to clean drips from the side of the oven.


Step 2: Remove the drip pans, oven racks, gas burners, handles, and knobs. Place the items in the bathtub and submerge in warm, soapy water. Let them soak overnight. If you don’t have a tub, place the items inside of a large storage container to soak.
 Step 3: Wearing cleaning gloves, spray a small area of your sticky stovetop with Clorox Clean-Up Cleaner + Bleach. Allow the cleaner to sit for 30 seconds. Then, use a sponge or soft scrubbing pad to scrape away gunk. Keep a bucket of warm, soapy water nearby to rinse your sponge before you move onto a new section of the stove. Clean the stovetop from back to front, so that any crumbs are moving toward the front edge and can be brushed into the trash.


Step 4: Put on your cleaning gloves again, and remove the oven racks, knobs, and other components from the tub of soapy water. Rub the pieces with the scrubbing pad to remove the goo. If necessary, use toothpicks to scrape out the goo stuck in the crevices of the knobs.


Step 5: Allow all items to dry. Reconnect the stove’s power. Return the oven to its normal position between the cabinets.

Step 6: Replace the drip pans, oven racks, gas burners, handles, and knobs to their proper location on the stove. Turn on the stove to ensure that it’s working properly. Then, stand back and enjoy your gleaming, like-new stove.
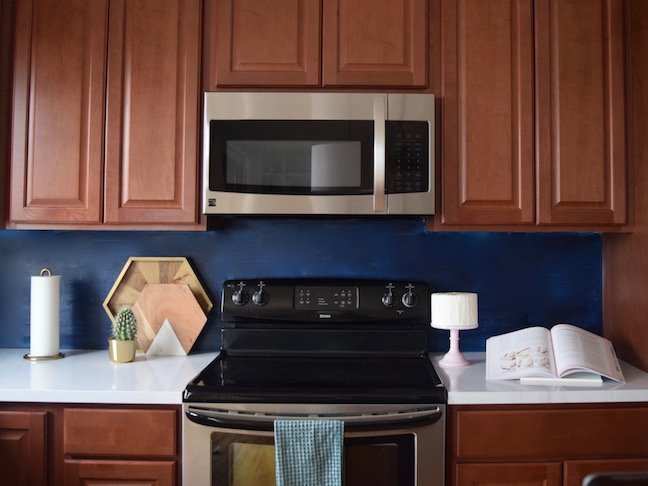
 Look at this gleaming beauty! No more dull, sticky knobs. And, the stovetop is so clean (bye grease splatters!), that I can actually see reflections in the surface. Whether you’re going to sell your stove or simply want it to be spotless for you to use for years to come, this DIY is perfect to get your stove squeaky clean.
Photos: Shauna Younge