Kids love mixing colors and that’s why they love to tie dye. Plus, there are so many things you can try it on. This is the first time we tie-dyed coffee filters, and we are addicted. It’s so much fun, and so easy. It’s a stress-free craft, and we all need less stress in our lives at the moment. Am I right? You can do this a variety of ways, with markers, watercolors, or food dye. I chose to make DIY tie-dye coffee filters with washable markers. I thought it was the least messy, more time consuming option, and also more magical. I’ll explain. There’s something mesmerizing about watching the colors bleed into each other when you drop water on the markers scribbles and designs.
What I love about tie dye is (with the right combination of colors) it will always turn out cool. Try this craft today with the kids.
Tie-Dye Coffee Filter Art
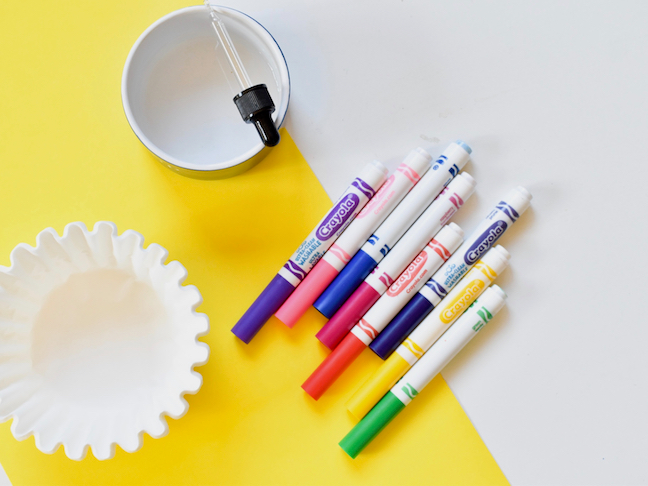
Materials:
- Crayola washable markers, not the thin markers (Mr. Sketch markers work well here too)
- Coffee filters
- Dropper
- Water
- Pipe cleaners or floral wire
- Cardboard or oven sheet pan (to save your table)
Directions:
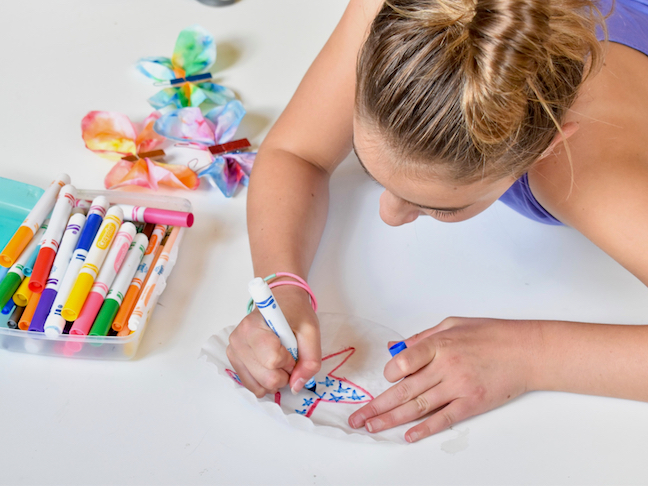
Step 1: Draw colorful lines, squiggles and designs on the coffee filters. The more color you use (the less white space (the more colorful the tie-dye will be). Similar rules apply as far as browns, so try to use colors than blend well next to each other. You cannot make a mistake, which is what’s so amazing for kids. If they don’t like it, they can make another. But, sometimes the ones that we don’t like, surprise us with their beauty.
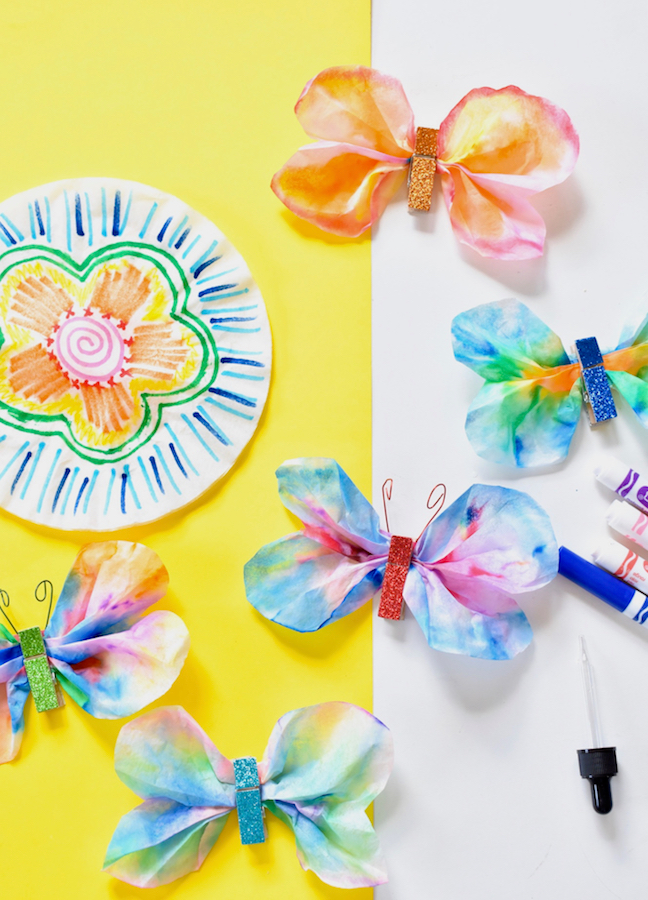
Step 2: Line your table with cardboard or an oven sheet pan, so the color that seeps through doesn’t ruin your table. With a dropper and warm water, begin to drop water on the coffee filter. The colors will begin to blend immediately, and it’s so fun to watch. I like to move from the inner circle out to the edges, but you can blend however you want.
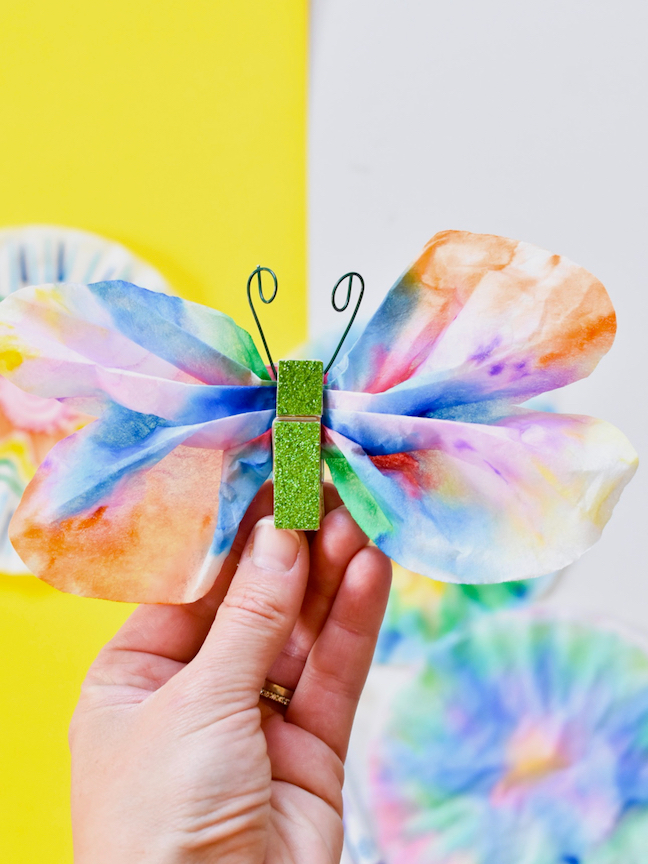
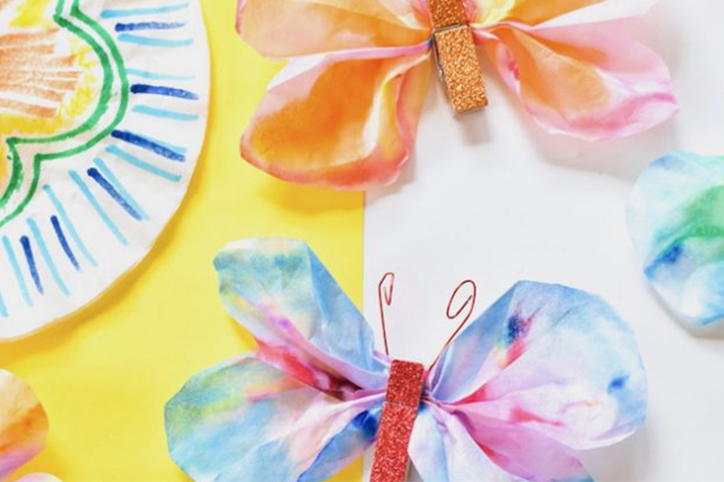
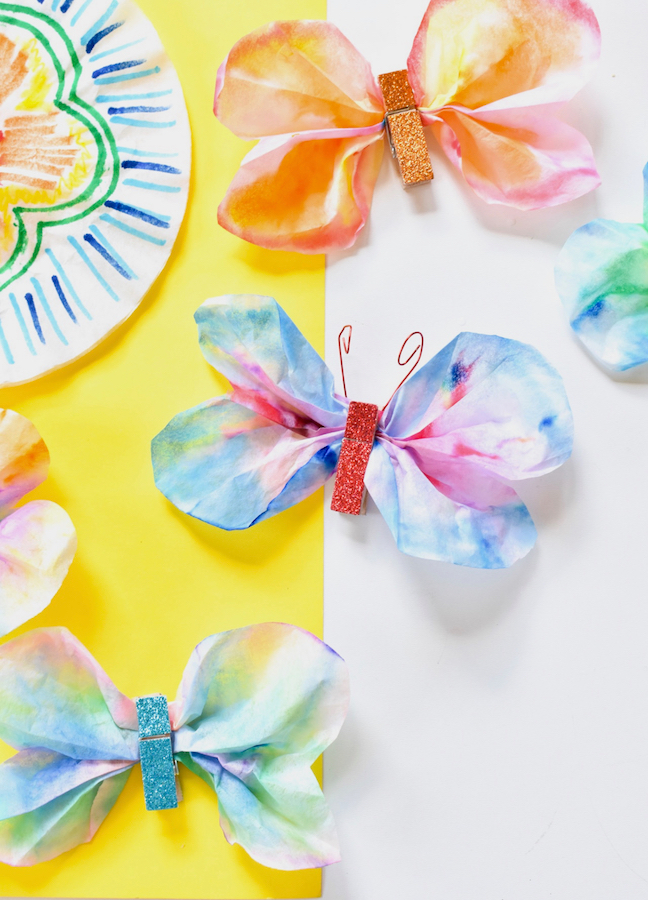
Step 3: Let the coffee filter dry for about 12 hours or less. Next, fold it like an accordion (or the kids can just bunch it together in the center). Press the center of it into a clothespin. Play with the folds if you need to, and fluff the sides (aka the wings), but you should have something that resembles a butterfly.

Step 4: Trim the wings with a small cut on the middle edge to look more like butterfly wings.
Step 5: Use floral wire, craft wire or pipe cleaners to form antennas. Slightly open the clothespin and insert the antennas on top.