
I do all the laundry in my house, which as every mom knows is an endless, vicious cycle. When I put away my kids clothes last week I found myself doing what I call “the stuff and shut.” I’m not proud of it, but yes, I did what an 8-year-boy does when he puts away clothes. I stuffed them in the drawer, and then swiftly shut it, because if the clothes were out of sight, they were out of mind. At least I folded all of it first!
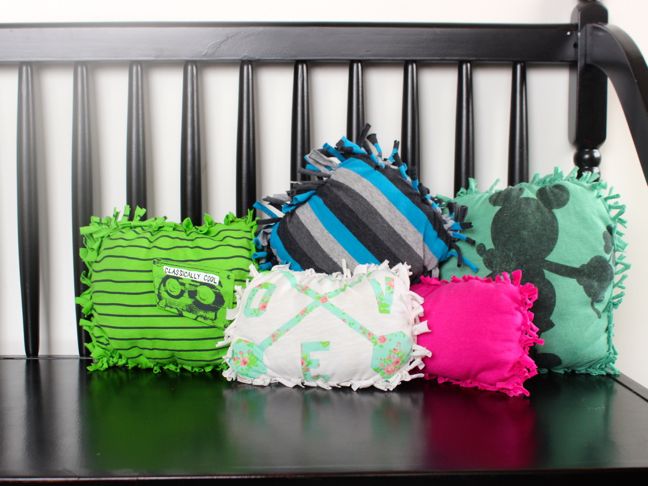
In the spirit of being organized in 2017 (and having more drawer space), I am determined to stop my weekly fold, stuff, and shut routine. First things first: I got rid of all the old t-shirts clogging up the dresser drawers. To prevent tears and maintain happy relations in the home, I didn’t throw them away; instead I upcycled my kids’ favorites into DIY No-Sew Pillows from Old T-shirts. Now, they can cuddle and play with their old tees, and I can finally shut their dresser drawers!

Since I can’t sew, there was no needle and thread used in the making of these DIY pillows. I did it no-sew style. Details are below.
Materials:
- Old t-shirts
- Scissors
- Polyester Fiber Fill (aka pillow stuffing)
Instructions:

Step 1: Go through dresser drawers to find favorite old t-shirts you want to transform.

Step 2: Lay the shirt on a hard, flat surface. Make sure there are wrinkles at all.


Step 3: Cut the center part of the t-shirt into a square, or rectangle (whatever shape your going for). Cut both the front and the back of the shirt. Do not cut the sleeves as a part of the square. You can measure and be really precise with a ruler and marker, or freehand the cut. I chose to just eyeball my square since I knew the pillows would be used for play and my kids wouldn’t notice the difference.


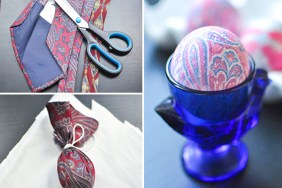
Step 4: Fold the square in half, bringing the bottom up. Then fold in half again, bringing the left to the right side.


Step 5: Cut a small to medium size square in the top right corner. Once the shirt is open again, there should be a cut in each corner.


Step 6: Cut slits along all 4 sides of the shirt. The size of the slits depends on the size of the shirt. The smaller the shirt, the smaller the slits; the larger the shirt, the larger the slits. I made each one about 1/2 inch to 1 inch thick, and 1 to 2 inches in length.


Step 7: Tie knots along three sides of the square. I tied double knots to prevent them from coming undone.


Step 8: Stuff the fiber fill pillow stuffing into the pillow. Leave enough space to tie knots along the fourth side to finish the pillow.


Step 9: Tie knots along the final side, and that’s it! To take this one step further, cut the shirt’s graphics and pockets and tape it to the pillow for a DIY pillow with a pocket.


My kids love to use the pillows when they play house with their stuffed animals, plus it makes the perfect pillow for Samantha, my daughter’s American Girl Doll. The minute the pillows were done, my son and I had a pillow fight, then laid our heads down to rest comfortably. This DIY craft is an all-around win.