
The amazing trips my parents took my sisters and me on when we were young still live with me. I’ll never forget swimming with dolphins in the Bahamas, flying in a helicopter over the gorgeous green landscape of Hawaii (yes, the motion sickness and all), or my all-time favorite, standing in front of the enchanting castle at Walt Disney World. We ended our first day at the happiest place on earth at the magical evening parade. There’s no place like Disney, there just isn’t (that’s us, below)!

Now that I have kids of my own, I’ve made it a priority to continue the tradition of family vacations. (We haven’t taken them to Disney yet, but it’s on our list!) I have to admit, I’m that mom who takes hundreds of photos on vacation. Instead of our photos living on my camera and Smartphone, I made it my goal to develop them. After all, if I’m going to hear my kids moan and groan every time I make them pause to take a photo, I better do something with the photos, right?


On a cold winter morning, my kids and I created beautiful scrapbooks with all of my newly developed snapshots. I made them each a basic, DIY scrapbook kit and we got to work. Not only did my kids create a unique keepsake, but we had fun together as we cut, glued, and stamped our way through our Florida vacation. It beat scrapbooking alone, and it was neat to watch my children talk about their favorite vacation memories. The location for our scrapbooking was special, too, because it was in our new airstream that my husband is renovating. It’s the spot for many future adventures and vacations…and thus, scrapbooks.
Here’s how we did it without expensive scrapbooking supplies.
Supplies:
- Art supplies (many you already own) such as colorful paper, glue sticks, markers, stickers, scissors, stamps, glitter, and crayons
- Blank books
- Wood cut-out of Florida, Artistic Craft Supply via Etsy
- Vinyl letters, black
- Hot glue gun and hot glue
- Optional: marbling supplies, which includes nail polish, disposable container, toothpick, and Mod Podge
Instructions:

Step 1: Decorate the front of the blank book. We chose to decorate the cover with our vacation destination, Florida, as the main focus. I love a good marble DIY, and so do my kids, so for a punch of color we marbled the state of FL. If you don’t want to marble the state cut out, you can paint it, decoupage it, or leave it as is.
To marble it, follow these instructions: Set up a disposable container with warm water. Slip on gloves to keep your hands clean. Pour several drops of each color of nail polish in the water and swirl it around with a toothpick. Move swiftly with this step, as the nail polish will quickly stiffen or stick together. Dip the wood cut-out into the water face down until it’s totally immersed, then quickly pull it back out of the water. If it’s too wet, you can dab it, but otherwise, wait for it to dry. Once it’s completely dry, add a layer of Mod Podge to protect it from peeling.

Step 2: Use hot glue to glue the state onto the blank book. Then, add the name of each child on front of the book with vinyl sticker letters.

Step 3: Separate photos into piles for each child. Wrap them with a ribbon or twine.


Step 4: Set up a scrapbooking station for each child. For me, this included a clipboard with colorful paper, a scrapbook, and photos, as well as a container with glue, washi tape, stickers, and scissors. We had some community supplies in the middle of the table as well, including stamps, glitter, markers, and beach cut-outs (think palm trees, sharks, and mermaids).


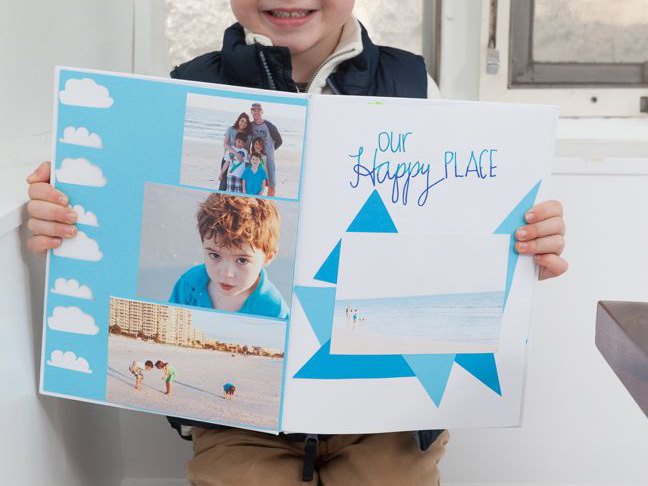
Step 5: Let their imagination and creativity flow. I helped my kids cut and glue, but they were the designers of their books. They were so proud of the finished products!


Whether you take vacation to an exotic beach somewhere far away, or camp for a night in your own backyard, take the time to make memories with your family. Unwind and vacation together. You won’t regret it.
Love this? Don’t forget to Pin it!

Photography by Kirsten Webster Photography