
When our little dude was on the way and we were preparing his nursery, we went around and around deciding about furniture. We wanted pieces that would be highly functional but that did not necessarily scream “baby.” We were also looking for things that could grow with our son and his changing tastes, and pieces that were a bit unique. And, of course, affordable is always good. So! We had quite a few boxes to check on our list of requirements, and naturally we thought it would be easiest to just DIY something rather than hunt down the perfect piece. And as it turns out, it was one of our easiest and most inexpensive projects for the little guy’s room, with a pretty awesome payoff. If you’re looking to build some custom DIY nursery shelves for your kiddo’s room, here’s how we tackled ours.

Supplies:
- shelf brackets
- plain white shelf (or unfinished board)
- wood stain
- drill and drill bits
- wall anchors
- screws
- level
- paintbrush
- measuring tape
Instructions:
Step 1: Choose your shelf and bracket. The ones we chose from IKEA are really sturdy and nice and simple, so you can paint or stain them however you like.

Step 2: Optional: Stain your brackets. If you’re using unfinished wood brackets and want to adjust the color, use a little wood stain. Paint on a thin coat with a paintbrush according to the directions on the packaging. Add coats as desired to get the right shade. Allow the brackets to dry completely.
Step 3: Start hanging the brackets. Drill a pilot hole into a stud in the wall and insert your anchors for the first bracket. Then screw the bracket into the anchors. Measure across the wall and find another stud, repeating the process with the second bracket. Use the measuring tape and level to ensure that they’re centered on the wall the way you like, and to make sure the two brackets per shelf are level.

Step 4: Once the brackets are in place, place the shelf board on top and screw it in place on the brackets. If your shelf has pre-drilled holes, great! If not, be sure to drill some pilot holes first.

Step 5: Repeat with as many shelves as you like. We decided two was just enough to hold everything we needed.
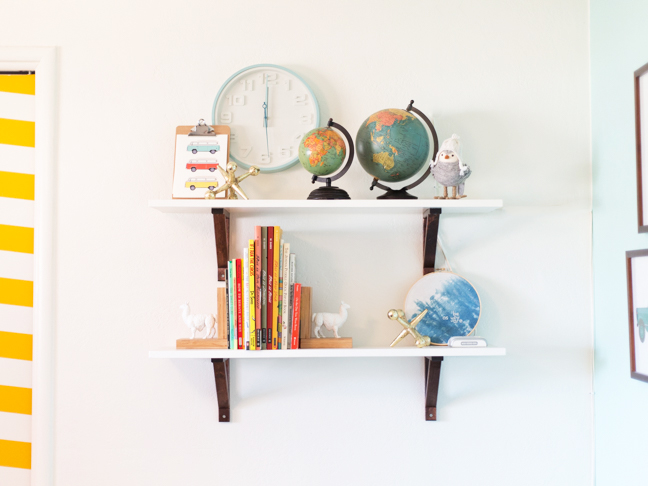
Step 6: Fill the shelves with all of your baby’s goodies and stand back to admire your handiwork!


More DIY Nursery Projects: