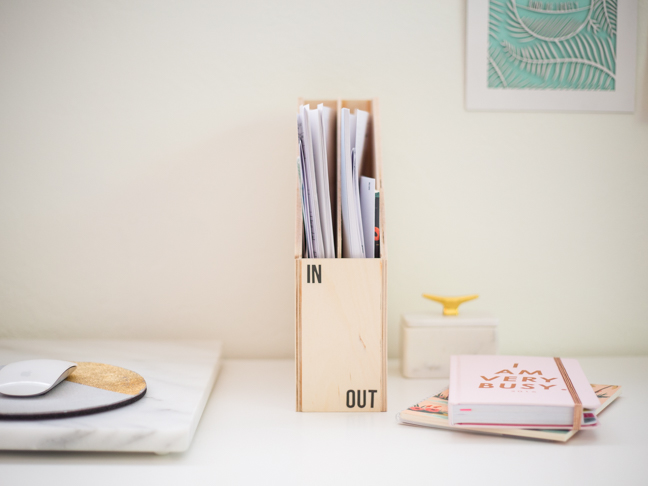

I was tired of having a pile of unorganized paperwork all over my desk, so I decided to go old school and make myself a good old DIY desk inbox. Now my papers are organized in a pile of things I need to take care of, and a pile of things I either need to shred or file. Here’s how you can make your own.

Supplies:
- 2 12-inch square sheets of ¼-inch plywood
- 1 12-inch square sheets of ⅛-inch plywood
- Wood glue
- Clamps
- Miter saw
- Table saw
Instructions:

Step 1: Start by cutting your sheets of plywood down to size. Start by cutting a strip 2.5 inches wide off of each square of plywood, so you are left with three sheets of plywood 12 inches by 9.5 inches, and the three strips that are 2.5 inches long. Then cut a triangle off the large sheets with 9 inches along the long side.
Step 2: On the ⅛-inch sheet, cut an extra ¼ inch off of the 12-inch long side.
Step 3: Of the remaining 2.5 strips, cut them to the following lengths: 8¼, 5¾, and the last one should stay at 12 inches long.


Step 4: Glue along the edge of each thin strip and clamp into place between the thick side pieces. Let the glue dry a bit, and then continue constructing your file box until all three sides are in place.


Step 5: Glue along the bottom three edges of the remaining piece to act as the divider, and glue it into place in the middle of the box.


Step 6: Construction is complete! Decorate your in and out box any way you would like. I chose to keep it simple with some letter stickers to differentiate the sides of the box. Get creative!

More DIY Home Office Decor:


