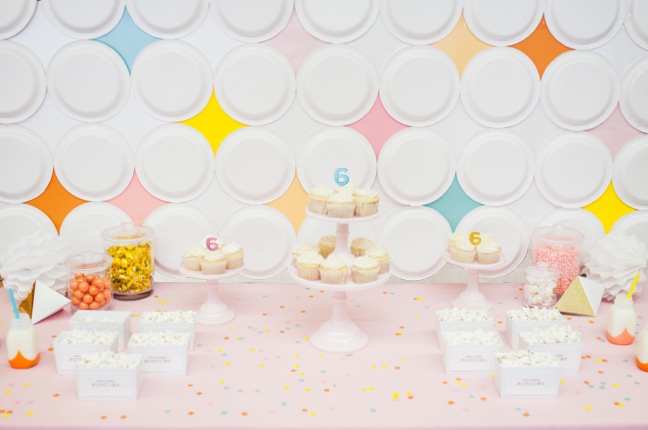
") You’ve been following along with my blah to badass venue posts, right? No? OK, here’s a quick rundown: After plopping down money to rent a boring, basic venue, I didn’t want to have to sink any into expensive decor. One way to camouflage a space’s boring or style-conflicting walls is to use everyday items in an unexpected way. I designed this DIY retro diamond paper plate backdrop. Yeah, you read that right. Paper plates. It doesn’t get much more affordable than that.
You’ve been following along with my blah to badass venue posts, right? No? OK, here’s a quick rundown: After plopping down money to rent a boring, basic venue, I didn’t want to have to sink any into expensive decor. One way to camouflage a space’s boring or style-conflicting walls is to use everyday items in an unexpected way. I designed this DIY retro diamond paper plate backdrop. Yeah, you read that right. Paper plates. It doesn’t get much more affordable than that.


Not only did this decor feature pack a big bang for the buck, it also had style for days.
Supplies:
- our paper plate backdrop layout
- 36 – 8.5″ white paper plates
- 48 – 8.5″ x 11″ sheets of scrapbook paper in your palette
- paper cutter or scissors, pencil, and ruler
- clear shipping tape
- hot glue gun and sticks
Instructions:
Step 1: Using a paper cutter, measure and cut the 8.5″ x 11″ scrapbook paper to create an 8.5″ square. Determine the pattern you want to create, and lay the squares end-to-end to create five rows of ten squares.
Step 2: Carefully apply a long strip of shipping tape across the seam of each horizontal row to connect each square with the one beside it, as well as the one below. (See layout diagram.)
Step 3: Turn a paper plate upside down, and position the edge of it in the center of a scrapbook paper square. Continue adding plates one at a time until you complete a row. Then continue adding plates to the subsequent rows. (See layout diagram.)
Step 4: Lift one edge of the plate, and apply a dot of hot glue to secure its position. Repeat with each row, making sure you adjust spacing as needed. Set aside to dry.
Step 5: Lay the completed backdrop on a clean sheet, large towels, or shower curtain liner to keep the backdrop from getting dirty. Gently fold the entire backdrop in half for transport, and remove the shower curtain liner once you arrive at your venue. Hang the backdrop from a long dowel.
Stay tuned this week and next for tutorials and printables from this party! Follow the tag “Birthday Party Makeover” to see all the posts!
Photos by Sydnee Bickett Photography | Dessert table by Shauna Younge of Sweet Tooth
More DIY Party Decor Ideas: