
I’ve always been a crafty person and loved doing little projects, even as a kid. Now that I have a 2-year-old of my own, I’m constantly seeking inspiration for fun things we can do together, especially around holidays. And Valentine’s Day is such a fun one because it’s all about love and friendship, something that big and little kids alike can get excited about. My daughter and I had a blast making these scratch-off Valentine cards together, but it’s an easy enough craft that older kids can totally handle it on their own, too. Minimal supplies and clean-up mean moms with kids of all ages will rejoice at this cute and easy V-Day DIY.

Supplies:
- dish soap
- acrylic paint
- clear packaging tape
- paint brush
- paper / card stock
- markers for decorating and adding hidden text
- scissors
Instructions:
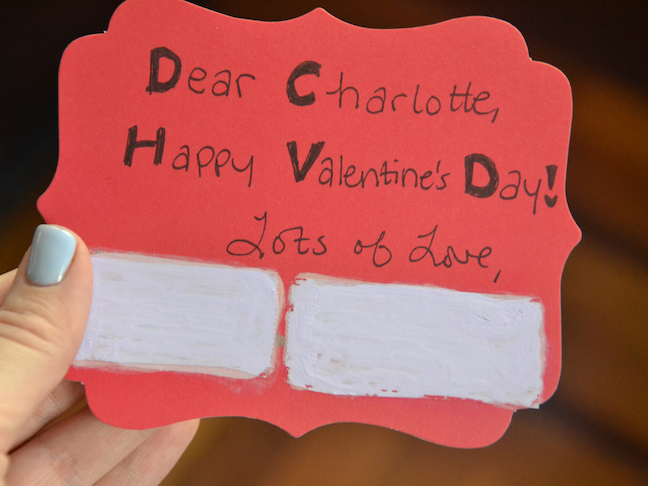
Step 1: Cut and decorate your cards. Any shape or size will do; I bought cute, pre-cut blank cards with matching envelopes for $3 at Target. I entered some fun phrasing and inscribed each card with “Love, Willow” for the scratch-off part, creating a fun element of mysterious Valentine-giving. To keep my daughter somewhat “in the lines,” I created little coloring zones for her on each one, where she can leave her mark. After we were done laying out the basics on the card, I took over, since my girl is only 2. But, slightly older kids (say, kindergarten and above) could totally handle the next steps, with a little set-up help from Mom.

Step 2: Cut your tape to fit the scratch-off area. Apply the tape only to the portions of the card that you’ll be using for scratching off.

Step 3: Mix up your scratch-off solution. To make it, combine one part dish soap and one part paint. I used an old medicine dosing cup to measure and mix, but you can pretty much eyeball it. We used 1 3/4 tsp dish soap and 3 tsp paint, making more than enough to complete about 20 cards.
Step 4: Apply the scratch-off solution to the taped area with a paint brush. Let this first layer dry completely before adding your next layer. Depending on the consistencies of your dish soap and paint, you might need several layers to hide the text and drawings beneath it — ours took about five layers.

Step 5: Once completely dry, try one for fun! I made a couple of extras because I knew Willow would enjoy scratching them off herself, including a card just for my little girl from Mommy. As soon as they’re dry, these are ready to be popped into envelopes and handed out or sent in the mail.


